This article was co-authored by Luigi Oppido. Luigi Oppido is the Owner and Operator of Pleasure Point Computers in Santa Cruz, California. Luigi has over 25 years of experience in general computer repair, data recovery, virus removal, and upgrades. He is also the host of the Computer Man Show! broadcasted on KSQD covering central California for over two years.
wikiHow marks an article as reader-approved once it receives enough positive feedback. This article has 17 testimonials from our readers, earning it our reader-approved status.
This article has been viewed 879,336 times.
Heat management is important to consider when constructing or maintaining your computer. Too much heat can spell death for your sensitive components, and if you’re overclocking it’s even more of an issue. Knowing how to apply thermal paste correctly is one of the foundations of proper computer cooling.
Steps
Preparing the Surface
-
1Choose a good thermal paste. Most of the basic thermal greases contain silicone and zinc oxide, while more expensive compounds contain heat conductors such as silver or ceramic. Silver or ceramic thermal greases facilitate more efficient heat transmission. However, the basic thermal grease will sufficiently fill the needs for most applications.
- If you are planning on overclocking your computer, try to get thermal paste composed mainly of silver, copper, or gold. These are the most conductive metals commonly used in thermal paste.
-
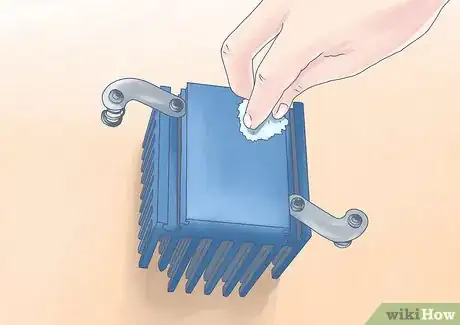
2Clean the CPU and heat sink surfaces. Wipe the surface lightly with a cotton ball or cotton swab dampened with isopropyl alcohol. The higher the percentage of alcohol the better. 70 percent is good but 90 percent is better (if you can find it).[1]
- If you're building with brand new components, try not to touch the heatsink surface or the surface of the CPU. Even if your hands are clean, you're still transferring oil from your skin to the surface, which can reduce its ability to transfer heat.
Advertisement -
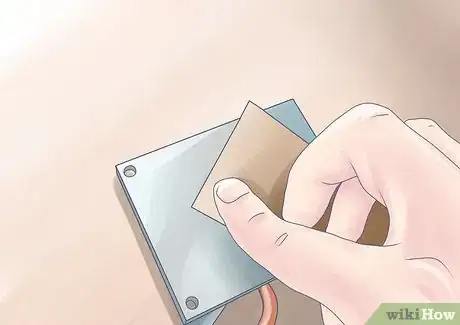
3Sand the heat sink and processor surfaces if necessary. Ideally, the two touching surfaces will be perfectly flat, allowing for as much contact as possible. If your heat sink base is rough, you can wet-sand it with fine grit paper or emery cloth it to make it smoother. This isn’t necessary unless you are aiming for the ultimate in cooling performance.
- Thermal paste is designed to fill in the gaps and imperfections on the surfaces that you are joining. Since modern production techniques cannot make surfaces without imperfections, thermal paste will always be necessary.
- Even if the surfaces of your components seem to be completely flat, there are still tiny surface imperfections that will trap pockets of air, reducing the heat transfer. For this reason, it's best to always use thermal paste.
Applying to Circular-based Coolers
-
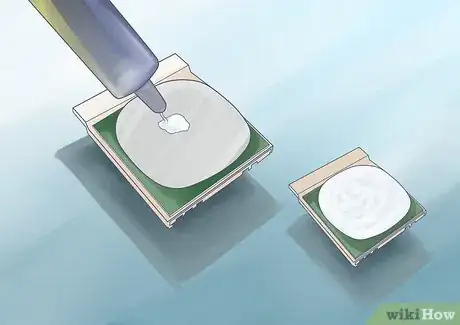
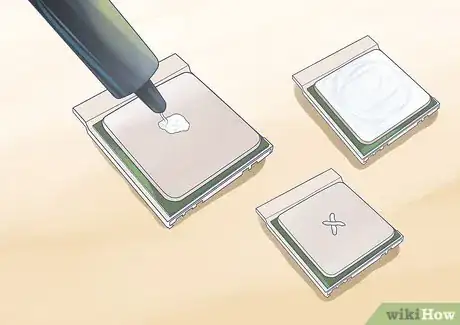
1Place a tiny drop of thermal paste to the center of the cooler base. The bead of paste should be smaller than a BB or a grain of rice. If you’ve read that it should be “pea-sized”, that is far too much paste, and you will end up with paste on your motherboard.[2] [3]
- There is no need to spread the paste for circular coolers, as the pressure of being applied will spread it evenly across the surface.
- Alternatively, you can place your thermal paste in an 'X' pattern across the chip, although make sure to only use a tiny amount as you'll be covering a greater area than the 'blob method'.
-
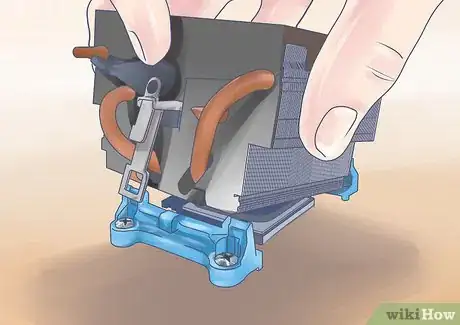
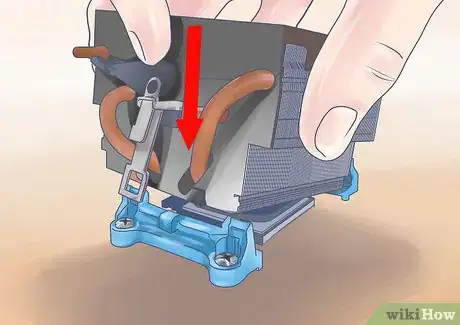
2Attach the heat sink to the processor. Install the heat sink with even pressure from all sides, and the bead that you placed on the surface will spread over the entire contact surface. This will create a thin, even layer that will fill any gaps but avoid excess build up.[4]
- As heat is applied, the paste will become thinner and spread more towards the edges. This is why using a small amount of paste is important, as a little goes a long way.
- Tighten the heat sink from each corner a little at a time. For example turn the top right screw twice, then switch to two turns on the bottom left, before moving the the top left, then the bottom right, and continue until all screws are tight. This will allow for even pressure for both the component, helping to avoid damage, and even spreading of your thermal paste.
-
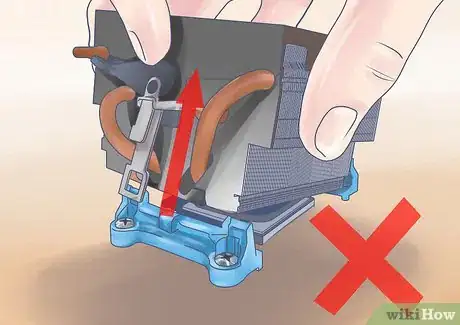
3Avoid removing the heat sink after installing it. It can be difficult to check if your paste has been applied correctly. If you break the seal that is created when you install the heat sink, you will need to restart the process, first cleaning off the old paste and then reapplying it.
-
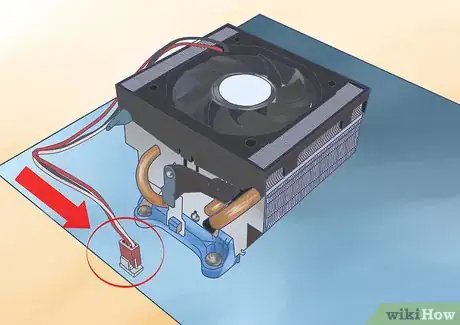
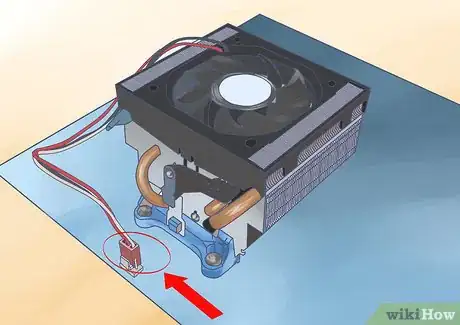
4Connect the CPU fan to the motherboard. The CPU fan wire should be plugged in the CPU fan socket to supply power to the fan as well as allowing the computer to adjust the speed of the fan.
- The connector is usually a three-pin plug usually above the CPU cooler on the motherboard, labelled with 'CPU FAN' or something similar.
-
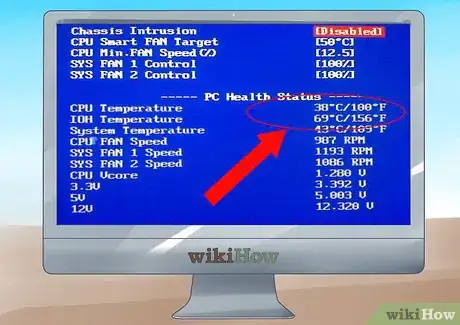
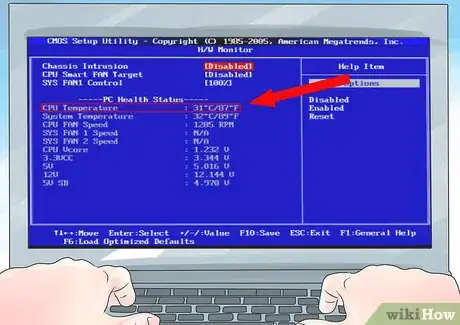
5Boot the system. Check that the fan is spinning. Enter the BIOS by pressing F1 or Del key as the computer boots up. Check if the temperature is normal, CPU temperature should be below 40 degree Celsius when idle, same for GPU.
- The key used to enter the BIOS of your computer could vary, so check the motherboard manual. Common keys are ESC, DEL, F12 and F1
Applying to Square-based Coolers
-
1Apply paste to the base of the cooler. Applying paste to a square cooler is a bit more challenging than a round one, because simply placing a dot and applying pressure will not result in full coverage. There are varying approaches that people claim allegiances to, so we’ll cover a few of the more popular ones:
- The lines method – Place two thin lines of thermal compound on the base of the cooler. The lines should be parallel and spaced so that they are each placed a third of the width of the processor. The lines themselves should also be about a third of the processor’s width in length.
- The cross method – This is very similar to the previous method, but the lines are crossed in an “X” pattern instead of parallel. The length and thickness of the lines should be the same as the previous method.
- The spread method – This is one of the most popular and effective methods, but takes a little more effort. Place a small amount of thermal paste onto the base of the cooler. Using a plastic finger protector or a plastic bag, use your finger to spread the paste evenly across the surface. Make sure to cover the entire surface that will be in contact with the processor, and ensure that you do not apply the paste too thick. In most cases, the paste should barely hide the metal underneath.
-
2Install the heat sink. If you are using either of the line methods, apply even pressure to the heat sink as you install it to ensure that the paste covers the entire surface. If you are using the spread method, you MUST install the heat sink at a slight angle to prevent bubbles from forming. This is because the paste is usually spread too thin to compensate for bubbles after pressure is applied.
-
3Reconnect the fan to the motherboard. The CPU fan wire should be plugged in the CPU fan socket because it mostly has the PWM function which allows the computer to adjust the fan speed automatically without changing voltage.
-
4Boot the system altogether. Check that the fan is spinning. Enter the BIOS by pressing F1 or Del key during POST. Check if the temperature is normal, CPU temperature should be below 40 degree Celsius when idle, same for GPU.
- The key used to enter the BIOS of your computer could vary, so check the motherboard manual. Common keys are ESC, DEL, F12 and F1
Expert Q&A
Did you know you can get premium answers for this article?
Unlock premium answers by supporting wikiHow
-
QuestionI still don't get what thermal paste does. How does it work?
 Luigi OppidoLuigi Oppido is the Owner and Operator of Pleasure Point Computers in Santa Cruz, California. Luigi has over 25 years of experience in general computer repair, data recovery, virus removal, and upgrades. He is also the host of the Computer Man Show! broadcasted on KSQD covering central California for over two years.
Computer & Tech Specialist
-
QuestionWhat's the easiest way to remove thermal paste?
 Luigi OppidoLuigi Oppido is the Owner and Operator of Pleasure Point Computers in Santa Cruz, California. Luigi has over 25 years of experience in general computer repair, data recovery, virus removal, and upgrades. He is also the host of the Computer Man Show! broadcasted on KSQD covering central California for over two years.
Computer & Tech Specialist
-
QuestionIs applying thermal paste necessary?
 Luigi OppidoLuigi Oppido is the Owner and Operator of Pleasure Point Computers in Santa Cruz, California. Luigi has over 25 years of experience in general computer repair, data recovery, virus removal, and upgrades. He is also the host of the Computer Man Show! broadcasted on KSQD covering central California for over two years.
Computer & Tech Specialist
Warnings
- Using oil based cleaners to clean your surfaces will ruin your coolers performance. They will prematurely and permanently fill the spaces the thermal paste is intended to, not allowing the paste to do its job. If the oil based cleaner is used and thermal paste is placed on top of it, the coolers will never work efficiently.⧼thumbs_response⧽
- Although it may seem obvious, ensure your computer is switched 'Off' on the power supply switch. Even if the computer is shut down, there is still power in the motherboard, so it's best practice to switch this off first.⧼thumbs_response⧽
References
- ↑ Luigi Oppido. Computer & Tech Specialist. Expert Interview. 13 November 2020.
- ↑ http://www.tomshardware.com/forum/256233-29-blob-spread-applying-thermal-paste
- ↑ Luigi Oppido. Computer & Tech Specialist. Expert Interview. 13 November 2020.
- ↑ Luigi Oppido. Computer & Tech Specialist. Expert Interview. 13 November 2020.
About This Article
If you want to apply thermal paste to help your computer stay cool, wipe the surface of your CPU and your heat sink with a cotton ball dampened with isopropyl alcohol. Apply a tiny amount of thermal paste to the center of the cooler base on the heat sink. Attach the heat sink to the processor, then reconnect the CPU fan wire to the motherboard. Keep reading to learn about the different strategies for applying thermal paste to a round or square cooler!




-Electric-Shock-Step-9.webp)








-Electric-Shock-Step-9.webp)


