This article was co-authored by Sarah Stearns and by wikiHow staff writer, Jessica Gibson. Sarah Stearns is a DIY Specialist, Artist, Maker, Blogger, and the Founder of SarahMaker.com. With over ten years of experience, she specializes in fun, approachable crafts like crocheting, making polymer clay jewelry, quilting, and creating Cricut projects. Her work has been featured in several publications, such as Scientific American, Good Housekeeping, Vox, and Apartment Therapy. Sarah holds a BA in Psychology from Vanderbilt University.
There are 8 references cited in this article, which can be found at the bottom of the page.
This article has been viewed 96,805 times.
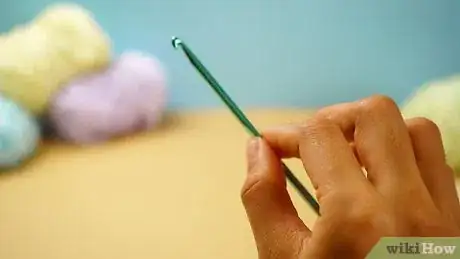
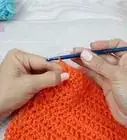
When you're just starting out with crocheting, it can feel like there's a right and wrong way to do everything. Fortunately, when it comes to holding the crochet hook, it's totally up to you! Play around with the 2 common holding styles and decide which feels the most comfortable for you. You can use either of these styles regardless of whether you're left- or right-handed. Then, find a comfortable way to hold your yarn and enjoy learning to crochet.
Steps
The Pencil Grip
-
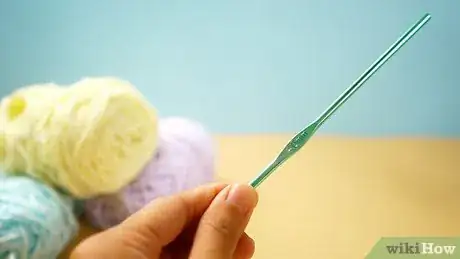
1Pinch the flat part of the hook with your thumb and index finger. Look for the thumb rest, which is the flat section on your crochet hook. Put the thumb of your dominant hand on the thumb rest and pinch the opposite side of the hook with your index finger.[1]
- Turn the point of the crochet hook towards you when you're gripping the hook. This way you can see if the loop of a stitch catches on the end of the hook, which is called the throat.
-
2Rest the hook on your middle finger like it's a pencil. Bring the rest of your fingers down so they're pointing towards your palm and let the hook sit on your middle finger just as you would hold a pencil.[2]
- If you usually rest your pencil on your ring finger, try resting your hook on it. You'll probably find that what you usually use is most comfortable for you.
Advertisement -
3Use your fingers to direct the hook when you crochet. If you like keeping your fingers close to the stitches you're working or you sometimes place your index finger on a loop that you're crocheting, the pencil grip is a good method to start with. This is because your fingers, instead of your wrist, control the crocheting action.[3]
- Many people find that the pencil grip is more comfortable if you'll be crocheting for a long period of time. This is because the shaft of the hook rests on your hand.
The Knife Method
-
1Place your thumb on or just in front of the thumb rest. Look for the wide, flat section of your crochet hook and put the thumb of your dominant hand on this flat section, the thumb rest. If you want your fingers to be closer to the point of the hook, put your thumb in front of the thumb rest, instead of on it.[4]
- Some crochet hooks have a flat section on both sides of the hook. Put your thumb on the side that has the hook pointing towards you so you can work your stitches.
-
2Curl your other fingers over the hook to grip the shaft. Once your thumb is in place, imagine you're holding a knife and let your fingers curve over the length of the hook. Keep your hand relaxed so you don't strain your muscles.[5]
- If your hand starts to cramp, loosen your grip on the crochet hook or try the pencil grip.
-
3Use your wrist to guide the action of the hook when you crochet. Unlike the pencil method, the knife method gives you a stronger hold on the hook, which is useful if you tend to crochet with tight tension.[6]
- If your fingers feel calloused from rubbing against the hook, buy crochet grips that slide onto the hook and act as a cushion.
Holding the Working Yarn
-
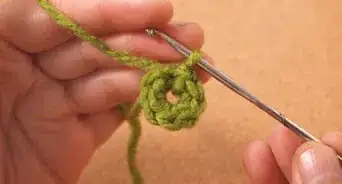
1Slide a slip knot onto the end of your hook. Once you've found a comfortable way to hold your hook, it's time to start crocheting! Make a simple slip knot with whatever yarn you're using and place the loop of the knot right behind the tip of the crochet hook. Then, pull on the working yarn to tighten the knot onto the hook.[7]
- Remember to crochet with the working yarn that's attached to the yarn ball and not the yarn tail.
-
2Wrap the working yarn around the pinky of your other hand to control tension. Bring the working yarn under the pinky of your non-dominant hand and wrap it around the finger once. Then, pull the yarn over your ring, middle, and index finger so you can bring it under your thumb.[8]
- After you loop the yarn around your pinky, you can also pull it under your ring and middle fingers, and then over your index finger.
- To tighten the tension in the yarn, tighten your hand so all the fingers touch. To loosen the tension, spread your fingers apart.
- If you don't like the feeling of the yarn twisting around your pinky, place it under your pinky and pull it up over your other fingers. Then, bring it under your thumb so your hand controls the yarn, but it's not wrapped around any of your fingers.
-
3Try wrapping the yarn around your index finger if it's more comfortable. If you'd rather control the working yarn with your index finger, bring the yarn under your pinky and over your ring and middle fingers. Then, wrap the yarn around your index finger.[9]
- If you try this way of holding the yarn, you'll be able to grip the crocheted fabric with your thumb and middle finger.
-
4Use a combination of these or create your own way to hold the yarn. Play around with both of these styles and adjust them until you find a way that feels comfortable. For example, you might wrap the yarn around your pinky and ring finger. You may even wrap the yarn over your fingers and around your thumb.[10]
- Whatever way you choose, you'll want to hold the yarn tight enough to keep tension on it, but loose enough so that it can still slide through your fingers while you are crocheting.
- Remember that there's no correct way of holding the yarn as long as it works for you!
References
- ↑ https://youtu.be/M83DAbKSAb0?t=109
- ↑ https://crochetnerd.com/how-to-hold-a-crochet-hook/
- ↑ https://youtu.be/yzAL_BosKvM?t=45
- ↑ https://youtu.be/M83DAbKSAb0?t=80
- ↑ https://crochetnerd.com/how-to-hold-a-crochet-hook/
- ↑ https://youtu.be/yzAL_BosKvM?t=75
- ↑ https://extension.usu.edu/utah4h/files/crocheting-handbook.pdf
- ↑ https://youtu.be/GQAD3gzQGyM?t=74
- ↑ https://extension.usu.edu/utah4h/files/crocheting-handbook.pdf
