This article was co-authored by wikiHow staff writer, Travis Boylls. Travis Boylls is a Technology Writer and Editor for wikiHow. Travis has experience writing technology-related articles, providing software customer service, and in graphic design. He specializes in Windows, macOS, Android, iOS, and Linux platforms. He studied graphic design at Pikes Peak Community College.
This article has been viewed 143,373 times.
Learn more...
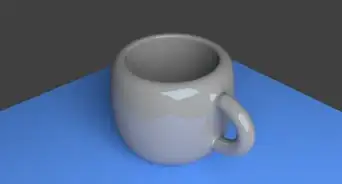
This wikiHow teaches you how to import and add 3D models and objects from saved files to a Blender project, using a computer. You can import a variety of file formats to a Blender project, or import a single object from a blend file.
Steps
Importing Files
-
1Open Blender on your computer. The Blender icon looks like a blue dot inside an orange circle with three arms. You can find it on your Start menu on Windows or in your Applications folder on Mac.
-
2Click the File menu on the top-left. You can find this button on Blender's menu bar in the upper-left corner. It will open a drop-down menu.Advertisement
-
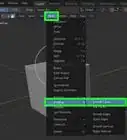
3Hover over Import on the menu. A sub-menu will pop up with a list of the compatible file formats.
-
4Select the format of the file you want to import. This will open Blender's file navigator, and allow you to select the file you want to import. Each of the following formats are supported:
- Collada (.dae) This is the default format.
- Alembic (.abc)
- FBX (.fbx)
- Motion Capture (.bvh)
- Stanford (.ply)
- Wavefront (.obj)
- X3D Extensible 3D (.x3d/.wrl)
- Stl (.stl)
- Scalable Vector Graphics (.svg)
- glTF 2.0 (.glb/.gltf)
-
5Find and select the file you want to import. Use Blender's file navigator panel to find your file, and click on its name.
-
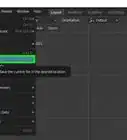
6Click the Import button. It's the blue button in the lower-right corner of the Blender navigation window. This will instantly import and open the selected file in Blender.
- If you don't see the object, try to zoom in closely. Sometimes objects import really small and need to be enlarged.


Importing Individual Objects From Another Blender File
-
1Open Blender on your computer. The Blender icon looks like a blue dot inside an orange circle with three arms. You can find it on your Start menu on Windows or in your Applications folder on Mac.
-
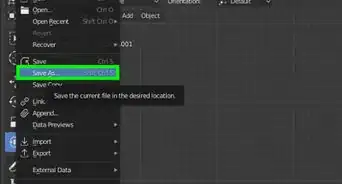
2Click the File menu. This button is located on a menu bar in the upper-left corner. It will open a drop-down menu.
-
3Click Append on the File menu. This will open a new menu panel, and allow you to navigate the files on your computer to select the object to import.
- Alternatively, press ⇧ Shift+F1 on your keyboard. This keyboard shortcut will open the Append menu.
-
4Find and click the Blender file you want to import from. Use the file navigator in the Append window to find your Blender (.blend) file, and click on it to view its components.
-
5Click Append. It's the blue button in the lower-right corner of the Blender navigation window. This displays a new set of folders that contain the different components of the Blender file or scene.
-
6Click the folder that contains the object you want to import. Most object meshes can be found inside the "Object" folder. The following folders contain the following objects:
- Armature: This folder contains armatures (bones) used to create animated characters and models.
- Brushes: This folder contains any custom brushes used in the Blender file.
- Camera: This folder contains all the cameras used in your Blender scene.
- Freestylelinestyle: This folder contains line data for the Freestyle engine.
- Image: This contains any images used in your Blender scene. This includes world images like a sky, as well as diffuse texture images and UV images.
- Light: This folder contains all lights used in your Blender file.
- Material: This contains folder materials for objects. Materials control the base color of an object and how light is reflected off the object.
- Mesh: This folder contains the geometry for the 3D objects in your Blender file.
- Object: This folder contains 3D objects in your scene. This is where you will go to import most objects.
- Scene: This folder contains scene data for your Blender file.
- Texture: This folder contains custom textures applied to objects in your Blender file.
- World: This folder contains world data for your Blender file.
-
7Select the object you want to import. Click on the object's name in the Append window to select it.
- You can hold "Shift" or "Ctrl" ("Command" on Mac) and select multiple objects at a time.
-
8Click the Append button. It's the blue button in the lower-right corner. This imports the object into your new Blender file.


About This Article

1. Open Blender.
2. Click the File menu.
3. Hover over Import.
4. Select your file type.
5. Select the file you want to import.
6. Click Import on the top-right.