X
wikiHow is a “wiki,” similar to Wikipedia, which means that many of our articles are co-written by multiple authors. To create this article, volunteer authors worked to edit and improve it over time.
This article has been viewed 24,931 times.
Learn more...
There are many premade meshes in Blender including the cube, the cone, and even the head of Suzanne the Monkey. You may have found this article after realizing that Blender does not have a pyramid mesh option. Blender version 2.8 will be used here, so earlier versions may or may not work with these steps. Any operating system that can run Blender should work with these steps.
Steps
-
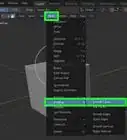
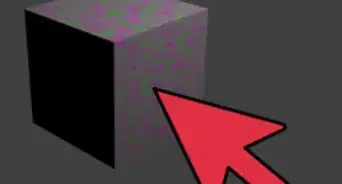
1Make sure that you are in Object Mode and create a cone by selecting Add > Mesh > Cone. Doing so will add a cone at the origin with the pointed end facing upward. These options should be found at the top-right corner of the program window.
-
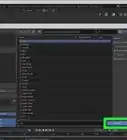
2Select "Add Cone". This will open a panel specifying the properties of the cone. This should be found at the bottom-left of the program window.Advertisement
-
3Change the number of vertices from its default of 32 to 3, 4, or however many sides you want the pyramid to have. This is done by clicking the box with the number of vertices and either dragging the box with your mouse to change the number or typing your number in the box.
-
4Set "Radius 1" to 2. At this point, you may make the pyramid at any size you like by changing the values of "Radius 1" and "Depth". It is recommended to keep their values equal to each other unless you desire a narrow or a wide pyramid.
-
5Set "Rotation Z" to 45 degrees. You only need to type in the number and Blender sets that to the number of degrees. This rotates the cone, now a pyramid, and aligns it with the grid.
-
6Finish adjusting the values under "Add Cone" until you're happy with the pyramid, and then click on a blank area. At this point, the pyramid is complete.
-
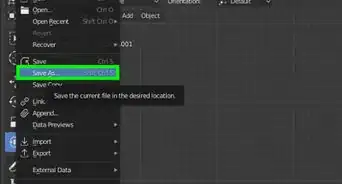
7Save your work by selecting File > Save or pressing Ctrl+S on a PC or ⌘ Command+S on a Mac. It is wise to save your work periodically to avoid losing your work in the event of a crash.


Advertisement
Warnings
- Save your work often so you don't lose it if Blender crashes.⧼thumbs_response⧽
- After creating the cone, avoid clicking anywhere except where it says "Add Cone". Clicking in a blank area or someone else may cause that option to disappear. In that case, the cone will have to be deleted and created again.⧼thumbs_response⧽
Advertisement


About This Article
Advertisement