This article was co-authored by Jonas Jackel and by wikiHow staff writer, Eric McClure. Jonas Jackel is the Owner of Huckleberry Bicycles, a bicycle retail store based in San Francisco, California. Jonas has over 20 years of experience managing bicycle retail stores and has operated Huckleberry Bicycles since 2011. Huckleberry Bicycles specializes in servicing, repairing, and custom building road, cross, gravel, touring, folding, and e-bikes. Jonas was also previously sat on the Board of Directors for Bike East Bay, a bicycle-advocacy non-profit organization based in Oakland, California.
There are 15 references cited in this article, which can be found at the bottom of the page.
This article has been viewed 13,681 times.
If your neck, shoulders, or upper back get sore when you ride your bike, you may have a problem with your bicycle’s reach. A bike’s reach is the horizontal distance from the head tube, which is just below the top of your handles, to the bottom bracket, which is the tube that connects your pedals to the bike. While you cannot technically change a bike’s reach since the head tube and bottom bracket are in fixed locations, you can artificially increase your reach by adjusting your seat or handlebars. You can only move your reach so far, so if the problem doesn’t resolve itself after you’ve changed your handlebars or raised your seat, it may be time to get a newer, bigger bike.
Steps
Changing Your Handlebars
-
1Purchase wider or longer handlebars to artificially increase the reach. A bike’s reach is determined by the frame and you cannot change it. However, you can artificially increase the reach by purchasing wider or longer handlebars. This will force you to sit further forward while you bike, which is effectively the same thing as buying a bike with a longer reach.[1]
- Bike handles, like other components on a bike, are always measured in millimeters. Grab some calipers and open the jaws around an exposed portion of the handlebar, near the center. Close the jaws and check where the adjustable jaw crosses the ruler at the top to measure your handlebars.
- Get wider handlebars if you have broad shoulders or you like holding the sides while you ride.
- Get longer handlebars if you like to keep your hands close to the stem while you ride. The stem is the bracket in the middle of your frame that holds the handlebars in place.
- Changing your handlebars out is more work than adjusting the seat, but you shouldn’t mess with the saddle height if you’re serious about riding and it’s already at a comfortable height.
-
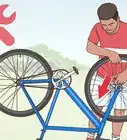
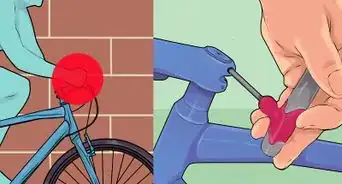
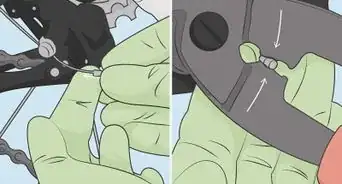
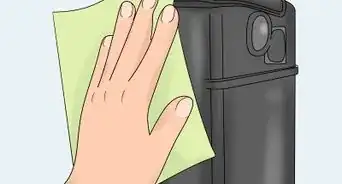
2Peel off the brake covers and unscrew the brakes with an Allen wrench. Set your bike on your work stand. Carefully peel up the plastic or fabric cover on top of each brake where the cable inserts into the assembly. Every bike is different, so take your time here and consult your instruction manual if you can’t figure out how to remove these covers. Unscrew the bolt under this cover on each brake and gearshift to unlock the assemblies before sliding them off of your handles.[2]
- This process is identical on mountain and racing bikes. The only difference may be that you’ll need to remove the rubber grips on the end of mountain bikes first before doing anything else.[3]
- You may need to cut your grip tape and peel it off first before taking the brakes and gearshifts off if there isn’t any slack in the cables and they’re taped to the handlebars.
- You can just let the brakes and gearshifts hang as you complete the rest of these steps.
Advertisement -
3Unscrew the bolts on the faceplate that holds the handlebars on the stem.[4] Stand in front of your front wheel and look at the junction where the handlebars meet the head tube. There is a bracket with 4 hex bolts holding the faceplate on the stem. Grab an Allen wrench that fits these bolts and unscrew them. Count the number of times that you unscrew each bolt so you can reattach the new handlebars with the same tension.[5]
- If you don’t count the number of rotations required to undo each bolt, you’ll need to use a torque wrench with an Allen key attachment to reinstall the bolts without breaking the stem. The tension for these bolts should be listed in the bike’s instruction manual if you have one, but it’s much easier to count the rotations and write them down as you remove the stem’s bolts.
-
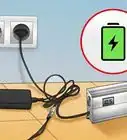
4Lubricate your bolts and oil the handlebars if they’re carbon fiber. If you bought carbon fiber handlebars, lubricate the stem and the handlebars with fiber grip. Grab some lubricating grease and rub it around the threading of each bolt or screw you removed. This will keep them from catching as you reinstall them with your new handlebars and reduce the odds that they break while you’re riding.[6]
- You don’t need to lubricate your handlebars if they’re made of aluminum or some other material.
-
5Slide your new handlebars against the stem and reattach the faceplate. Take your new handlebars and hold them in place against the stem. Line the marks up on the center of the new handlebars to make sure they’re centered against the edges of the stem.[7] Hold the faceplate over the stem and screw each hex bolt back in. Tighten them half of the way to hold your handlebars in place.[8]
- Be sure to screw each bolt in halfway. If you had to unscrew each bolt 24 times to remove them, put them back in by twisting 12 times. This will make it easy to remember how many more rotations you need once you adjust the angle of the bars.
-
6Adjust the angle of the handlebars before tightening the bolts all the way. The angle of the handlebars is entirely up to you. For most serious cyclists, the goal is for the top of the handlebars to be parallel to the ground when you ride so you can intuitively balance and guide the front wheel. However, many cyclists find higher handlebars more comfortable. Take the bike off of the work stand and adjust the angle by tilting the handlebars up or down by hand based on your personal preference.[9] Once you’re happy with how your handlebars are resting in the stem, tighten the bolts on the front of the faceplate all the way.[10]
- Don’t tighten the bolts too hard. If you overtighten them, you could break your stem.
-
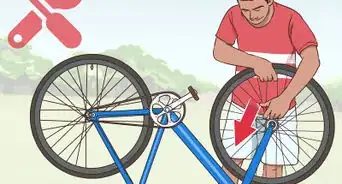
7Reattach the brakes to the handles by tightening the bolts. Slide each brake and gearshift back over the handles. Slide them up so that the brakes sit facing away from the saddle on the front of the handlebars. Line them up so that they’re symmetrical on your handlebars and in a comfortable location where they’re easy to grip.[11] Once you’re happy with the locations of the brakes and the gearshifts, tighten the bolt on the top of each assembly to secure them to the handles.[12]
- Slide or reinstall the covers on top of the brake and gearshift assembly on each side the same way you took them off.
-
8Wrap your new handlebars with handlebar tape. Use electrical tape to wrap the cables around the underside of your handlebars if you want to hide them. Grab a roll of handlebar tape and peel the end off. Wrap the end of the handlebar in 1-2 even layers. Then, wrap the remainder of the handle using even, equal wraps so that ½ of each layer overlaps with the previous length of tape. Repeat this process on the other handle so that your tape meets in the center of the faceplate.[13]
- If you purchased handlebars with rubber grips, slide them over the handles and adjust them as needed until they fit the shape of each handlebar.


Raising Your Seat
-
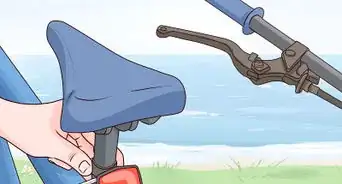
1Raise your bike seat to increase the angle you sit if you ride casually. If you’re a serious cyclist, you shouldn’t mess with the bike seat if it’s already at the proper height. However, you can certainly increase the height of your seat to increase the reach if you don’t particularly care about perfect riding conditions or you just casually use your bike to take short trips.[14]
- When you’re on your bike and your feet are at the lowest point on the pedals, your knee should be slightly bent. This is the ideal height for your seat and changing its height will mess with the angle your feet rotate when you’re pedaling. So long as you can pedal comfortably, it’s fine to raise the seat.
-
2Unlock the seat post clamp to release the bike saddle. Look at the bar that connects your saddle to the seat tube, which is the vertical tube that holds the seat post in place. At the top of the seat tube, there is a round clamp. If there’s a bolt on the back of this clamp, use an Allen wrench to turn it counterclockwise until the seat tube unlocks. If there’s a bar sticking out of this clamp, just turn it away from the seat post by hand to unlock the seat post.[15]
-
3Raise your seat post 2.5–7.6 centimetres (0.98–2.99 in) to your desired height. If your legs are normally comfortable when you bike, it’s best to not raise the seat post more than 7.6 centimetres (3.0 in). Just lift the seat up a little bit further than it used to sit to increase the reach artificially and hold the saddle in place.[16]
- By raising your butt further off of the ground, you’ll have to lean further forward to grab the handlebars. This is effectively the same thing as extending your handlebars for your back and neck, but raising your seat does change how far your legs have to extend to pedal.
- If your knees lock at any point when you’re pedaling, the seat is too high and you’ll have to lower it a little bit.
-
4Tighten the clamp to secure your seat post and lock it in place. Once you have the seat at its desired height, tighten the bolt on the back of your seat post with your Allen wrench to lock your saddle in place. If you unlocked the seat post by hand, just slide the metal tab that’s sticking out of your bike back against the seat tube to lock your saddle.[17]
- Upper back and neck pain are symptoms of a short reach. However, lower back and leg pain are signs that your seat is too high. If you notice your upper back pain goes away and you start getting lower back pain, you’ll need to install bigger handles or get a new bike.


Checking the Reach on a Prospective Bike
-
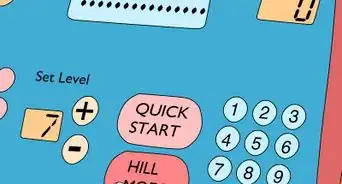
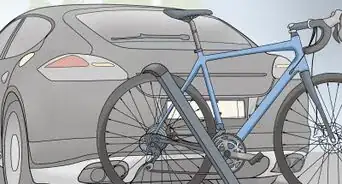
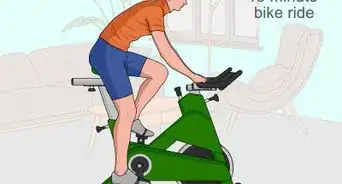
1Sit on the bike to see how it feels. If you’re looking to buy a new bike, the best way to see if it’s right for you is to sit on it first. Adjust the seat post so that the saddle rests at a height where your knees are slightly bent when your feet are at their lowest point on the pedals. Place your hands on the top of the handlebars or drops depending on how you ride. Keep your spine straight and take the bike for a short ride. If it feels comfortable, it may be a good fit for you.[18]
- If you don’t feel comfortable when you take a bike for a test drive, it’s not an ideal bike for you.
- When it comes to finding the right bike, the common small-medium-large sizes are too simplistic to be helpful. The popular usage of the top tube’s length can be problematic since the top tubes on most bikes sit on an angle and aren’t universal. Judging a bike by the reach solves part of this problem by using an imaginary point based on how you sit on the bike to see if it’s right for you.
-
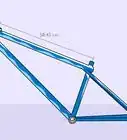
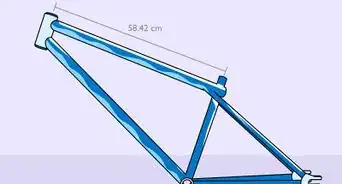
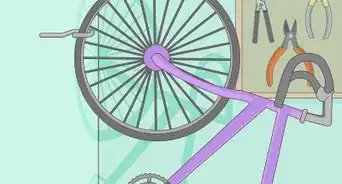
2Measure the reach with a measuring tape to see how long it is. Set the bike against a corner of the wall so that the handlebars sit against one wall and the back wheel sits against the adjacent wall. Take a measuring tape and measure the distance from the center of the pedals to the wall behind the back tire. Note this measurement. Then, measure from the middle of the handlebars to the wall above the back tire. Subtract the first measurement from the second measurement to find the reach.[19]
- For example, if the distance from the middle of the pedals to the back wall is 810 millimetres (32 in) and the distance from the handlebars to the back wall is 1,270 millimetres (50 in), the reach is 460 millimetres (18 in).
- Bike reach is always measured in millimeters, so you’ll need to convert the measurement if you aren’t using the metric hash marks on your measuring tape.
-
3Use your height to determine if the reach falls in a comfortable range. While a bike’s reach is largely a matter of personal preference, there are ideal ranges based on your height. If a bike’s reach falls within the range for your height, you’re more likely to feel comfortable as you ride. Check to see if the prospective bike will be comfortable for you.[20]
- Height: 157–168 centimetres (62–66 in) – Ideal reach: 410–450 millimetres (16–18 in)
- Height: 168–178 centimetres (66–70 in) – Ideal reach: 430–470 millimetres (17–19 in)
- Height: 178–188 centimetres (70–74 in) – Ideal reach: 450–490 millimetres (18–19 in)
- Height: 188–199 centimetres (74–78 in) – Ideal reach: 470–510 millimetres (19–20 in)


Expert Q&A
-
QuestionWhy do my handlebars keep moving?
 Jonas JackelJonas Jackel is the Owner of Huckleberry Bicycles, a bicycle retail store based in San Francisco, California. Jonas has over 20 years of experience managing bicycle retail stores and has operated Huckleberry Bicycles since 2011. Huckleberry Bicycles specializes in servicing, repairing, and custom building road, cross, gravel, touring, folding, and e-bikes. Jonas was also previously sat on the Board of Directors for Bike East Bay, a bicycle-advocacy non-profit organization based in Oakland, California.
Owner, Huckleberry BicyclesWhen you install the handlebar and you're tightening the stem bolts, you want to make sure that the gap between the faceplate of the stem and the stem itself is even on the top and bottom of the faceplate. You need to tighten those bolts evenly. If you don't tighten them evenly, the faceplate will be all the way bottomed out on top or the bottom, which can cause your handlebars to not be tight enough.
Things You’ll Need
Changing Your Handlebars
- Allen wrenches
- Bike stand
- Scissors or utility knife
- Grease
- Fiber grip (optional)
- Torque wrench (optional)
Raising Your Seat
- Allen wrench (optional)
Checking the Reach on a Prospective Bike
- Measuring tape


References
- ↑ https://youtu.be/fyIOPDfX494?t=239
- ↑ https://youtu.be/Ir-Or1xszMQ?t=107
- ↑ https://youtu.be/D9zY2hh8308?t=30
- ↑ Jonas Jackel. Owner, Huckleberry Bicycles. Expert Interview. 18 February 2020.
- ↑ https://youtu.be/Ir-Or1xszMQ?t=135
- ↑ https://youtu.be/Ir-Or1xszMQ?t=158
- ↑ Jonas Jackel. Owner, Huckleberry Bicycles. Expert Interview. 18 February 2020.
- ↑ https://youtu.be/Ir-Or1xszMQ?t=165
- ↑ Jonas Jackel. Owner, Huckleberry Bicycles. Expert Interview. 18 February 2020.
- ↑ https://youtu.be/Ir-Or1xszMQ?t=215
- ↑ Jonas Jackel. Owner, Huckleberry Bicycles. Expert Interview. 18 February 2020.
- ↑ https://youtu.be/Ir-Or1xszMQ?t=294
- ↑ https://youtu.be/Ir-Or1xszMQ?t=388
- ↑ https://youtu.be/fyIOPDfX494?t=246
- ↑ https://youtu.be/IbUmoPA5e4Q?t=28
- ↑ https://youtu.be/IbUmoPA5e4Q?t=105
- ↑ https://youtu.be/IbUmoPA5e4Q?t=105
- ↑ https://youtu.be/fyIOPDfX494?t=107
- ↑ https://www.mbr.co.uk/buyers_guide/mountain-bike-frame-size-380074
- ↑ https://www.mbr.co.uk/buyers_guide/mountain-bike-frame-size-380074
About This Article