This article was co-authored by Luigi Oppido and by wikiHow staff writer, Megaera Lorenz, PhD. Luigi Oppido is the Owner and Operator of Pleasure Point Computers in Santa Cruz, California. Luigi has over 25 years of experience in general computer repair, data recovery, virus removal, and upgrades. He is also the host of the Computer Man Show! broadcasted on KSQD covering central California for over two years.
There are 13 references cited in this article, which can be found at the bottom of the page.
This article has been viewed 26,903 times.
A background image can really make a page in your Word document pop. If you want to add an image to just one page, there are a few different methods you can try. In this article, we’ll talk you through the easiest ways to do it, from making a tiled background with the Shapes tool to using Word’s watermark feature on a single page.
Steps
Inserting a Shape with an Image Fill
-
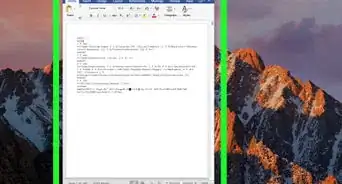
1Click the View tab. It’ll be easier to work with an image on a single page if you isolate that page in your document window. To get started, go to the View tab in the ribbon menu at the top of the window.
-
2Select One Page. Scroll to the page where you’d like to put the background image, then go up to the Zoom group in the View tab. Select One Page to fit the whole page to your document window.Advertisement
-
3Open the Insert tab. Navigate to the Insert tab in the ribbon menu at the top of the page. Click on the tab to open it.[1]
-
4Click Shapes. This will open a menu displaying all the possible shapes that you can insert into your document.[2]
-
5Select a rectangle. You can also select different shapes, but a rectangle is the best choice if you want to fill the entire background of the page with the image. Click the shape, then click on the page to insert it into the document.[3]
-
6Drag the edges of the rectangle to fit the page. Click in the middle of the rectangle to drag it into the middle of the page, then click on one of the “handles” on an edge or corner of the shape. Hold down your mouse button and drag to expand the rectangle until it meets an edge of the page. Do this on all sides of the rectangle until it fills the page completely.[4]
- If you’d rather not fill the page all the way, simply drag the rectangle into whatever size and position you like.
- You can also set the shape to a specific size by clicking the Shape Format tab while the shape is selected, then entering the desired measurements in the Height and Width boxes.
-
7
-
8Select Shape Fill. In the Shape Format tab or the Drawing Tools tab, look for a button labeled Shape Fill. Click the down arrow next to the button to open a menu with different fill options.[7]
-
9Click Picture…. In the drop-down menu, select Picture… from the list of options. This will allow you to fill the shape with the image of your choice.[8]
-
10Choose an image from your computer. Once you click Picture… a dialog box will open prompting you to insert an image. Browse your computer to find the image you want to use, select it, then click Insert.[9]
- Once you do this, the image will appear inside the shape. However, it will appear stretched and distorted if the shape doesn’t match the dimensions of the original picture.
-
11Select Tile picture as texture. With the shape still selected, either right-click the shape and select Format Shape… or navigate to the Format Pane in the Shape Format tab. Select the Fill button in the Format Pane and check the box next to Tile picture as texture.
- The Tile picture as texture option will fill the shape with repeated copies of your image. This is a good option if you want to use an abstract or repeating pattern as your background image.
-
12Increase transparency to make the image fainter. If the picture is too dark or vibrant, it may be hard to see your text against it. While you’re still in the Format Pane, select the Image tab, then click Picture Transparency. Move the slider to make the image as transparent as you like.[10]
-
13Set the outline to No Outline. In the Shape Format tab, look for an Outline button next to the Shape Fill button. Click it to open the drop-down menu, then click No Outline.
- If you’re using the Windows version of Word, you can also right-click the shape to open a format menu. Select Outline, then No Outline.[11]
-
14Right-click the shape and select Wrap Text. Now that the shape is in place, you’ll need to put it behind the text if you want it to show up in the background. You can either bring up this option by right-clicking the image and selecting Wrap Text or by navigating to the Layout tab and finding Wrap Text in the Selection group.[12]
-
15Select Behind Text from the text wrapping options. Once you do this, the shape will appear behind your text as a background image.[13]


Adding a Watermark (Windows)
-
1Open the Design tab. Open your Word document, then navigate to the Design tab in the ribbon menu at the top of the window. Click on the tab to open it.[14]
-
2Click Watermark. In the Design tab, click on the Watermark button.[15]
-
3Select Custom Watermark. This will allow you to create your own watermark from an image rather than choosing one of the preset watermarks in the Word gallery.[16]
-
4Click Picture Watermark and select your image. Once you choose Picture Watermark, you’ll be prompted to select an image. Click Select Image and either browse your computer for the picture you want, or use the option to search Bing Images to find one on the web.[17]
- Once you find the image you want, click Insert to add the watermark. At this point, the watermark will be added to all the pages of your document.
-
5Open the header and select the watermark image. Double-click near the top of the page to open the header. Then, move your cursor over the watermark. Your cursor should change to a 4-headed selection arrow. Click the watermark to select it.[18]
-
6Navigate to the Design tab. With the watermark still selected, go to the Design tab in the ribbon menu at the top of the window.[19]
-
7Click Watermark in the Page Background group. This will open options for editing your custom watermark.[20]
-
8Select Save Selection to Watermark Gallery. Enter a name for your new watermark image. Then, click OK to save it.[21]
-
9Delete the watermark. To apply the watermark to just one page, you’ll need to delete it first and then re-apply it.[22] You can do this by pressing Delete while the watermark is still selected, or by opening Watermark in the Design tab and selecting No watermark.
-
10Open the Watermark menu again. Click the page where you want the watermark to appear, then click Watermark in the Design tab. This should open up a gallery of saved watermarks, including your custom design.[23]
-
11Right-click the watermark you want in the gallery. Locate your custom watermark in the gallery and right-click on it to open a context menu.[24]
-
12Select Insert at Current Document Position. This should be the first option on the menu. When you select it, the watermark image will appear on just the page that you selected.[25]
-
13Adjust the boldness of the watermark if you like. The watermark will automatically appear as a faint, washed-out image behind the text. If you want it to look bolder, select the watermark again, then open the Picture Tools tab. Select Format, then select Recolor, Brightness, or Contrast to adjust its appearance.[26]


Adding a Watermark (Mac)
-
1Navigate to the Layout tab. To add a watermark to just one page in the Mac version of Word, you’ll need to isolate that page from the rest of the document. Start by going to the Layout tab in the ribbon menu at the top of the document window.[27]
-
2Insert section breaks before and after the page. Scroll to the bottom of the page just before the one where you want the watermark to appear, then click the Breaks button in the Layout tab. Go to the Section Breaks section of the menu and select Next Page. Do the same thing at the bottom of the page where you want the watermark to appear.[28]
- If you’re putting the watermark on the first page of the document, you only need to insert a break at the bottom of that page.
-
3Go to the Design tab. Once you’ve inserted the section breaks, navigate to Design in the ribbon menu and click on it.[29]
-
4Select Watermark. The Watermark button is located on the far right side of the Design tab. Click it to open a dialog box with options for inserting a watermark.[30]
-
5Turn on the Picture radio button. Once the dialog box pops up, click the button next to Picture. This is the second option, right under No watermark.[31]
-
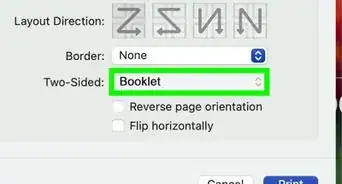
6Click Select Picture… and insert your image. When you click the Select Picture… button, a Finder window will pop up. Browse your computer and select the image you want to use for your watermark, then click Insert. Click OK to apply the watermark.[32]
- By default, your watermark will appear washed out and will be automatically scaled to fit the page. It will also appear on every page in the document.
- Uncheck the Washout option if you want the watermark to appear with its original brightness and contrast.
- Change the scale with the Scale dropdown menu to make the image bigger or smaller.
-
7Double-click at the top of the page to open the Header & Footer tab. Navigate to the page where you want the watermark to appear, then double-click at the top. This will open the header and footer, and will automatically take you to the Header & Footer tab in the ribbon menu. You can also go to the Insert tab, then select Header. Then, scroll to the bottom of the dropdown menu and select Edit Header.
-
8Deselect Link to Previous. Click the header at the top of the page, then navigate to Link to Previous in the Header & Footer tab. Make sure that this option is deselected. Do the same thing with the header on the next page after the one where you want the watermark to appear.[33]
-
9Select the watermark on any pages where you don’t want it to appear. With the Header & Footer tab still open, scroll to any pages where you don’t want to have the watermark visible. Hover your cursor over the watermark and click on it to select it.
-
10Press Delete to remove the watermark. Once the watermark is selected, hit the Delete key. The watermark should disappear from that page and any pages that are linked to it. You should still see the watermark on the page that you isolated with the section breaks.
-
11Close the Header and Footer. Once you’ve deleted the watermark from any pages where you don’t want it to appear, click on Close Header and Footer on the right side of the Header & Footer menu. Now you will have a watermark image in the background of just one page.


Using the Insert Image Tool
-
1Open the Insert tab. Navigate to the page where you want the image to appear, then click the Insert tab in the ribbon menu at the top of the document.[34]
-
2Click the Pictures button. This will open up a series of options for finding and selecting an image, either from your computer, from the web, or from a gallery of stock images or backgrounds.[35]
-
3Choose an image and click Insert. Once you’ve found the image you want, select it and click the Insert button to add it to your document.[36]
-
4Position the image wherever you like on the page. Once you insert the image, click it to select it, then drag it to your preferred position on the page. You can also use the “handles” on the edges and corners of the image to resize it.[37]
- If you want to resize the image without changing its proportions, select the image and open the Picture Format tab. Make sure the Lock aspect ratio box is checked, then type in either the height or width you want in the image size text boxes. The other dimension will automatically adjust to match.
-
5Right-click the image and select Wrap Text. Or, if you’re on a Mac, use Control click. When the context menu pops up, select the Wrap Text option.
- You can also access the Wrap Text menu by navigating to the Layout tab while the image is selected. You’ll find it in the Selection Group on the right side of the ribbon menu.
-
6Select Behind Text. The Behind Text option will send the image to the background of your document. Once you deselect the image, you can type over it.[38]
-
7Set the picture transparency in the Picture Format tab. If the image is too bold for you to easily see the text in front of it, you can adjust its transparency. With the image selected, go to the Picture Format tab and click the Transparency button. Select from one of the preset options or click Picture Transparency Options… to customize the transparency of the image.


References
- ↑ https://support.microsoft.com/en-us/office/add-shapes-0e492bb4-3f91-43b5-803f-dd0998e0eb89#OfficeVersion=macOS
- ↑ https://support.microsoft.com/en-us/office/add-shapes-0e492bb4-3f91-43b5-803f-dd0998e0eb89#OfficeVersion=macOS
- ↑ https://support.microsoft.com/en-us/office/add-shapes-0e492bb4-3f91-43b5-803f-dd0998e0eb89#OfficeVersion=macOS
- ↑ https://support.microsoft.com/en-us/office/change-the-size-of-a-picture-shape-text-box-or-wordart-in-word-901ec456-33ce-40d3-828d-5552ee794aa1
- ↑ https://support.microsoft.com/en-us/office/add-shapes-0e492bb4-3f91-43b5-803f-dd0998e0eb89#OfficeVersion=macOS
- ↑ https://support.microsoft.com/en-us/office/change-the-colors-in-a-text-box-or-shape-c3ab6bb7-89f9-4908-912e-e86ea5fd106d
- ↑ https://support.microsoft.com/en-us/office/add-shapes-0e492bb4-3f91-43b5-803f-dd0998e0eb89#OfficeVersion=macOS
- ↑ https://support.microsoft.com/en-us/office/add-shapes-0e492bb4-3f91-43b5-803f-dd0998e0eb89#OfficeVersion=macOS
- ↑ https://support.microsoft.com/en-us/office/add-shapes-0e492bb4-3f91-43b5-803f-dd0998e0eb89#OfficeVersion=macOS
- ↑ https://support.microsoft.com/en-us/office/make-a-picture-transparent-in-word-128bfdb6-9906-4f9d-b4c6-e5aa22ba082f
- ↑ https://support.microsoft.com/en-us/office/make-a-picture-transparent-in-word-128bfdb6-9906-4f9d-b4c6-e5aa22ba082f
- ↑ https://support.microsoft.com/en-us/office/layout-options-a0f53857-b501-46c6-ba8b-68ba51e0e3cc#ID0EBBD=Text_Wrapping
- ↑ https://support.microsoft.com/en-us/office/layout-options-a0f53857-b501-46c6-ba8b-68ba51e0e3cc#ID0EBBD=Text_Wrapping
- ↑ https://support.microsoft.com/en-us/office/use-a-custom-watermark-954cd296-7dab-4731-b5dd-84f9fa15bcd3
- ↑ https://support.microsoft.com/en-us/office/use-a-custom-watermark-954cd296-7dab-4731-b5dd-84f9fa15bcd3
- ↑ https://support.microsoft.com/en-us/office/use-a-custom-watermark-954cd296-7dab-4731-b5dd-84f9fa15bcd3
- ↑ https://support.microsoft.com/en-us/office/insert-a-picture-watermark-b48f5c1e-8b71-4aa3-b753-bc661760cd3a#ID0EBDD=Windows_-_newer
- ↑ https://support.microsoft.com/en-us/office/use-a-custom-watermark-954cd296-7dab-4731-b5dd-84f9fa15bcd3
- ↑ https://support.microsoft.com/en-us/office/use-a-custom-watermark-954cd296-7dab-4731-b5dd-84f9fa15bcd3
- ↑ https://support.microsoft.com/en-us/office/use-a-custom-watermark-954cd296-7dab-4731-b5dd-84f9fa15bcd3
- ↑ https://support.microsoft.com/en-us/office/use-a-custom-watermark-954cd296-7dab-4731-b5dd-84f9fa15bcd3
- ↑ https://support.microsoft.com/en-us/office/insert-a-background-picture-or-image-in-word-08782ea3-086c-4778-94bb-2ea3d187f83e#ID0EDBD=Windows
- ↑ https://support.microsoft.com/en-us/office/insert-a-watermark-on-just-one-page-7b84b344-e92b-486e-9c92-466a21a39de8
- ↑ https://support.microsoft.com/en-us/office/insert-a-watermark-on-just-one-page-7b84b344-e92b-486e-9c92-466a21a39de8
- ↑ https://support.microsoft.com/en-us/office/insert-a-watermark-on-just-one-page-7b84b344-e92b-486e-9c92-466a21a39de8
- ↑ https://support.microsoft.com/en-us/office/adjust-the-washout-effect-of-a-watermark-63c0d9f5-f9da-4c55-8276-b959c3edd012
- ↑ https://answers.microsoft.com/en-us/msoffice/forum/all/how-to-make-a-single-page-watermark-in-a-multiple/c2c07c9e-ea2a-42ce-9aec-ace7b035acdd
- ↑ https://answers.microsoft.com/en-us/msoffice/forum/all/how-to-make-a-single-page-watermark-in-a-multiple/c2c07c9e-ea2a-42ce-9aec-ace7b035acdd
- ↑ https://support.microsoft.com/en-us/office/insert-a-picture-watermark-b48f5c1e-8b71-4aa3-b753-bc661760cd3a#ID0EBDD=macOS_-_newer
- ↑ https://support.microsoft.com/en-us/office/insert-a-picture-watermark-b48f5c1e-8b71-4aa3-b753-bc661760cd3a#ID0EBDD=macOS_-_newer
- ↑ https://support.microsoft.com/en-us/office/insert-a-picture-watermark-b48f5c1e-8b71-4aa3-b753-bc661760cd3a#ID0EBDD=macOS_-_newer
- ↑ https://support.microsoft.com/en-us/office/insert-a-picture-watermark-b48f5c1e-8b71-4aa3-b753-bc661760cd3a#ID0EBDD=macOS_-_newer
- ↑ https://answers.microsoft.com/en-us/msoffice/forum/all/how-to-make-a-single-page-watermark-in-a-multiple/c2c07c9e-ea2a-42ce-9aec-ace7b035acdd
- ↑ https://support.microsoft.com/en-us/office/insert-pictures-3c51edf4-22e1-460a-b372-9329a8724344#OfficeVersion=Windows_newer_versions
- ↑ https://support.microsoft.com/en-us/office/insert-pictures-3c51edf4-22e1-460a-b372-9329a8724344#OfficeVersion=Windows_newer_versions
- ↑ https://support.microsoft.com/en-us/office/insert-pictures-3c51edf4-22e1-460a-b372-9329a8724344#OfficeVersion=Windows_newer_versions
- ↑ https://support.microsoft.com/en-us/office/insert-pictures-3c51edf4-22e1-460a-b372-9329a8724344#OfficeVersion=Windows_newer_versions
- ↑ https://support.microsoft.com/en-us/office/layout-options-a0f53857-b501-46c6-ba8b-68ba51e0e3cc#ID0EBBD=Text_Wrapping
About This Article