This article was co-authored by Mark Spelman and by wikiHow staff writer, Luke Smith, MFA. Mark Spelman is a General Contractor based in Austin, Texas. With over 30 years of construction experience, Mark specializes in constructing interiors, project management, and project estimation. He has been a construction professional since 1987.
There are 8 references cited in this article, which can be found at the bottom of the page.
wikiHow marks an article as reader-approved once it receives enough positive feedback. This article received 20 testimonials and 90% of readers who voted found it helpful, earning it our reader-approved status.
This article has been viewed 1,108,578 times.
Corrugated roofing is a great way to top a garden shed, shop, or patio. It's quick, easy, low cost, and, best of all, you can do it yourself. All it takes is some common tools and a little math, which is where we come in. We’ll give you the rundown on how to measure, cut, and install corrugated roof panels, and also an overview of which material is best for your budget and project.
Things You Should Know
- Measure the area of your roof and use an angle grinder to trim the corrugated panels to size.
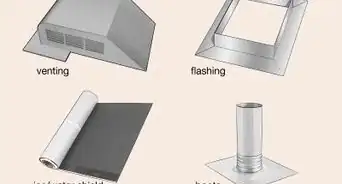
- Roll out an underlayment, then install the flashings on the eaves of the roof.
- Attach the roofing panels starting from the eaves, overlapping them by about 3–4 in (7.6–10.2 cm), and working your way to the peak of the roof.
- Install the peak caps on top of the panels, and seal any visible seams with sealant.
Steps
Measuring and Cutting
-
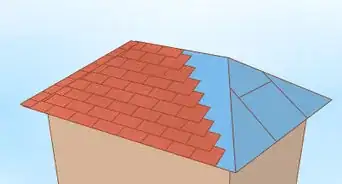
1Measure your roof’s area. Use a ladder and a tape measure to note your roof’s dimensions. Measure the width (horizontal) and length (from the peak to the lowest point). To get the area, multiply those 2 numbers. Repeat this for every section of your roof. Finally, add 15% of that number to the total to find your approximate required square footage of roofing.[1]
- For example, a roof with a width of 15 ft (4.6 m) and a length of 10 ft (3.0 m) has an area of 150 sq ft (~14 sq m), which we then double for an A-frame roof. Fifteen percent of that number is 45 sq ft (~4 sq m), which brings the total estimated material needed to 345 sq ft (~32 sq m).
- The added 15% is to accommodate roofing overlap. Add another 5-10% if you want to be sure to buy enough.
-
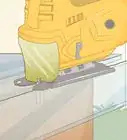
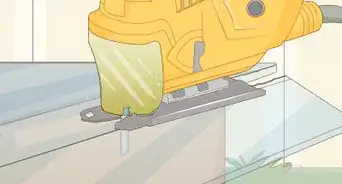
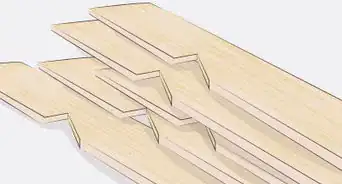
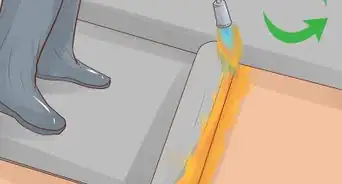
2Cut the panels to the desired length. Use an angle grinder to cut and shape the panels to your roof. Most panels come up to 32 feet (9.8 m) in length. Gather enough panels to cover your roof’s area, accommodating for about 3–4 in (7.6–10.2 cm) of overlap on each side of the panel.[2] Cut down a few panels that would otherwise make for excess roofing area.
Cutting tools:
Angle grinder:[3] The fastest option. Wear hearing and eye protection. Paint or prime cut edges to prevent rust.
Circular saw: Slower than an angle grinder, but follow the same instructions. Use a metal blade and expect it to wear quickly.
Nibbler: Effective if rated for the right metal and gauge.
Tin snips: Slow but safe. Wear work gloves and find the longest pair you can.Advertisement -
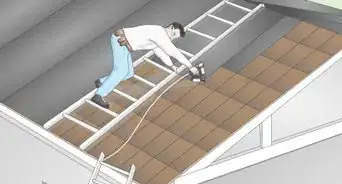
3Pre-drill holes on the ridges. Some panels have pre-drilled holes. If yours do not, then use an electric drill to add them. Use a 3⁄16 in (4.8 mm) drill bit, and space the holes every 6 to 8 in (15 to 20 cm) horizontally and every 2 ft (0.61 m) vertically, drilling on the nearest ridge.[4]
- In addition, space the lowest row of holes on what will be the lowest panels 6 in (15 cm) from the bottom of the panel.[5]


Installing
-
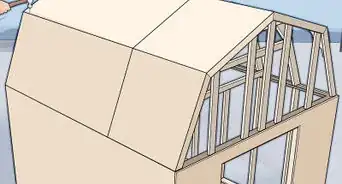
1Lay down your underlayment. Underlayment is key to insulating your structure and catching any leaks that may make it through the roofing. Simply roll it out horizontally, adhesive-side down, starting at the eaves of the roof. Overhang it by 2–3 in (5.1–7.6 cm) and overlap each strip by 1–2 in (2.5–5.1 cm).[6]
- If your underlayment doesn’t have adhesive, nail or staple your underlayment to the structure of the roof.
- If you’re installing your roofing over shingles, remove any damaged shingles first.
-
2Secure the edging to the eaves with a roofing nailer. The edges, or “flashing,” sits on the underside of the roof, about where your gutters are. Fit the flashing over the underlayment on the edges of the roof, overlapping each section by .25–.5 in (0.64–1.27 cm), and driving a nail every 16 in (41 cm). As you overlap them, apply a line of caulk to the edge of the bottom flashing to seal it.[7]
- The flashing will overhang any gutters by about .25 in (0.64 cm). It’s totally normal, and there’s no need to remove or fiddle with the gutters.
-
3Apply sealant tape and closure strips to the edge. Lay sealant tape along the edge of the flashing, and peel away the back paper. Then, lay your closure strips—the bits of foam that block the underside of the panels—along the adhesive, taking care not to stretch them out.[8]
-
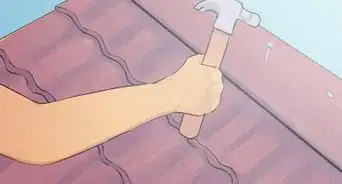
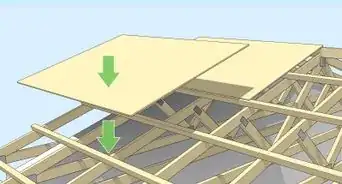
4Install the panels, starting from the eaves. Draw a line of sealant atop the closure strip, then place the panels onto the closure strips, overhanging the edge by about 4 inches (10 cm). Start at one corner, and overlap the panels themselves by 3–4 in (7.6–10.2 cm), or by one ridge, more or less, screwing them in with 1.5 in (3.8 cm) wood screws and washers.[9]
- Drive the screws so that the head of the screw just meets the corrugated panel and holds it securely, but no more, to prevent denting or dimpling the panels.
- Continue across the roof until the first row of panels is completed.
-
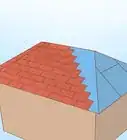
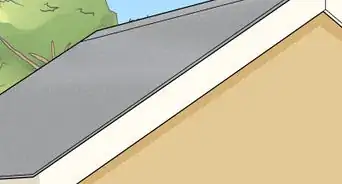
5Install the upper rows of panels. Once the first row is complete, begin the second row, overlapping each row by 4 in (10 cm). Continue in this way until the entire roof is covered by the corrugated panels, leaving the peak exposed.[10]
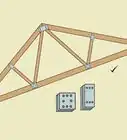
- As you work, make sure the panels are square with the roof, to avoid laying crooked panels. Use a chalk line to snap down a grid that’s perpendicular to the edges of the roof.
-
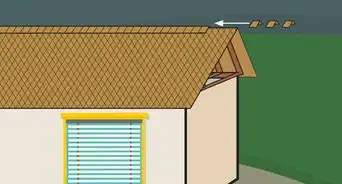
6Attach the gable trim and roof cap. The gable trim covers the edges of the panels and keeps out the elements. Secure it with additional screws or butyl tape. The roof cap is the bent bit of metal that covers the very peak of the roof between the panels. Lay it atop the panels, overlapping them by 3–4 in (7.6–10.2 cm), and screw it in just as you did with the panels below. Also overlap the trims and caps themselves by 3–4 in (7.6–10.2 cm).[11]
- Your ridge cap may require an additional closure strip and sealant. When in doubt, follow the manufacturer’s instructions.
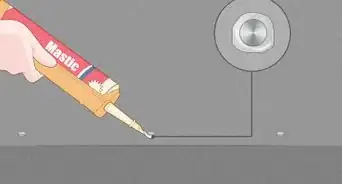
- Once you’ve placed the ridge cap, seal any visible or dramatic seams with sealant.


Choosing Roofing
-
1Choose PVC or other plastic roofing to let light in. The advantage of the PVC, polycarbonate, or vinyl roofing is the translucency of the panels. They allow daylight to enter through them, making them preferable for things like chicken coops, greenhouses, or low-profile carports.[12]
- PVC sheets are often cheaper than metal, but are much less durable.
- Other plastics, like polycarbonate or fiberglass, are much more durable than PVC, but are often more expensive.
- Plastic panels do tend to be noisier than metal in rain and hail conditions, however.
-
2Go with aluminum panels for practical durability and sensible cost. Aluminum panels are lightweight, more durable than plastic (it can last up to 50 years), and often more affordable than other metal panels. It won’t rust, either, making it great for humid, salty air. Since it’s lightweight, though, it is more susceptible to dents and divots.[13]
-
3Pick terne roofing for greater durability. One of the strongest features of corrugated terne (stainless steel pressed between layers of tin) is its durability. It can withstand extreme weather conditions, weathers to a pleasant matte look, and can last longer than 100 years.[14]
- Terne tends to be the most expensive of the 3, and is often more difficult to work with.


Warnings
- Work from the sides, using ladders or movable scaffolding, to avoid standing or walking on the panels.⧼thumbs_response⧽
- Before you install corrugated roofing on your home, check local building codes to find out if there are any restrictions on using this kind of roofing.⧼thumbs_response⧽
- To prevent leaks, do not drill holes for the screws in the valley of the ridges.⧼thumbs_response⧽
Things You'll Need
- Angle grinder
- Electric drill
- 3⁄16 in (4.8 mm) drill bit
- Polycarbonate or galvanized metal corrugated roofing panels
- Underlayment
- Roofing sealant

References
- ↑ https://housemethod.com/roofing/metal-roof-installation/
- ↑ https://housemethod.com/roofing/metal-roof-installation/
- ↑ https://www.protoolreviews.com/what-is-an-angle-grinder-used-for/
- ↑ https://myrooff.com/how-to-install-corrugated-metal-roofing/
- ↑ https://housemethod.com/roofing/metal-roof-installation/
- ↑ https://housemethod.com/roofing/metal-roof-installation/
- ↑ https://www.forbes.com/home-improvement/roofing/how-to-install-metal-roofing/
- ↑ https://www.forbes.com/home-improvement/roofing/how-to-install-metal-roofing/
- ↑ https://www.naturalhandyman.com/iip/infxtra/infcorroofpanels.html
- ↑ https://myrooff.com/how-to-install-corrugated-metal-roofing/
- ↑ https://myrooff.com/how-to-install-corrugated-metal-roofing/
- ↑ https://buildingadvisor.com/metal-vs-plastic-roofing-for-carport/
- ↑ https://www.thisoldhouse.com/roofing/21345689/metal-roofs
- ↑ https://www.thisoldhouse.com/roofing/21345689/metal-roofs
- ↑ https://web.ornl.gov/sci/buildings/conf-archive/2013%20B12%20papers/084-Biswas.pdf
About This Article

To install corrugated roofing, start by cutting your panels to length with an angle grinder. Next, pre-drill holes on the end and side ridges of the panels, spacing the holes 6 to 8 inches apart. Beginning at the outside edge of your roof, place each panel directly onto the purlins that are attached to the roof trusses. Screw down the panels using the pre-drilled holes, then continue across the roof until it is completely covered. To learn more from our Contractor co-author, like how to choose between corrugated PVC or metal roofing, keep reading the article!