This article was co-authored by Barry Zakar. Barry Zakar is a professional handyman and the founder of Little Red Truck Home Services based in the San Francisco Bay Area. With over ten years of experience, Barry specializes in a variety of carpentry projects. He is skilled at constructing decks, railings, fences, gates, and various pieces of furniture. Barry also holds his MBA from John F. Kennedy University.
This article has been viewed 39,210 times.
Outdoor lighting, from flood lights to motion sensor lights to simple landscape lighting, is a popular method of increasing lawn security and establishing mood and atmosphere in the evenings. The process of installing outdoor lighting can be tricky and difficult for someone who has never done it before, but it's not an impossible task. Once you’ve got an outdoor lighting starter kit, connecting it to your house’s power supply is a pretty straightforward process.
Steps
Laying Out the Electrical Wiring
-
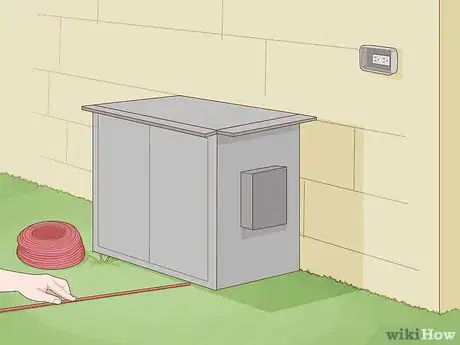
1Mark the route that you’ll run your electric cable along. Identify the spots in your yard where you want your light fixtures to be located, as well as where you’ll set up your transformer box. Use string or spray paint to plot a route that takes an electric cable from the transformer to each of the light fixtures you’ll install. This will allow you to plan ahead of time where you’ll dig and bury the cable.[1]
- Try to steer clear of placing the route near any trees, since they’ll likely have shallow roots that will interfere with the installation process.
- Plan on setting up your transformer box next to an outdoor electrical outlet.
-
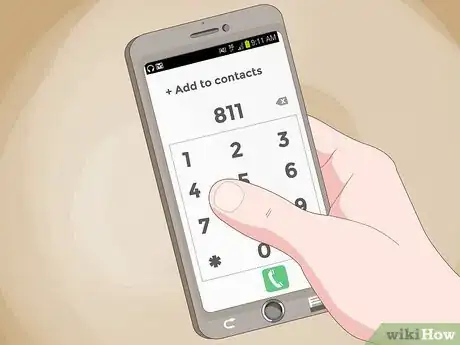
2Contact the power company to have them identify any underground lines. Call the telephone company and cable company as well, if you have these services in your home. You’ll need to make sure you’re not going to sever any important cables running underground when you start digging along the cable route.[2]
- If you live in the United States, you can call 811 to be put in touch with your local utility company.
- Have the company mark the locations of any underground utilities in your yard so that you won’t accidentally dig into them.
Advertisement -
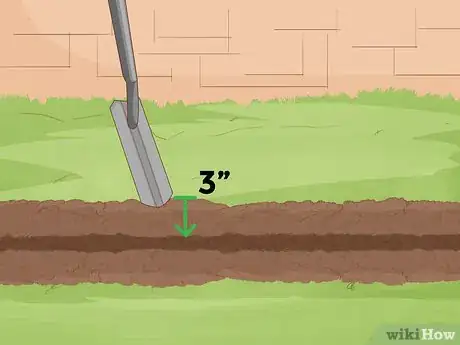
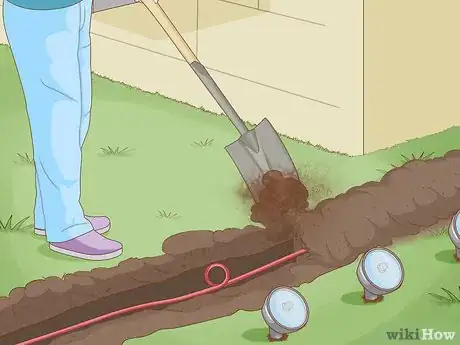
3Dig a shallow trench along your wiring route. Use a ditch-witch or a trenching shovel to dig this trench about 3 inches (7.6 cm) deep. You may need to use the shovel to turn over any sod or grass on your lawn first.[3]
- Using a ditch-witch or trenching shovel is ideal since these tools will give you a more narrow trench. You don’t want to have to move a bunch of loose dirt around during this installation process.
- Don’t worry about the width of the trench; just make it as wide as the width of your shovel.
-
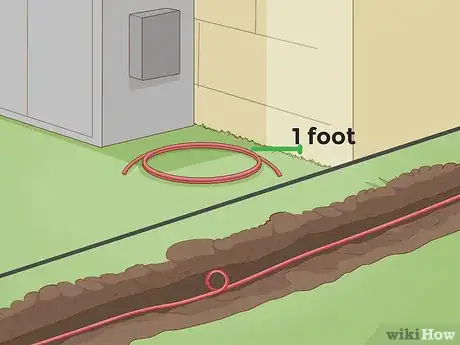
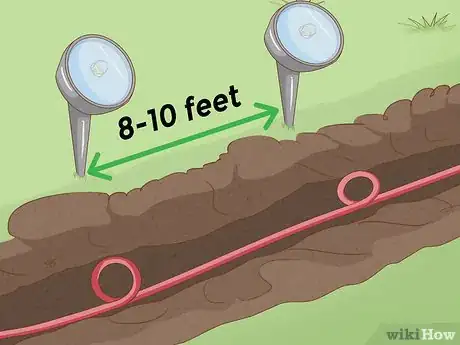
4Place the cable in the trench without burying it. Leave about 1 foot (0.30 m) of loose cable on the end next to the transformer, since you’ll need to attach the wiring to the box. Leave a small loop at each planned fixture location as well, so you can connect the wiring to the fixture.[4]
- Make sure you can push the cable all the way down to the bottom of the trench, so that it won’t jut out of the trench when you go to bury it.
Connecting the Wiring to the House
-
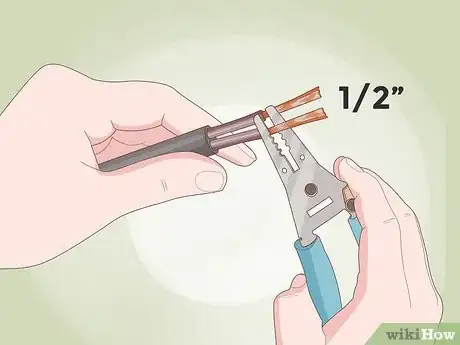
1Run the cable up to the outdoor outlet and strip the end of it. Use wire strippers to cut the end of the cable and remove about 1⁄2 inch (1.3 cm) of rubber insulation. This should leave 2 wires exposed.[5]
- You can also use a utility knife to strip the wire, although it will be much easier to use the wire strippers.
- If the cable has cable nuts, remove them before stripping it.
-
2Attach the 2 exposed wires from the cable to the transformer box. Slide the wires under the 2 screws (called terminal screws) located on the bottom of the transformer box. Then, use a screwdriver to tighten the top and bottom terminal block set screws to attach the wires to the box.[6]
- The inside of the transformer box should include guidelines and brief instructions on how to safely attach these wires to the box.
- Be sure the screws are tightened all the way to prevent the wires from sliding out.
-
3Drive a stake into the ground and attach the transformer to it. Hammer a sturdy wooden stake about 1 foot (0.30 m) into the ground next to the outlet. Then, use the screwdriver to screw the transformer box into the stake to attach it.[7]
- You can also mount the box onto the side of your house if you have wooden or vinyl siding. Use a screwdriver to drive a screw through the back of the box and into the siding.
Installing the Light Fixtures
-
1Place your fixtures about where you intend to install them. Lay the light fixtures alongside your cable, keeping them about 8 to 10 feet (2.4 to 3.0 m) apart from one another. Don’t worry about how they look just yet; it’s fine to just lay them on the ground![8]
-
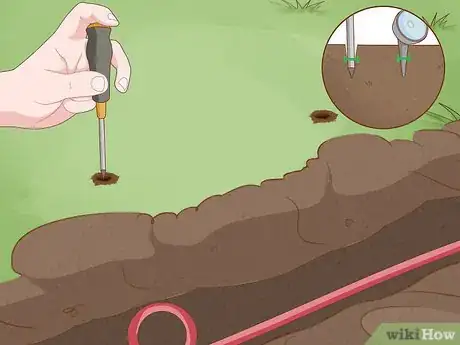
2Dig a narrow hole on the spot where you plan to put 1 of the fixtures. Use your screwdriver or a long steel punch to make a deep, narrow hole for the light fixture’s stake. Make the depth of the hole the same as the length of the stake.[9]
- Doing this will make it much easier for you to drive the stake into the ground later on.
- Your light fixtures should have come with stakes, if you purchased them from a store. If you don’t have one of these stakes, buy some metal stakes that are about 8 to 10 inches (20 to 25 cm) long to use instead.
-
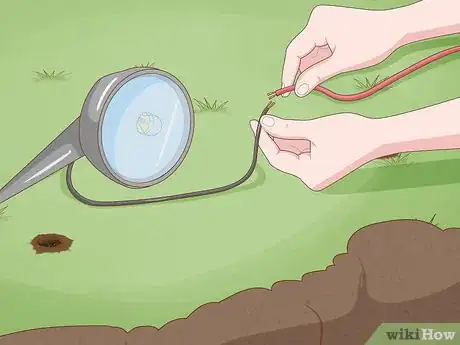
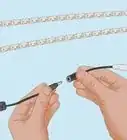
3Connect the fixture wires to the main cable. Take the 2 connector halves hanging from the bottom of the light fixture and slip them over the cable. Then, pinch them together until you hear a click. This is the sound of the connectors making a connection with the wires inside the cable.[10]
- Be sure the cable is not hooked up to a power source when you go to connect it to the light fixture.
-
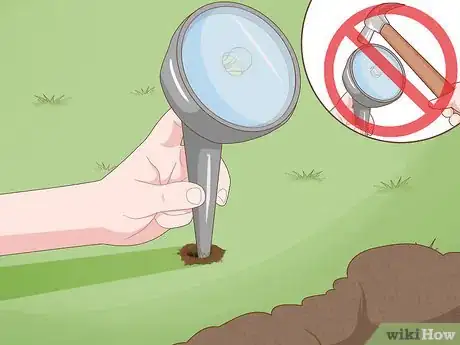
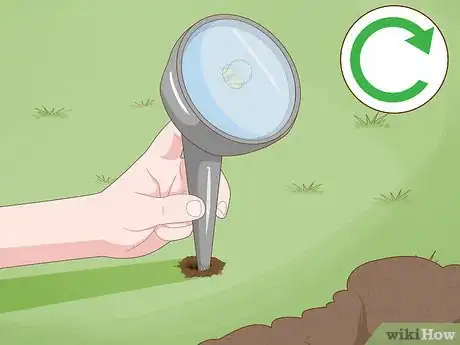
4Attach the fixture to the stake, then push the stake into the ground. Use both hands to grip the stake (with the fixture attached to it) and push it into the narrow hole you dug for it. Don’t try to hammer it into the ground, since this may damage the light.[11]
- You will most likely just have to snap the fixture onto the stake. However, some manufacturers ask that you use a screw and screwdriver to attach the two.
- Check to make sure the fixture is vertically straight after you insert it into the ground. If it isn’t straight, pull it out and reinsert it.
-
5Repeat this process for all the other light fixtures. Hook up each fixture to the main cable, then attach them to stakes and push them into the ground. Make sure they’re all aligned the way you want them to be and that they’re all straight before proceeding.[12]
-
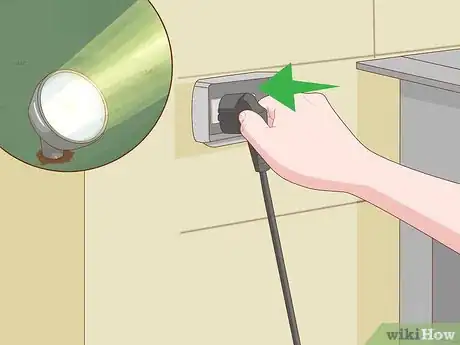
6Plug the transformer into the outlet to test your lights. If any of the lights don’t come on, check to see that the bulb is correctly screwed in. If the bulb is good but the light still doesn’t come on, it’s most likely a problem with the wiring.[13]
- If the lights are dim, this means they’re not getting enough electricity. Make sure the cable isn’t running beyond the manufacturer’s recommended length.
-
7Bury all of the exposed wiring. Use your shovel to replace all of the dirt that you displaced to create your cable trench. Place some loose soil around the light fixtures to hide the wires coming out of them as well, if necessary.[14]
Expert Q&A
-
QuestionHow do you install outdoor lighting?
 Barry ZakarBarry Zakar is a professional handyman and the founder of Little Red Truck Home Services based in the San Francisco Bay Area. With over ten years of experience, Barry specializes in a variety of carpentry projects. He is skilled at constructing decks, railings, fences, gates, and various pieces of furniture. Barry also holds his MBA from John F. Kennedy University.
Handyman If there's already a receptacle outside your door, you just remove the fixture that's already there, then install the new light. If there's not a receptacle, you'll have to run the wiring, but it's best to have an electrician help you with that. You can also choose solar-powered lights that will charge during the day.
Warnings
- If you're not experienced working with electrical wiring, consider hiring an electrician to help you.[16]⧼thumbs_response⧽
Things You'll Need
- Outdoor lighting starter kit
- Transformer
- Ditch-witch or shovel
- Screwdriver
- Wire strippers
References
- ↑ https://www.familyhandyman.com/electrical/outdoor-lighting/how-to-install-outdoor-lighting-and-outlet/view-all/
- ↑ https://www.familyhandyman.com/electrical/outdoor-lighting/how-to-install-outdoor-lighting-and-outlet/view-all/
- ↑ https://www.thisoldhouse.com/how-to/how-to-put-landscape-lighting
- ↑ https://www.bhg.com/home-improvement/lighting/outdoor/install-outdoor-lighting/
- ↑ https://www.thisoldhouse.com/how-to/how-to-put-landscape-lighting
- ↑ https://www.thisoldhouse.com/how-to/how-to-put-landscape-lighting
- ↑ https://www.thisoldhouse.com/how-to/how-to-put-landscape-lighting
- ↑ https://www.popularmechanics.com/home/lawn-garden/how-to/a8906/how-to-put-in-low-voltage-landscape-lighting-15326645/
- ↑ https://www.thisoldhouse.com/how-to/how-to-put-landscape-lighting
- ↑ https://www.thisoldhouse.com/how-to/how-to-put-landscape-lighting
- ↑ https://www.popularmechanics.com/home/lawn-garden/how-to/a8906/how-to-put-in-low-voltage-landscape-lighting-15326645/
- ↑ https://www.popularmechanics.com/home/lawn-garden/how-to/a8906/how-to-put-in-low-voltage-landscape-lighting-15326645/
- ↑ https://www.bhg.com/home-improvement/lighting/outdoor/install-outdoor-lighting/
- ↑ https://www.familyhandyman.com/electrical/outdoor-lighting/how-to-install-outdoor-lighting-and-outlet/view-all/
- ↑ Barry Zakar. Handyman. Expert Interview. 16 July 2020.
- ↑ Barry Zakar. Handyman. Expert Interview. 16 July 2020.
About This Article
To install outdoor lighting, first, dig a trench about 3 inches deep along the route your electrical wires will follow from the transformer to the lights. You don’t want to accidentally sever any cable or phone lines as you do this, so call your utility companies to have them identify any underground lines they may have put near your home. After digging your trench, strip the end of the cable and attach the 2 exposed wires to the terminal screws located at the bottom of the transformer box. Once those screws are tightened, drive a stake into the ground near an outdoor outlet and screw the transformer onto the stake. Next, connect your light fixtures to the main cable, attach them each to a stake, and push them into the ground. Finally, plug your transformer into the outlet to test your new lights! For more advice, like how to hide your wires, read on!
