This article was co-authored by wikiHow staff writer, Janice Tieperman. Janice is a professional and creative writer who has worked at wikiHow since 2019. With both a B.A. and M.A. in English from East Stroudsburg University, she has a passion for writing a wide variety of content for anyone and everyone. In her free time, you can find her working on a new crochet pattern, listening to true crime podcasts, or tackling a new creative writing project.
There are 18 references cited in this article, which can be found at the bottom of the page.
This article has been viewed 3,573 times.
Learn more...
Looking to upgrade the factory sights on your pistol? A new pair of sights can improve your handgun's aim, especially if you plan on using it at night. Thankfully, the installation process is pretty simple—all you need are the right tools and a little familiarity with the basic setup of your weapon. We’re here to walk you through everything you need to know, so you can safely install sights on your pistol at home.
Things You Should Know
- Invest in night sights if you plan on using your pistol at night, and fiber-optic sights if you plan on using it during the day.
- Take apart your pistol safely so the slide is completely separate from the rest of the gun.
- Remove and replace your rear sight with a tack hammer and brass punch.
- Change your front sight with a front sight tool. Coat the new screw with a tiny dot of Locktite so the new sight stays in place.
Steps
Pistol Disassembly
-
1Select a new set of pistol sights that best meet your needs. From fiber-optic sights to night sights, there’s no shortage of options to choose from. Here’s a quick breakdown of what a few different types do:
- Open sights: Also known as “iron sights,” these are sights that are typically pre-installed on a pistol. They could be a good option if you’re looking for something basic.
- Fiber-optic sights: These sights are made with fiber-optic material that soak up light, making them easy to see. They’re great if you plan on using your handgun during the day.
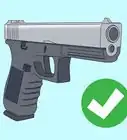
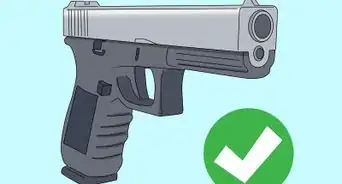
- Night sights: These sights are made with tritium or special photoluminescent paint that allows the sights to glow in the dark/at night. They’re an especially great choice if you carry a Glock.
-
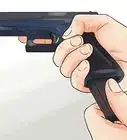
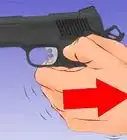
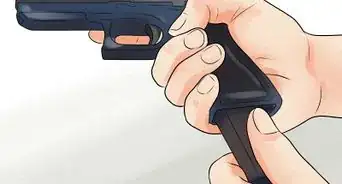
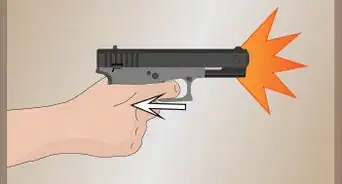
2Disassemble your pistol safely and separate the slide. Take out the magazine from your pistol and pull the slide back. Inspect the chamber and empty any bullets you find. Then, point the barrel in a safe direction and pull the trigger to confirm that it’s unloaded. Place your dominant hand around the pistol’s beavertail (the curved grip along the backside), grip your fingers on top of the slide, and pull the slide back a little bit. Then, use your opposite hand to lower both sides of the takedown lever and separate the slide completely.[1]
- The takedown lever is a set of rectangular levers that can be pushed down and back up. You can find them on either side of your handgun, towards the center of the weapon. Make sure that you’re pulling down both levers at once so the slide can come off easily.
- The exact disassembly procedure depends on the type of handgun you own. Search your gun’s model online and see if there’s a manual available.
Advertisement -
3Remove the recoil spring and barrel from the slide. Flip the slide over and look for a long, coiled piece of metal that takes up about half of the surface—this is the recoil spring. Press down on the end of the spring to loosen and pull it out of the slide. Then, pull the barrel out, which is a mostly cylindrical piece of metal that sits underneath the spring.[2]
- The barrel should slide out easily after you remove the spring.
-
4Set the slide on its side on top of a universal bench block. Place your bench block directly on your work surface. This circular metal tool provides a sturdy platform for your pistol slide and makes it easier to remove the rear sight from your weapon.[3]
- The stability of a bench block prevents you from accidentally damaging your handgun during the sight installation.
- You can also secure your slide in a padded table vise if you don’t have a universal bench block on hand.[4]


Rear Sight
-
1Remove the rear sight with a brass punch and a tack hammer. Grab a brass or aluminum punch and center it on top of the rear sight. Tap along the top of the punch with a tack hammer to gradually nudge the sight out of the dovetail.[5]
- Aluminum and brass are softer than steel and won’t damage your weapon as you remove and install your sights. You can also use a nylon punch for this.
- The dovetail is the rectangular slot along the back of your slide. The rear sight snugly fits into it.
- Some pistol experts prefer using a sight pusher to remove their rear sight. To use one, just insert your gun slide into the sight pusher, lining up the old sight right next to the sight pusher block. Then, turn the T-handle to carefully push the sight out of the dovetail.[6]
-
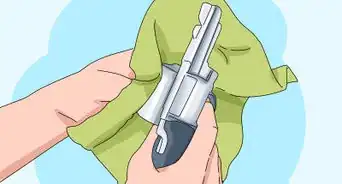
2Degrease the empty dovetail and new rear sight with rubbing alcohol. Dip a cotton swab in rubbing alcohol and swipe along the inside of the dovetail. Then, rub along the bottom and sides of your new rear sight. This removes any oils and grime from your equipment and ensures a snug, secure fit.[7]
-
3Face the new rear sight backward and partially slide it into the dovetail. Check that the 2 dots along the back of the sight are facing you (rather than facing the front of the gun). Then, line the sight up with the side of the dovetail and partially slide it into the slot. It’s okay if it doesn’t go all the way in—just a few millimeters is what you’re going for.[8]
-
4Tap the rear sight into the dovetail with the same punch and tack hammer. Line up your punch along the side of the rear sight that’s sticking out. Then, gently hit the top of the punch with your tack hammer until the rear sight goes all the way into the dovetail.[10]
- If you’re using a sight pusher, partially slip the new sight at least a third of the way into the dovetail. Then, secure the pistol slide in the device, right next to the sight pusher block. Turn the T-handle to nudge the new sight into the center of the dovetail.[11]
-
5Adjust the rear sight with your punch and hammer until it’s centered. It’s okay if it’s not exact—just try to eyeball it and make it as centered as you can. You can center your sights more accurately after you zero your weapon at a gun range.[12]
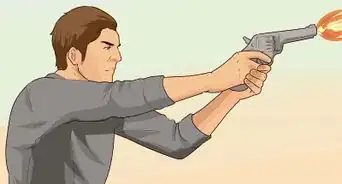
- “Zeroing” your gun involves test shooting it and making sure that the handgun fires accurately. Bring your punch and tack hammer with you to the range so you can make further adjustments there.[13]


Front Sight and Reassembly
-
1Unscrew the front sight with a front sight tool. Flip your slide over and examine the front end of the pistol. Look for a small, hexagon-shaped screw—this is what’s holding your front sight in place. Remove this screw by unscrewing it with a front sight tool.[14]
- A front sight tool is designed specifically for pistols. The tip is hexagon-shaped, which makes it super easy to remove the screw.
-
2Squeeze a tiny drop of Locktite onto the new screw threads. Grab the new screw that came with your front sight and place it pointy-side-up in your front sight tool. Then, add a really small dot of Locktite to the tip—this helps lock your screw in place and keep your sight steady while you’re shooting.[15]
- Locktite comes in both red and blue varieties. Choose the semi-permanent blue Locktite if you plan on changing your sights later on, or the permanent red variety if you’d like something more long-lasting.[16]
-
3Center the new front sight on top of the handgun and screw it into place. Place the front sight into the designated slot, making sure that the sight dot faces backward. While gripping the sight in place, flip the slide over and secure the screw into the new sight. Give the front sight tool a good twist to make sure that everything is tight and locked down.[17]
- Try to keep the front sight centered with your finger as you attach the screw.
-
4Reassemble your pistol with the new sights installed. Slip the barrel into the slide first, followed by the recoil spring. Then, line up the slide with the frame of the gun and slip it all the way back into place. You’ll hear a “click” as the takedown levers secure back into place.[18]
-
5Wait a full day for the Locktite to cure completely. Set your pistol in a safe area (away from children) so the Locktite can dry and cure properly. Once a day has passed feel free to zero your gun at the range and use it at your discretion.[19]
- Always practice safe firearm habits whenever you use your pistol.


Warnings
Things You’ll Need
- Sights
- Universal bench block
- Brass punch (or aluminum or nylon)
- Tack hammer
- Rubbing alcohol
- Cotton swab
- Front sight tool
- Locktite
- Padded table vise (optional)
- Sight pusher (optional)
- Gun oil (optional)


-Step-18-Version-3.webp)

-Step-6.webp)
References
- ↑ https://www.nrafamily.org/articles/2019/1/10/hints-from-our-armorer-replacing-glock-sights/
- ↑ https://www.youtube.com/watch?v=WIpTS-Qm5Jw&t=1m24s
- ↑ https://www.youtube.com/watch?v=pBDp0W2XSk8&t=2m24s
- ↑ https://www.shootingillustrated.com/content/how-to-change-handgun-sights-the-right-way/
- ↑ https://www.youtube.com/watch?v=pBDp0W2XSk8&t=2m42s
- ↑ https://www.youtube.com/watch?v=KlEDjZj-Cc8&t=0m8s
- ↑ https://www.youtube.com/watch?v=H_Mok73k5Cg&t=1m25s
- ↑ https://www.youtube.com/watch?v=01g-QRZIulg&t=6m29s
- ↑ https://speedsights.com/support/installation-tips/
- ↑ https://www.youtube.com/watch?v=pBDp0W2XSk8&t=4m52s
- ↑ https://www.youtube.com/watch?v=KlEDjZj-Cc8&t=0m35s
- ↑ https://www.youtube.com/watch?v=pBDp0W2XSk8&t=6m38s
- ↑ https://www.youtube.com/watch?v=pBDp0W2XSk8&t=7m40s
- ↑ https://www.youtube.com/watch?v=pBDp0W2XSk8&t=8m29s
- ↑ https://www.youtube.com/watch?v=pBDp0W2XSk8&t=10m6s
- ↑ https://www.loctiteproducts.com/en/know-how/build-things/threadlocker-red-or-blue-which-ones-right-for-you.html
- ↑ https://www.youtube.com/watch?v=pBDp0W2XSk8&t=9m34s
- ↑ https://www.nrafamily.org/articles/2019/1/10/hints-from-our-armorer-replacing-glock-sights/
- ↑ https://www.nrafamily.org/articles/2019/1/10/hints-from-our-armorer-replacing-glock-sights/
- ↑ https://www.nrafamily.org/articles/2019/1/10/hints-from-our-armorer-replacing-glock-sights/
- ↑ https://gununiversity.com/how-to-change-glock-sights/