X
This article was co-authored by wikiHow Staff. Our trained team of editors and researchers validate articles for accuracy and comprehensiveness. wikiHow's Content Management Team carefully monitors the work from our editorial staff to ensure that each article is backed by trusted research and meets our high quality standards.
This article has been viewed 306,914 times.
Learn more...
For some people any stereo in a car is sufficient. For others, only the best will suffice. If you are the latter, you may need to consider an aftermarket stereo that outperforms the stereo originally in your car. These can be professionally installed, or you can do the job yourself.
Steps
Part 1
Part 1 of 4:
Having a Plan
-
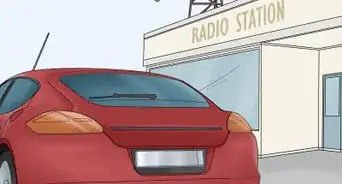
1Choose a new stereo. Browse online or in at a local retailer to find a stereo that fits your needs. Make sure to do research on the brand you choose and confirm the quality of your choice.
-
2Purchase additional accessories. For a successful installation you will need some additional pieces that may or may not come with your stereo.
- You should make sure to get a trim plate for the outer face of the stereo.
- A DIN cage or mounting bracket may be necessary to secure the stereo to your dash.
- You should also purchase a wiring harness adapter so that you can plug your new stereo into your car’s electrical system.[1]
Advertisement -
3Gather all the necessary tools. This list can change from vehicle to vehicle, but the basic tools include: screwdrivers, wire strippers, wire cutters, and electrical tape. You might also need a panel remover tool and factory stereo removal pins depending on your vehicle.
-
4Locate a manual on dash panel removal for your car. This can be very helpful in knowing exactly which pieces of dash to remove and how to remove them. If your owner's manual or service manual does not provide the details you need, you might try looking for a Haynes Service Manual for your car.[2]


Advertisement
Part 2
Part 2 of 4:
Removing the Original Stereo
-
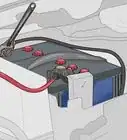
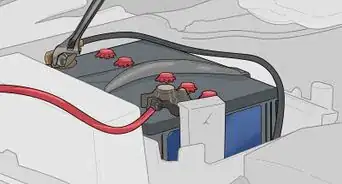
1Disconnect the ground cable from your battery. This is the negative, commonly seen as the black terminal of the battery. You never want to work on your cars electronics with this connected as it might result in damage to the electrical system or injury to yourself.
-
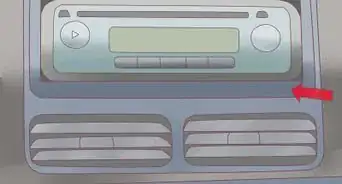
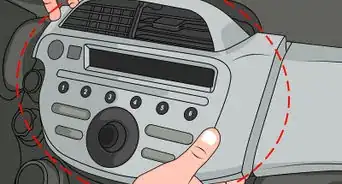
2Remove any necessary pieces of the dashboard. Using the manual from above, determine which pieces of your dash must be taken off to remove the factory stereo. These pieces may pull right off with a panel remover, or they may be held on with screws, bolts, or clips.
-
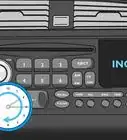
3Remove the factory stereo. Once any necessary pieces of dashboard have been removed you can take out your stereo. Sometimes the stereo is bolted or screwed onto the dash and sometimes you will need to use special tools that are inserted into the face of the factory stereo to release it from the dashboard. This procedure will vary from car to car.[3]
-
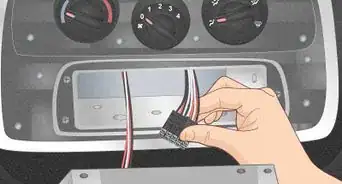
4Unplug the factory wiring harness from the back of the stereo. If you opted out of buying a wiring harness adapter, you may have to cut the wires instead of just pulling them out. Some vehicle manufacturers may void warranties if wiring is cut. Cut only as a last resort.

Advertisement
Part 3
Part 3 of 4:
Installing the Aftermarket Stereo
-
1Connect the new aftermarket wiring harness adapter. The aftermarket wiring harness adapter is specifically designed to fit your vehicle's wiring harness. This allows you to simply plug the new harness adapter into the factory radio harness and makes wiring your stereo fairly straightforward.
-
2Connect the new radio's plug to the wiring harness adapter. The new radio will have a plug that must be spliced to the wiring harness. The harness adapter and plug are made to go together easily. This adapter set up will allow you to plug the car's original wiring harness into your stereo. A few quick steps is all that it takes to connect the new stereo plug and wire harness adapter.
- Match the colors and sizes of wires on the plug to their identical counterparts on the wiring harness adapter.
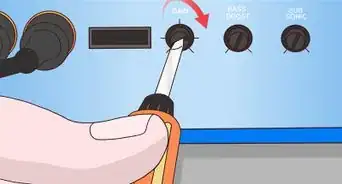
- Strip approximately two inches insulation off of all of the wires and twist matching wires together. This provides superior surface area connection to crimping and more flexibility than soldering.[4]
- Cover the splice with electrical tape or a twist on wire nut
- If you have any trouble matching the wires, follow the steps provided with the wiring harness adapter. The wires on the harness adapter and plug are usually color coded or tagged for easy identification and matching.
-
3Connect the aftermarket stereo. Now that the wiring harness adapter is plugged into the wiring harness and attached to the stereo plug, all you need to do is plug it into the back of your stereo. Now the wiring of your stereo is complete!
-
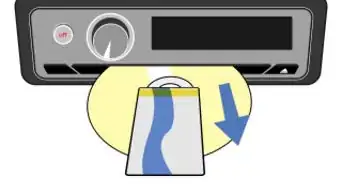
4Slide the new stereo into the dash. This step will differ with each car and may require first sliding in a DIN cage, or simply mounting the aftermarket stereo onto the original mounting brackets.
-
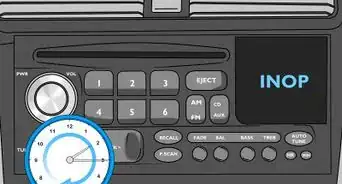
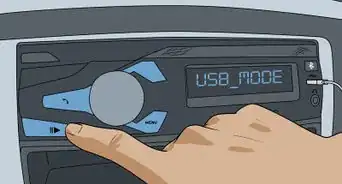
5Test the aftermarket stereo. Make sure no wires have become disconnected or pinched. Reconnect the negative battery terminal and power up your vehicle. Make sure that all features of the radio and all the speakers are working.
-
6Troubleshoot the stereo installation. If it doesn't work, you likely have a loose connection or have joined the wires incorrectly. Disconnect the negative battery terminal and troubleshoot.
- Make sure that the original wiring harness and aftermarket wiring harness adapter are securely attached.
- Make sure that all of the connections between the aftermarket wiring harness adapter and the aftermarket stereo plug are correct. Double check with the manual that came with the aftermarket stereo or adapter.
- Ensure that the aftermarket stereo plug is properly and tightly plugged into the back of the aftermarket stereo.


Advertisement
Part 4
Part 4 of 4:
Wrapping Up
-
1Re-assemble the dash. Once the new stereo works, secure it into the dash and put everything back together. This is the same way that dash was disassembled, but in reverse.
-
2Reconnect the negative battery terminal. If you unplugged the terminal again after testing the battery, you can reconnect it now.
-
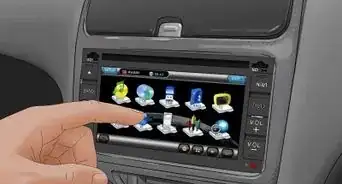
3Enjoy your new stereo! Your installation is complete and you can show off your new aftermarket stereo.

Advertisement
Community Q&A
-
QuestionHow do I know which color wires to match up?
 Community AnswerLook for a wiring diagram for your car as well as the wiring diagram for the head unit. This will guide you in relation to the exact model you're using.
 -
QuestionDo I need to connect the RCA cable and wiring harness that came with my new aftermarket stereo? If so, where do I connect it?
 Community AnswerThe RCA cables are for if you have an amp. If you are not hooking up subwoofers you don't need the RCA. If you are, the RCA runs to your amp.
 -
QuestionWhat if the new stereo is smaller than the stock stereo?
 Community AnswerYou may be able to get an adapter plate for your make and model from a car radio specialist, and possibly a wiring adapter identity, if need be.
Advertisement
Warnings
- Always make sure the negative battery terminal is disconnected when you are working with the wires. This will save time locating and replacing blown fuses and lowers the risk of damaging expensive automotive electronics (radio, on-board computer, dashboard, etc.).⧼thumbs_response⧽
Advertisement


References
About This Article

wikiHow Staff
wikiHow Staff Writer
This article was co-authored by wikiHow Staff. Our trained team of editors and researchers validate articles for accuracy and comprehensiveness. wikiHow's Content Management Team carefully monitors the work from our editorial staff to ensure that each article is backed by trusted research and meets our high quality standards. This article has been viewed 306,914 times.
How helpful is this?
Co-authors: 20
Updated: March 29, 2019
Views: 306,914
Categories: Car Radios and Sound Systems
Advertisement