X
This article was co-authored by wikiHow Staff. Our trained team of editors and researchers validate articles for accuracy and comprehensiveness. wikiHow's Content Management Team carefully monitors the work from our editorial staff to ensure that each article is backed by trusted research and meets our high quality standards.
This article has been viewed 309,600 times.
Learn more...
Do your car speakers make music sound muted and dull? If you install a car radio head unit you should hear an improvement. You'll need to make sure you get the right parts, remove your old unit, and connect the new unit to your car. Soon, your speakers will start sounding great again.
Steps
Part 1
Part 1 of 3:
Removing the Old Head Unit
-
1Purchase all the necessary parts. Depending on whether you are upgrading to an aftermarket head unit or simply replacing the old one with another OEM (original equipment manufacturer) unit, you may have to have some additional hardware. This could include things such as a dash kit, wiring harness, or antenna adapter. [1]
-
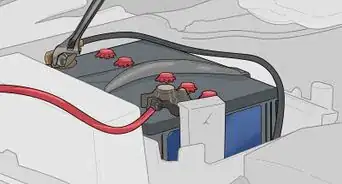
2Unplug your battery terminals. You do not want the system to have live power while you are making your connections. Turn the vehicle off and remove the cables from your battery.Advertisement
-
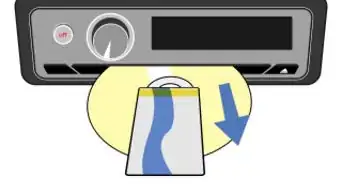
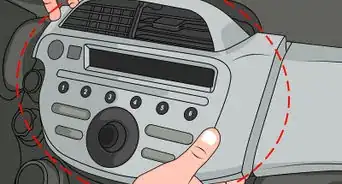
3Take your car radio head unit out of the dash. A vehicle repair manual is highly recommended. Also, the vehicle specific kit will contain detailed information on radio removal.
- Removal of dashboard components may be required, and if you don't know how to remove the parts properly, permanent damage may occur.
- In some cases, you may find two pairs of holes or slots on the left and right of the face of the radio. These are called "key holes" and will require a special tool that can be purchased at most car audio stores or online to release the head unit.
-
4Disconnect the car radio head unit wiring. With most harnesses, you will have to squeeze a clip or two for the harness to release from the radio. Make sure that you examine the harness before pulling on it. Be sure the harness you purchased fits the vehicle harness. If it doesn't, take the radio to a car audio shop and have them locate the correct harness adapter.
-
5Disconnect the antenna (usually a thick black wire but can also be a thick single wire). Using a pair of pliers at the base of the wire may help. Make sure you are pulling on the connector and not the wire as this will cause signal loss.


Advertisement
Part 2
Part 2 of 3:
Installing the New Head Unit
-
1Assemble the dash kit according to the appropriate instructions. Use either the cage mount method (which involves using the metal sleeve that goes around your radio) or the ISO mount method which involves using the screws that were included with the radio. When ISO Mounting a radio you use the factory brackets or brackets supplied with the new ISO Mount dash kit to Mount the radio.
- Do not cut an ISO Mount kit and install the metal radio sleeve!
- If you cannot find the screws you can usually purchase them at your local car audio shop. Make sure they do not exceed the maximum limits the manufacturer specifies or you will damage the radio.
-
2Wire up the new radio's harness. Attach it to the harness you purchased making sure to match the colors exactly including the color of the stripe (i.e. white to white, black to black, orange with white stripe to orange with white stripe).
- Strip approximately two inches insulation off of all of the wires and twist matching wires together. This provides superior surface area connection to crimping and more flexibility than soldering.
- Cover the splice with electrical tape or a twist on wire nut
- If you have any trouble matching the wires, follow the steps provided with the wiring harness adapter. The wires on the harness adapter and plug are usually color coded or tagged for easy identification and matching.
- Some solder has lead in it, so avoid breathing in the fumes when you solder.
-
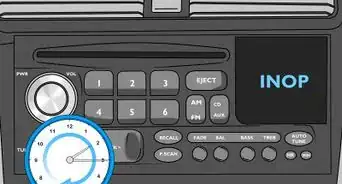
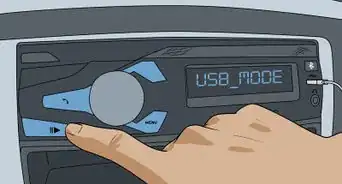
3Connect the factory wiring. Connect the wiring harness you prepared and the antenna. Make sure after you connect the wiring that the radio works properly. This way you can find any wiring or radio problems before you reassemble everything.
- Connect to the radio's wiring harness or harness adapter directly to the vehicle's wiring harness. It is designed to simply plug in.
- Connect the antenna wire to the back of the radio. This rarely, but occasionally, requires an adapter.
- If you don't have an adaptor. You will need to connect and [identify the wires][1] from the car's harness clip and stereo one at a time. To do so, use the repair manual for your car or find a wiring diagram online. The power wire from the stereo is typically red, whereas its corresponding wire from the car is usually black. The constant power wire for the stereo is usually yellow or blue, and the remaining wires will connect to the speakers. To secure all connected wires, you can solder them together, twist them and cover with heat-shrink wrap or electric tape, or get connectors that slide both wires in and crimp or twist them together.
-
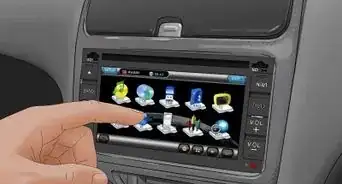
4Put the new car radio head unit into the dash. This step will vary depending on what kind of head unit you have chosen, but instructions will be provided with your unit. If the unit does not fit into the same space, it should have come with a modification kit to make it fit properly. If your kit did not come with this, you should purchase one from your nearest car stereo retailer.
-
5Reassemble the dashboard. Now that your head unit is back in, you can put your interior back together. Be sure to replace all clips and screws in the proper place and order. Do not force anything that doesn't fit. Consult your service manual if there are any portions of the dash that you are unsure how to install.
-
6Reconnect battery terminals. It is time to enjoy your new audio system!


Advertisement
Part 3
Part 3 of 3:
Connecting your New Head Unit to an Amp
-
1Plug in the remote turn-on wire. If you have an amp in your system you want to make sure that you wire it in as well. The remote turn-on wire is very important. It tells your amp when the car is on or off and prevents the amp from draining your battery. This wire will either plug directly into the back of your head unit, or need to be connected to the power supply to the head unit or another power supply.[2]
-
2Plug in the RCA cables. RCA cables are the insulated cables that transmit the sound signal from your head unit to the amp. They should plug into the RCA ports on your head unit. If they are not already run, be sure to run these cables on the opposite side of the car as the amp’s power wire to avoid signal disruption.[3]
-
3Set the gain on your amp. It is important to make sure that your amp and head unit are working well together. You need to reset the gain on your amp to compliment your new head unit.


Advertisement
Community Q&A
-
QuestionWhere is constant 12v terminal?
 Community AnswerTest for this with a voltmeter, obviously this is on all the time --- black to an earth (chassis maybe) and red to probe each of the pins once you find the constant 12v then you can look for the other switch 12v (ignition) when you turn the key to the on position and test by turning the ignition key off.
 -
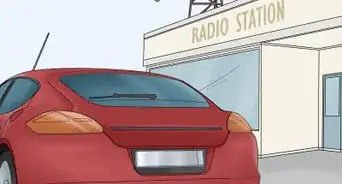
QuestionWhere can I buy an adapter for my car radio antenna?
 Community AnswerTry online shopping sites, specifically those selling automobile-related products. Depending on the model of your car, i.e. how recent it is, you can also find one at Wal-Mart, O'Reilly's, or AutoZone.
Advertisement
Warnings
- Any wiring not taped properly or left uninsulated could short, causing failure of your unit or possibly fire.⧼thumbs_response⧽
- The “Connecting Your New Head Unit to an Amp” section is intended for amps that are already installed in your vehicle. If you are plan to install a new amp the process is a bit more involved. You can see How to Install an Amplifier.⧼thumbs_response⧽
Advertisement
Things You'll Need
- Socket set
- Soldering iron
- Solder
- Electrical tape
- Screwdrivers
- Dashboard installation kit
- Antenna adapter(not always needed)
- Wiring harness adapter (specific to every car)
- Door chimes module (not always needed)
- Din tool (not always needed)
- New Radio


References
About This Article

wikiHow Staff
wikiHow Staff Writer
This article was co-authored by wikiHow Staff. Our trained team of editors and researchers validate articles for accuracy and comprehensiveness. wikiHow's Content Management Team carefully monitors the work from our editorial staff to ensure that each article is backed by trusted research and meets our high quality standards. This article has been viewed 309,600 times.
How helpful is this?
Co-authors: 22
Updated: January 27, 2023
Views: 309,600
Categories: Car Radios and Sound Systems
Advertisement