This article was co-authored by wikiHow staff writer, Travis Boylls. Travis Boylls is a Technology Writer and Editor for wikiHow. Travis has experience writing technology-related articles, providing software customer service, and in graphic design. He specializes in Windows, macOS, Android, iOS, and Linux platforms. He studied graphic design at Pikes Peak Community College.
There are 15 references cited in this article, which can be found at the bottom of the page.
This article has been viewed 1,151,952 times.
Learn more...
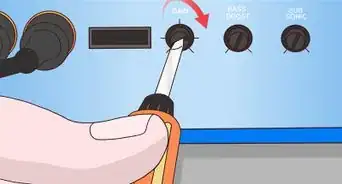
Do you want to install a subwoofer in your car? If the music coming out of your sound system seems weak and unimpressive, you may need subwoofers. Subwoofers are speakers that play low-frequency sounds called bass and sub-bass. Wiring one into an existing system isn’t as tricky as it first seems. Once all the wires are in place, turn on your sound system to enjoy the boost subwoofers provide to music. This wikiHow article teaches you how to install an after-market subwoofer in your automobile.
Things You Should Know
- Disconnect the battery before installing any electrical equipment in your car, for safety.
- Subwoofers require a lot of power, so they have to be wired to both a power source, like a car’s battery, and an amplifier.
- You'll need to connect a ground wire to a metal bolt on the car to prevent dangerous electrical discharges.
Steps
Purchasing Wiring and Disconnecting the Battery
-
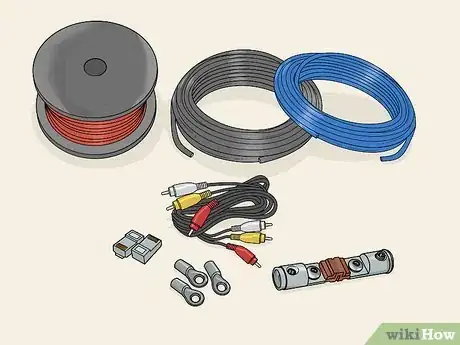
1Get a wiring kit with all the supplies needed for the installation. Your subwoofer doesn't come with wiring, so you have to buy it on your own. The easiest way to do this is to shop for wiring kits. The kit should include several different types of wires over 16 ft (4.9 m) long and some connectors to use during the wiring process. For the installation, you need the following items:[1]
- A 20 ft (6.1 m) power wire.
- A ground wire at least 3 ft (0.91 m) long.
- A 15 ft (4.6 m) RCA wire with both red and white connectors.
- A 15 ft (4.6 m) blue remote wire.
- Speaker wire, which can also be bought separately.
- A 60-amp in-line fuse and fuse holder.
- Crimp ring terminals for connecting the wires.
- A plastic crimp connector for the remote wire.
-
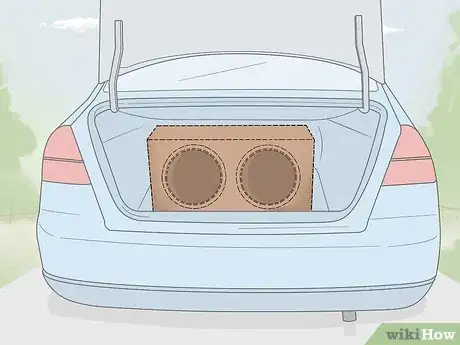
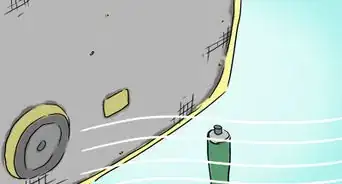
2Pick a stable, well-ventilated spot for the subwoofers. Your sound system will produce a lot of heat, so additional space around the subwoofer helps it perform better and last longer. Many people choose to put subwoofers in the trunk since it is an open and accessible area. It provides plenty of room for the subwoofer while also leaving space for the amp right next to it. You may also be able to fit the subwoofers underneath the driver’s seat or in another location.[2]
- Note that, for the best sound quality, the amplifier should be as close to the subwoofers as possible. Some subwoofer systems include a built-in amp, making this less of a problem.
Advertisement -
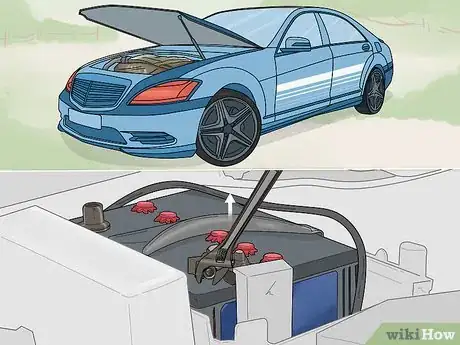
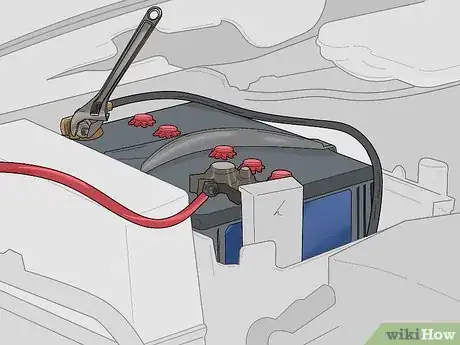
3Disconnect the car’s battery before starting. In order to safely install your subwoofer, you will need to disconnect the battery. Shut off your car using the key in the ignition, then pop open the hood. Locate the battery, which will look like a square box with a red and black cable connected to a pair of metal prongs on top of it. These cables are held in place by a pair of metal nuts. Turn them counterclockwise using a regular wrench or a similarly-sized socket wrench. Disconnect the wires from the battery terminals.[3]
- Disconnecting the battery deactivates all electrical systems, making the wires safe to touch. You can leave the battery in the vehicle, but make sure the red cable doesn’t come into contact with bare metal.
- Inspect the battery before touching it. If you notice corrosion, put on rubber gloves and safety goggles.
Routing the Power Wire to the Engine
-
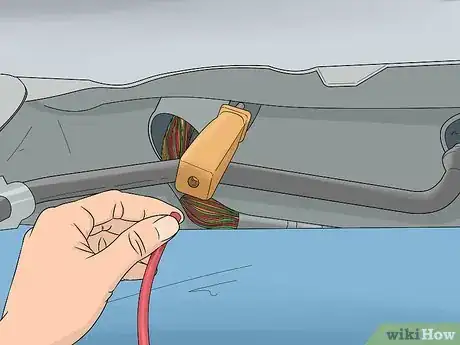
1Find an opening in the firewall to feed the power wire through. The firewall is the metal frame separating the engine compartment from the rest of the car. Even though it looks enclosed, it will have an opening for you to use when wiring the subwoofers. This opening is tiny, so it can be hard to see. Shine a light down from above the engine bay to try and spot the opening.[4]
- Many cars have an opening near the glovebox on the passenger side. You can also get into the car and look for the opening there.
- If you don’t see an opening, you may be able to make a hole with a sharp knife or drill fitted with a steel bit. Be careful to avoid cutting any wires.
-
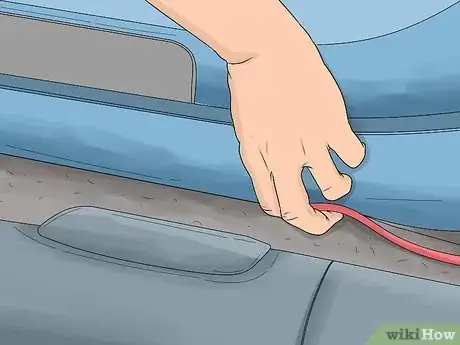
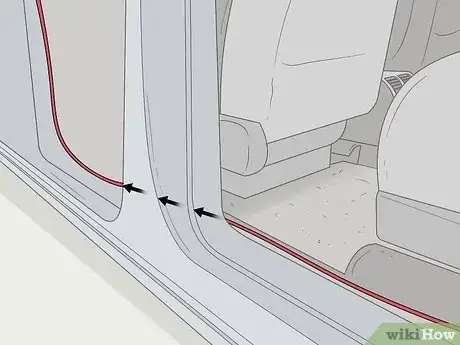
2Run the power cable from the battery to the subwoofer. The power cable is often the longest wire in a wire kit and is colored red, but make sure to check the labeling. Lower the wire down into the engine compartment and through the firewall hole until it emerges inside your car. Then, go inside your car to pull it all the way to the subwoofers. Route it along one side so it won’t be exposed and at risk of damage. Leave the wire unconnected for now.[5]
- Routing the wire through the firewall hole can be a little tricky. To make this easier, straighten out a hanger, then curl one end into a hook. Use the hook to guide the wire.
- Most cars have a little bit of extra space along the sides for wire storage. Expose these channels by lifting up the carpeting or trim panels.
- The trim panels are often held in place by plastic pins. Use a flathead screwdriver to pry the pins off. Note where each panel belongs before removal so you have no trouble reinstalling them later.
-
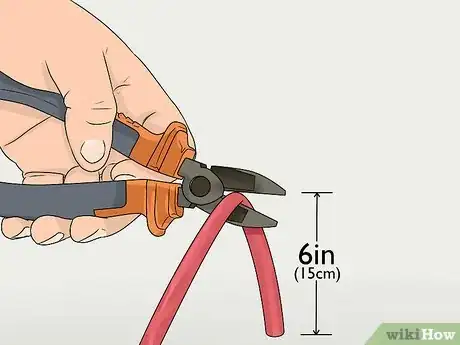
3Cut about 6 in (15 cm) off the front end of the power wire. This is the end that is closest to the battery. Use something sharp, such as lineman's pliers, that can sever the wire in one stroke. Measure out from the end of the wire in the engine compartment. Cut through it and set this section aside to reuse later.
- The in-line fuse you will use to power the subwoofer should be no more than 6 in (15 cm) from the battery. Cut the wire so it extends from the battery to where you plan to place the fuse.[6]
- Some wiring kits come with the fuse assembly already put together. If this is the case, then you do not need to connect any wires to the fuse assembly. Just run the wire so that the end with the fuse is closest to your battery.
-
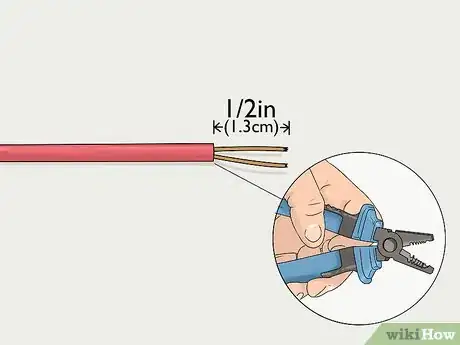
4Strip 1⁄2 in (1.3 cm) of insulation from the remaining wire. Position wire strippers on the end of the long power cable in the engine compartment. Squeeze the blade down until it breaks through the insulation but not the wire underneath it. Then, pull the cut casing off to expose the wire.
- Wire strippers are the best tool to use if you want to remove the insulation without risking the underlying wires. You can also use something like a sharp knife or sharp scissors, but be very careful to not damage the exposed wire underneath.
-
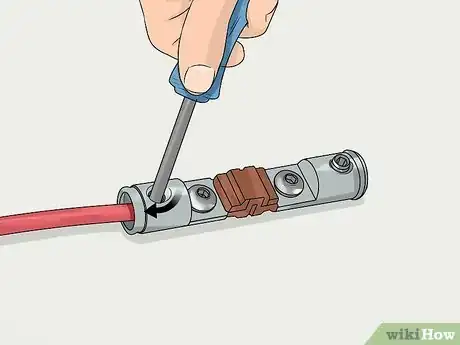
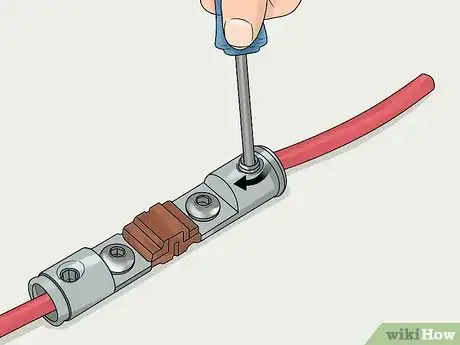
5Crimp the exposed wire and plug it into the in-line fuse. To crimp the wire, hold it in the jaws of a wire crimping tool and squeeze it. The crimping tool combines the wire strands into a single, neat ball that fits into one of the openings on the fuse. Open a terminal by using an Allen key on the hole above it. Turn the key counterclockwise to open the terminal, then insert the power wire and close the terminal again.[7]
- The power wire should be secure in the fuse holder. If it feels easy to move, tighten the terminal with the Allen key a little more. Be careful not to overtighten it.
-
6Connect the cut length of wire to the fuse holder after crimping it. Pick up the cut length of wire you set aside earlier. Measure about 1⁄2 in (1.3 cm) from the end, strip off the insulation, and then use the crimping tool on it. Plug the crimped end into the open part of the fuse holder, using an Allen key to open and close it as needed. This wire will be opposite from the rest of the power wire so you can attach it to the battery.[8]
- Position the fuse holder in a safe spot where it won’t be jostled around while you’re driving. Try anchoring it to the car frame with a screw or cable tie.
-
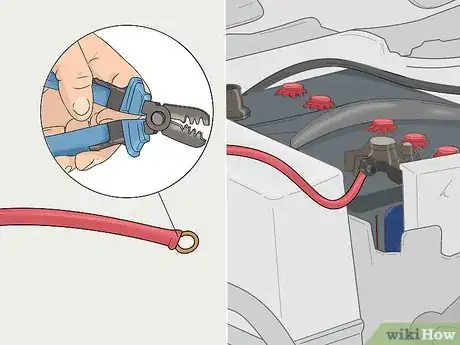
7Hook the power cord to the positive battery terminal using a ring terminal. Strip 1⁄2 in (1.3 cm) off the free end of the shorter length of power wire. Then, push the exposed end through the opening on the ring terminal. The opposite end of the terminal is a metal ring that fits over the positive terminal on your car's battery. Secure it in place by putting the positive battery cable and nut back in place.[9]
- The ring terminal needs to fit on the positive terminal of the battery, which is usually labeled and is recognizable by the red cable connected to it.
Connecting the Subwoofers to the Stereo
-
1Run the remote and RCA wires from the trunk to the stereo head. If you can, run these wires on the opposite side of the car from the power wire. Make use of any available space underneath the carpet or side panels. The remote wire is usually colored blue, while the RCA wire has red and white plugs.[10]
- The remote and RCA wires should always be far from the power wire, if possible. Otherwise, they may interfere with one another and have a negative effect on the sound quality.
-
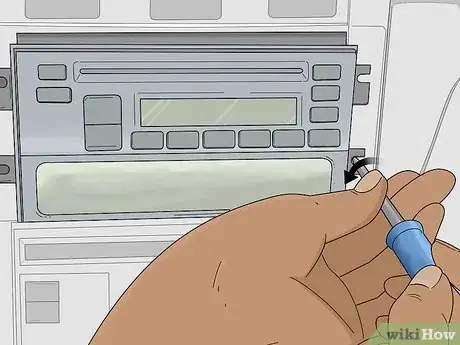
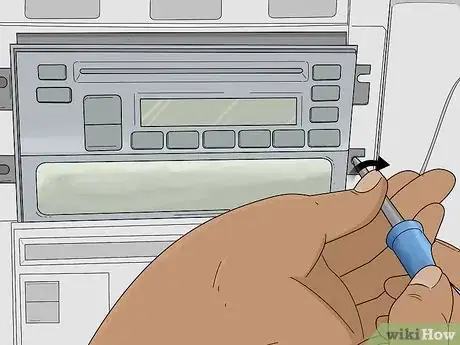
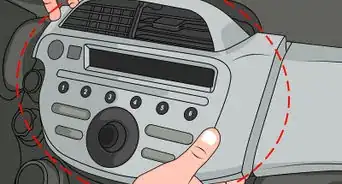
2Pull out the stereo head to access the wires behind it. In a lot of cars, the stereo stays attached to its enclosure through a series of plastic clips. You may need to pry off a few of the dashboard panels to be able to access them. Then, pry the clips up with a flathead screwdriver until you are able to slide the stereo toward you, exposing the wires connected to it.[11]
- Some stereos have screws that require a Phillips screwdriver to remove.
- The stereo removal process varies between models, so refer to the owner’s manual for your car to get more specific details about how to access the stereo’s wiring.
-
3Plug the RCA cable into the colored connectors on the stereo. Pull the RCA cable through the stereo enclosure. Next, look for a series of red and white outlets on its back end. Push the corresponding RCA cables into the colored outlets.[12]
- Note that the stereo may have several red and white outlets. Look for the ones labeled R/SW. They manage audio in the rear (R) part of your vehicle.
-
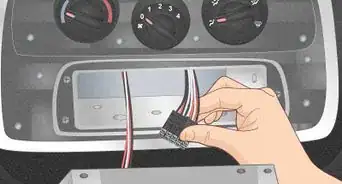
4Connect the blue remote wire to the blue stereo wire. Your stereo will have a bunch of colored wires inserted into a black connector. The blue wire may be plugged into this connector or left loose. The easiest way to join this wire with the one you’re using for the subwoofers is with a plastic connector, like a crimp connector or Posi-connector. Strip 1⁄2 in (1.3 cm) off the remote wire and stereo wire, crimp them, then plug them into the connector so the exposed ends contact one another.[13]
- The blue wire on the stereo may be labeled remote, antenna, or amplifier.
- Another option for joining the wires is to solder them together. It involves stripping and heating them with a soldering iron. Place a shrink wrap tube afterward to protect the joint.
-
5Replace the stereo in the enclosure. You’re all done wiring the subwoofers to the stereo, so push it back in place. Make sure all the wires stay attached and get tucked in behind the stereo. When you’re done with that, replace any side panels you removed to route the subwoofer’s connecting wires behind the stereo.[14]
Securing the Ground Wire to Exposed Metal
-
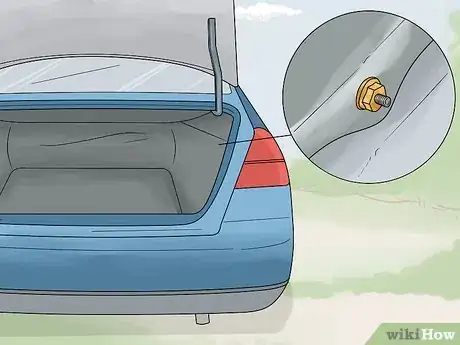
1Locate an exposed metal screw or bolt on the car’s frame. Try looking near the rear tires for a bolt near the sides. You may need to pull back the carpeting to get a view of it sticking up from the wheel well. The ground wire routes excess electricity away from your sound system. Take advantage of any accessible metal components to keep your system safe.[15]
- If your vehicle doesn’t have a contact point, you can install one. Use a masonry bit to drill through the metal, then insert a screw or bolt. Make sure you don’t drill through anything other than the metal!
-
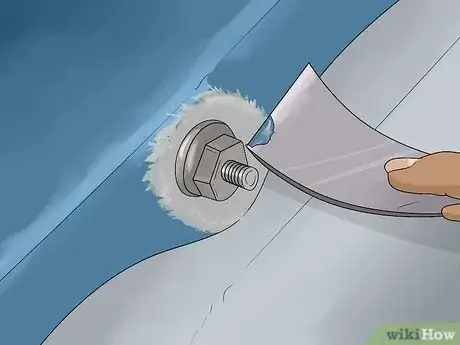
2Scrape away any paint around the bolt. Sometimes, the bolt is located on a small platform that has been painted over. The paint prevents the ground wire from making a good connection to the wire. Use a paint scraper to gradually remove all of the paint surrounding the bolt.[16]
- You don’t have to eliminate all of the paint, only the material around the bolt. When you install the ground wire, you will be able to see where it rests on the panel. Remove any paint underneath the ring connector.
-
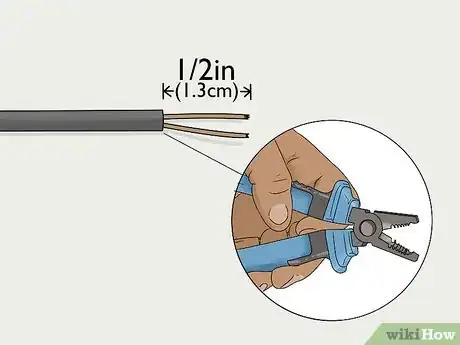
3Strip 1⁄2 in (1.3 cm) off the ground wire before installing it. The ground wire is usually black and much shorter than the other connecting wires. Use wire strippers again to take the insulation off one end, then crimp the exposed threads together. Leave the uncut end of the wire inside the trunk for now.[17]
- Make sure the wire strands are firmly wrapped together so they fit well inside a connector. If the wire doesn't do its job, it could blow out your system or shock you.
-
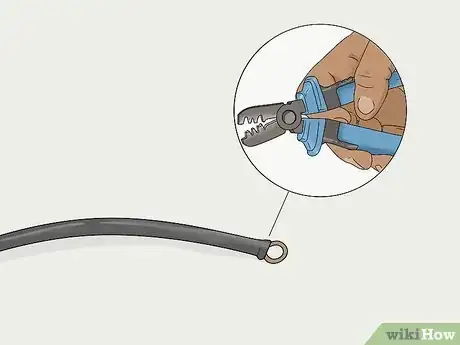
4Slip the wire into a ring terminal and attach it to the bolt. Plug the wire into the opening on the terminal. Push it all the way into the terminal until you see the wire come into contact with the ring. Then, place the ring onto the bolt to install it.[18]
- Your wire kit most likely came with a couple of ring terminals, but you can always buy more from a hardware store.
- Consider placing a lock or star washer on top of the ring terminal to keep it pinned. One of the most common problems with subwoofers and amps is when the terminal doesn’t have full contact with the bolt or screw.
Wiring the Amplifier and Subwoofers
-
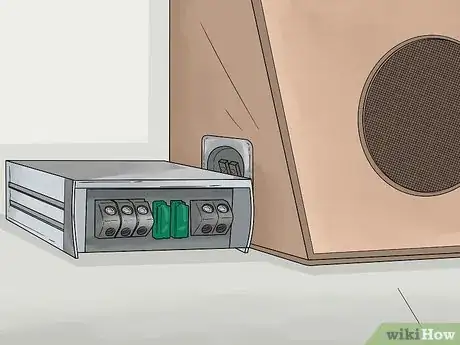
1Install and wire an amp if it isn’t set up yet. The amp should be installed next to or on top of the subwoofer enclosure. Some subwoofers have a built-in amp. If the amp is separate, it may have its own colored wires to connect to the ones on the stereo. Use more crimp connectors or solder the wires together as needed. Otherwise, use the existing cables to connect it to your sound system.[19]
- The amp wires connect directly to external subwoofers. Plan on connecting each subwoofer with separate speaker wires.
-
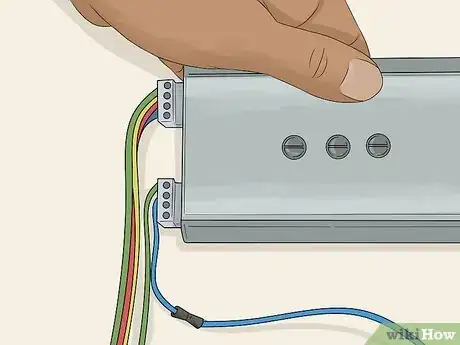
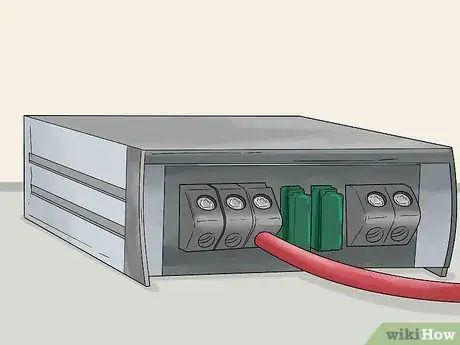
2Connect the red power cable to the amplifier. Look for a slot labeled “power” or something similar. Strip 1⁄2 in (1.3 cm) of insulation off the end of the wire, then crimp it by squeezing the exposed threads together. Finally, push it into the slot on the back of the amp.[20]
- The power slot may also be labeled as "Battery" or "12v."
- The slot is often controlled by a small screw. Turn it counterclockwise with a Phillips screw to open it. Close it back up after inserting the wire.
- If you’re using a combination amp and subwoofer, look for wiring slots on the back of the subwoofer.
-
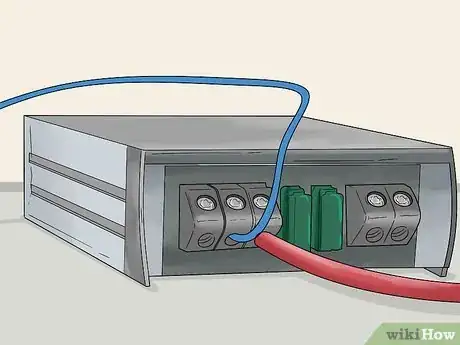
3Plug the blue remote wire into the amp’s remote slot. It is often labeled as "REM" for "remote." Go through the same steps you went through when inserting the power wire. Loosen any screw present, strip the wire, and put it into the amp. Make sure it is secure before moving on.[21]
- The remote slot may be in the middle of the other slots. When possible, arc the wires in a gentle curve to protect them from damage. Don’t try twisting them at a harsh angle to reach the slots.
-
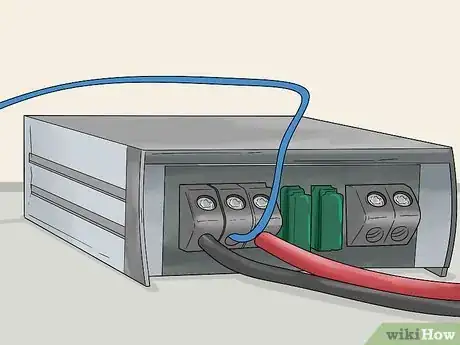
4Attach the black ground wire to the amp’s negative slot. The last slot is to direct excess electricity away from the amp and subwoofer. Strip the end of the ground wire and plug it in after loosening the screw. Check all the connections again to make sure the wires have been put in the right spots and are well-secured with the screws.[22]
- The ports on an amplifier are typically color-coded. If they are, use the colors to double-check that all the wires are in the correct slots.
-
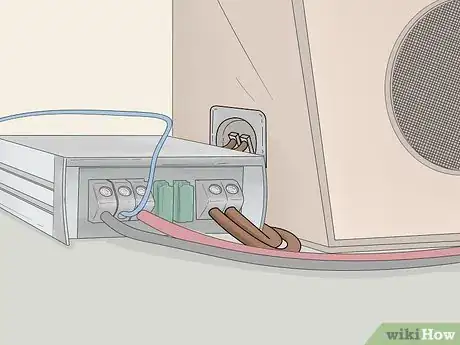
5Connect the subwoofer to the amp with speaker wires if they are separate. Unspool enough speaker wire to extend from the amp to the subwoofer’s inputs. Then, strip 1⁄2 in (1.3 cm) off both ends. Look for positive (+) and negative (-) terminals on both devices. Plug the wire into the positive ports, then repeat the process with another length of wire for the negative ones.[23]
- Speaker wire is often recognizable by the bronze-colored insulation that makes it look similar to a bare wire. It can be plugged into either the positive or negative ports as long as you match them on both devices.
- Some types of speaker wire consist of separate, color-coded wires. Plug the black wire into the negative ports and the red wire into the positive ones.
-
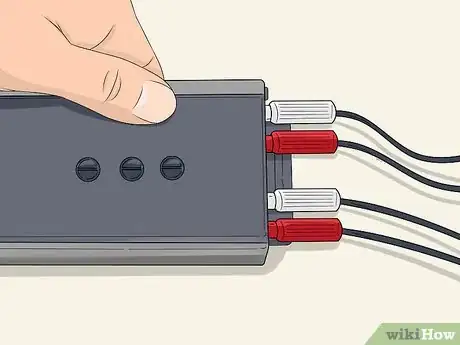
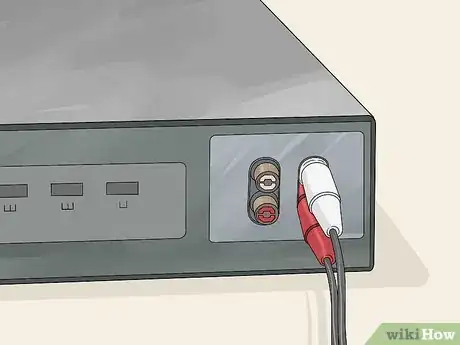
6Attach the RCA cable to the colored ports on the back of the amp. Note the colored ports, usually red and white, on the back of the amp. They are similar to the ones on your stereo. You don’t need to strip the cable at all. Simply plug the leads into the corresponding ports to finish wiring the subwoofers.[24]
- Make sure the RCA plugs are in the correct ports. If your system doesn’t produce the sound quality you expect, you may have switched the RCA cables by accident.
-
7Reattach the negative battery terminal cable to test the subwoofers. Hook the negative cable to the battery and cover it with the nut you removed. Turn it clockwise with a wrench or socket wrench to tighten it. Give your wiring one last check to make sure everything is where you want it. Then, start your car and turn up the stereo![25]
- If you notice problems, it is likely from a faulty connection. Make sure the wires are secure and well-connected, including the ground wire.
Community Q&A
-
QuestionWhere do I connect a red power wire to the battery?
 Community AnswerConnect it to the positive battery post. That is the one with the plus sign. Red is positive; black is negative.
 -
QuestionWill connecting the wire with the battery directly void the warranty of the battery?
 Community AnswerNo, it shouldn't.
 -
QuestionWhat does the remote wire consist of?
 Community AnswerThe remote wire needs a 12v signal to turn on the amp. Connect it to a source of power that is on only when you turn your key.
Warnings
- Working with active electrical components is dangerous. Always make sure the car is off with the battery disconnected before installing a subwoofer.⧼thumbs_response⧽
- If you’re not careful, you can cause damage to your car and its internal wiring. Consult a mechanic or auto electrician for assistance.⧼thumbs_response⧽
- Avoid running any wires under the car or through the door panels. This can expose the wires to debris on the road or damage from opening and closing the doors.⧼thumbs_response⧽
Things You'll Need
- Wire strippers
- A 20 ft (6.1 m) power wire
- A ground wire at least 3 ft (0.91 m) long
- A 15 ft (4.6 m) RCA wire with both red and white connectors
- A 15 ft (4.6 m) blue remote wire
- Speaker wire, which can also be bought separately
- A 50-amp in-line fuse and fuse holder
- Crimp ring terminals for connecting the wires
- Plastic crimp connectors
- Wire crimpers
- Flashlight
- Screwdrivers
- Metal file or paint scraper
- Cable ties (optional)
References
- ↑ https://www.popularmechanics.com/cars/how-to/a10359/installing-a-diy-car-amplifier-16639127/
- ↑ https://www.popularmechanics.com/cars/how-to/a10359/installing-a-diy-car-amplifier-16639127/
- ↑ https://www.popularmechanics.com/cars/how-to/a10359/installing-a-diy-car-amplifier-16639127/
- ↑ https://www.youtube.com/watch?v=eidK7FNI0GA&feature=youtu.be&t=255
- ↑ https://www.youtube.com/watch?v=2xrcSyvNWJk&feature=youtu.be&t=195
- ↑ https://www.youtube.com/watch?v=HrgfgbBR1qc&feature=youtu.be&t=325
- ↑ https://www.popularmechanics.com/cars/how-to/a10359/installing-a-diy-car-amplifier-16639127/
- ↑ https://www.youtube.com/watch?v=4SSEYK1ZZe4&feature=youtu.be&t=119
- ↑ https://www.youtube.com/watch?v=21QM2hbFtgc&feature=youtu.be&t=154
- ↑ https://www.popularmechanics.com/cars/how-to/a10359/installing-a-diy-car-amplifier-16639127/
- ↑ https://www.youtube.com/watch?v=ut2UhdYI7Ps&feature=youtu.be&t=364
- ↑ https://www.popularmechanics.com/cars/how-to/a10359/installing-a-diy-car-amplifier-16639127/
- ↑ https://www.youtube.com/watch?v=4SSEYK1ZZe4&feature=youtu.be&t=189
- ↑ https://www.popularmechanics.com/cars/how-to/a10359/installing-a-diy-car-amplifier-16639127/
- ↑ https://www.youtube.com/watch?v=21QM2hbFtgc&feature=youtu.be&t=233
- ↑ https://www.popularmechanics.com/cars/how-to/a10359/installing-a-diy-car-amplifier-16639127/
- ↑ https://www.youtube.com/watch?v=4SSEYK1ZZe4&feature=youtu.be&t=140
- ↑ https://www.youtube.com/watch?v=21QM2hbFtgc&feature=youtu.be&t=235
- ↑ https://www.popularmechanics.com/cars/how-to/a10359/installing-a-diy-car-amplifier-16639127/
- ↑ https://www.popularmechanics.com/cars/how-to/a10359/installing-a-diy-car-amplifier-16639127/
- ↑ https://www.youtube.com/watch?v=eidK7FNI0GA&feature=youtu.be&t=758
- ↑ https://www.youtube.com/watch?v=HrgfgbBR1qc&feature=youtu.be&t=752
- ↑ https://www.10tenmag.com/how-to-install-car-subwoofer/
- ↑ https://www.youtube.com/watch?v=eidK7FNI0GA&feature=youtu.be&t=711
- ↑ https://www.popularmechanics.com/cars/how-to/a10359/installing-a-diy-car-amplifier-16639127/
