This article was co-authored by Gino Colucci. Gino Colucci is a Home Improvement Specialist and the Owner of Crackerjacks Handyman Services (not a licensed contractor) in Chandler, Arizona. Crackerjacks Handyman Services offers an effective cost-saving solution for commercial and residential repair and maintenance needs, specializing in smaller projects. Crackerjacks Handyman Services carries liability insurance and all technicians go through a background check.
This article has been viewed 218,040 times.
Swag hooks are often used to support plants and light fixtures that hang by a chain. Installing a swag hook can be tricky, but here's what you need to know how to do it right and ensure that it stays put. It's important to remember that the swag hook itself will probably support more weight than you'd ever consider putting on it, but the hardware the hook is secured with and materials it is secured to will give out much sooner.
Steps
-
1Consider the weight of the object hung by the hook. If the swag hook should fall, will someone get hurt or will an expensive piece of furniture, etc. be damaged? If hanging a plant, consider how much heavier it will become after watering, and if over watered, will the overflow damage electrical / electronic devices below?[1]
-
2Determine installation hardware to be used, based on support material. A typical hook will have a threaded hole, and will be packaged with inserts that thread into this hole. One insert will be threaded with fine threads on one end, and wider threads and a point at the other end. This insert is designed to be used when screwed directly into wood or plastic anchor (some times called a "molly") that has been pressed into a drilled hole in brick, concrete, etc. (not wallboard/drywall!). An alternative insert uses a threaded rod with a spring loaded wing-like nut, and is called a "toggle" (or sometimes a "butterfly") nut. Many manufacturers include them for different uses and identify them for use in wallboard. They are actually designed for use in hollow walls constructed of durable materials such as cinder block. They have better success when used in vertical wallboard installations for light loads, but use in ceilings should be discouraged except the very lightest loads.[2]


Install in Wood
-
1To support a fixture or plant from a ceiling, the safest and sturdiest method for installing a swag hook is directly into wood studs or joists.[3]
-
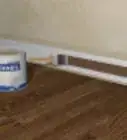
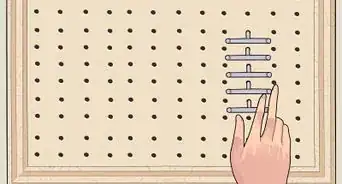
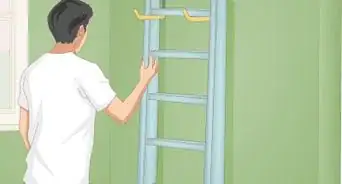
2Locate wood strapping or joists in the ceiling nearest the desired location with a commercially available stud finder. Follow the instructions included for proper use.[4]
-
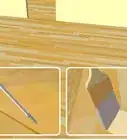
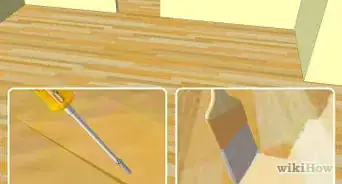
3Select a drill bit small enough that the resulting hole will be smaller than the thickness of the pointed end insert. This is done by holding the threaded insert behind the drill bit - the threads should be fully visible from behind the bit. Select a smaller rather than larger bit. It is most important that not too much material be removed from the hole so that the threads can "grab". Larger holes provide less gripping strength than smaller holes.
-
4Drill in the center of the stud or joist to a depth just longer than the pointed end threaded portion of the insert (approx 2").
-
5Thread the non-pointed end insert into the swag hook.
-
6Twist the swag into the freshly drilled hole until the flange or base of the hook is pressed tightly against the ceiling.
-
7Once secured fully into the ceiling, apply downward pressure (greater than the weight of the fixture / plant) on the hook to test the "pull out" strength.
-
8If the swag pulls out - verify the location of the strapping with the stud finder again and drill another hole with a smaller drill bit nearby and reinstall the swag. Repeat until the swag does not pull out.
-
9Additional swags used to support the chain and power cord of a light fixture may be supported with the toggle bolt anywhere desired - as this weight is a small fraction of the fixture.[5]
-
10Check for the presence of strapping or joists with the stud finder where additional swags are desired. If present, repeat the above procedure where needed.


Install in Wallboard
-
1If no studs (wall installation) or strapping or joists (ceiling) are present, the toggle method can be used. This method requires that the threaded rod be installed into the the swag, and the the toggle nut is spun only so far that the threaded rod protrudes out of the end by about two or three threads. The toggle nut should be installed so that the wings can be depressed against the threaded rod (towards the base of the swag hook). This same method is used to suspend objects from hooks in the ceiling. When using this method for ceiling installations, only the lightest loads or ornamental type loads should be considered, as this support method is the least robust.[6]
-
2While holding the wings against the threaded rod, determine the diameter of a hole that would be required to push the toggle nut through. Holes 1/2" or greater are not uncommon.[7]
-
3Drill into the ceiling only deep enough to penetrate the wallboard.
-
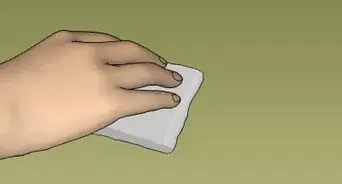
4Squeeze the toggle nut wings against the threaded rod, and press the toggle nut into the hole completely. Press the swag against the ceiling to ensure that the wings have popped open. Twist the swag hook clockwise while gently pulling downward.
-
5Twist the swag until the flange or base is firmly pressed against the ceiling.
-
6Repeat for as many swags as needed.


Post-operative Procedure
-
1Hang the fixture / freshly watered plant on the swag hook - keeping hands just underneath it - so it may be caught should the load prove greater that the capacity of the swag hook hardware or mount method.
-
2Once satisfied the load can be safely held, then you can now connect any chain / power cord through any additional swags.
-
3Check the swag regularly for indications of impending failure (bulging or cracking of ceiling around hook), and if found, take corrective action at once.


Community Q&A
-
QuestionHow do I install a swag hook if the ceiling is an eight inch thick concrete slab?
 Community AnswerYou may need to screw or screw & epoxy a 4" - 6" square of 3/4" plywood to the ceiling. You'll want to use 4 concrete screws rated for your load and screw them in about an inch back from the corners. You want over half of the concrete screw length to be in the concrete. You will need special concrete screws, hammer drill, and bits to make the screw holes. You may be able to rent the drill, don't go cordless. Screw on an appropriate thickness of wood for your swag hook and paint to match the ceiling. Once dry, install the swag hook following the wood instructions above.
 -
QuestionHow do I install a heavy-duty 60-pound swag hook in a 1" knotty pine ceiling tongue-and-groove board?
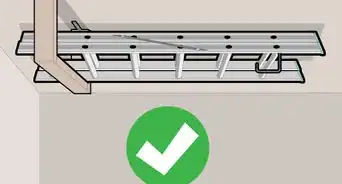
 Gerald GarveyCommunity AnswerIf you cannot locate a joist but can get into the attic or crawlspace above the ceiling, you can install a 2 x 6 (or wider) wood flat block between the ceiling joists and install the swag hook through the pine and into the block so that the pine is not bearing the weight of the swag hook.
 -
QuestionAre there any extra considerations I should take when installing a swag hook for a lamp chain in a sloped or slanted ceiling?
 Community AnswerYou may want to make sure the area you intend to use is level enough that the whole of the hook base touches the surface. Mostly cosmetic, but it can cause issues if the area is too curved or is over an uneven seam. Curves especially may be a different thickness than the surrounding walls or ceiling and may be less able to bear weight.
Warnings
- Never assume that existing swag hooks are secured into wood.⧼thumbs_response⧽
- Do not attempt to hang anything of substance secured only to a ceiling supported swag hook. Make sure the hook is screwed into wood strapping or joists behind the ceiling surface.⧼thumbs_response⧽


References
- ↑ https://www.youtube.com/watch?v=NoEUviHbscU
- ↑ https://www.prettyhandygirl.com/how-to-swag-a-light-fixture/
- ↑ https://www.youtube.com/watch?v=XonbqB6mZ3I
- ↑ https://www.bhg.com/home-improvement/walls/how-to-use-a-stud-finder/
- ↑ https://thediyplaybook.com/2014/02/hanging-swag-light.html
- ↑ https://www.youtube.com/watch?v=_IuNkiiqhO4
- ↑ https://www.youtube.com/watch?v=_IuNkiiqhO4
About This Article