This article was co-authored by Michele Dolan. Michele Dolan is a BCRPA certified Personal Trainer in British Columbia. She has been a personal trainer and fitness instructor since 2002.
This article has been viewed 72,276 times.
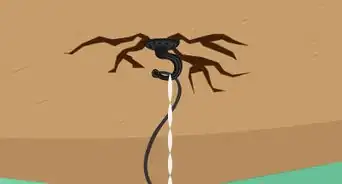
The Salmon Ladder is a grueling climbing obstacle. To overcome it, you must ascend to the top of a pair of vertical posts by hopping a free-moving bar up one rung at a time. The structure is designed to push your explosive power, upper body strength, hand-eye coordination, and endurance to the limit. Luckily, constructing a homemade version of the obstacle isn’t as challenging as actually completing it. In fact, it’s as simple as attaching a few angled rungs to two sturdy support posts and setting them into the ground. With a Salmon Ladder in your own backyard, you’ll be able to elevate your training regimen to the next level.
Steps
Installing the Posts
-
1Gather your materials. The Salmon Ladder has 2 main components—2 wooden posts and a series of angled rungs which you’ll use to catch and stabilize the bar. For this project, a pair of sturdy 12’-15’ (3.7-4.6 m) 4x4 posts will serve as the vertical supports, with a 2x6 across the top to connect the frame. The rungs themselves will be fashioned from a 2x4 sawed to the appropriate size and shape.[1]
- Depending on the spacing between the rungs, two 8 foot (2.4 m) (2.4 m) long 2x4's may be needed instead of one 12 foot (3.7 m) 2x4.
- Use only high-quality pressure-treated lumber. Since it’s made to withstand heavier loads, you can be sure that it will hold up under hours and hours of intense training.
- In addition to the raw lumber, you’ll also need a hammer or electric drill, 3” (7.6 cm) nails or heavy-duty wood screws, a handsaw, a bag of quickset concrete, and a tape measure.
-
2Dig holes to set the support beams. Use a post hole digger to clear the soil by hand quickly and ensure that the holes are uniform. Each hole should be approximately 4 feet (1.2 m) deep and 1 foot (0.30 m) across. Space them roughly 42” (1 m) apart in order to leave a comfortable amount of distance to maneuver between the posts.[2]
- A flat, stable patch of ground with plenty of room to move around will make the best site for your Salmon Ladder.
- It's also a good idea to position your Salmon Ladder where you can attach other supports. This could mean resting it against a tree or adding additional supports at the top.
- The length of the 4x4 posts will correspond to the total height of the obstacle. For a standard 11’-12’ (3.4-3.7 m) ladder, you’ll need to have your posts cut to 15’-17’ (4.6-5 m).
Advertisement -
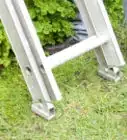
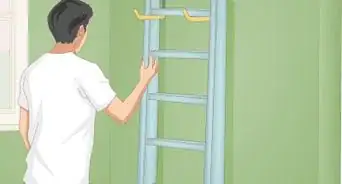
3Insert the posts into the holes. Slide the end of the first post into one of the openings you just made and stand it upright carefully. Then, do the same with the second post. Once you've set the supports, double check that they're straight, with corners and faces perfectly aligned.
- Recruit one or -- even better -- a few assistants to help you position and hold the heavy 4x4s.
- Use a level to make sure the posts are sitting evenly, and stretch a separate board across the two posts to test whether it sits flush.
- If you live in an area that receives a lot of precipitation, consider adding about 3” (7.6 cm) of gravel, sand, or aggregate to the holes before setting the posts to promote drainage. Keeping the wood dry will prevent it from rotting or splitting over time.[3]
-
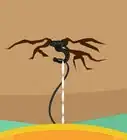
4Pour concrete to stabilize the posts. While a helper holds each post steady, shake half a bag of quickset concrete into each hole. Mix it to a consistency similar to cake batter by adding water gradually. Make sure the concrete is evenly distributed around the supports at the bottom of the holes. It should begin to set within 15-20 minutes, depending on the weather.[4]
- Consider setting the posts on one day, then returning to complete construction the next to give the concrete plenty of time to dry.
- Avoid putting any weight on the Salmon Ladder until the concrete has fully hardened.
- You can find a blueprint for a Salmon Ladder here: http://www.ninjawarriorblueprints.com/salmon-ladder-plans/.


Assembling the Frame
-
1Assemble the ladder before you place the posts in the holes. This will make it easier to build. After you attach all of the posts and insert the ladder into the hole, you will need to measure the top and bottom of the ladder to make sure that they are evenly spaced. Then cement the ladder.
-
2Use the 2x6 to connect the posts. Saw the board to 45-46” (1.1-1.2 m) so that it’s just the right length to bridge the gap between the vertical supports and complete the frame, which is 42" (1 m) wide. Line up the ends of the 2x6 with the outer edges of the posts and nail or screw it down at both ends. This piece will serve as the upper portion of the frame.
- You'll need to stand on a ladder or step stool while affixing the top piece and individual rungs.
- Buying precut lumber will save you some time, if you don’t mind paying a little extra. That way, all you’ll have to do is assemble the individual pieces once you get them home.
-
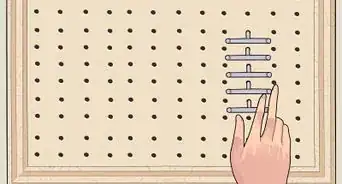
3Mark the posts where the rungs will go. Your starting point on the Salmon Ladder will be decided primarily by your unique stature. You want it to be low enough to climb safely and comfortably, but not so low that you’re forced to stoop or crouch to get in position. Once you’ve decided on the optimal placement for the first set of rungs, space every next set 12" (30 cm) apart.[5]
- A good way to determine where to put the lowest rungs is to reach up along the frame with one hand (without stretching too far) and draw a line on the side of the post.
- Measure and mark each set separately and use a flat board or straight edge to make sure they’re evenly aligned.
- 12” (30 cm) rung spacing is the official standard used for the American Ninja Warrior course, but yours can be more or less as you see fit.[6]
- For beginners, 6" (15 cm) rung spacing can be helpful for learning how to do the Salmon Ladder.
-
4Cut the rungs to the appropriate size and shape. Starting on one end of the 2x4, draw a line at a 30-35 degree angle every 12” (30 cm). Saw the board along these lines to fashion the individual rungs for the ladder. Keep in mind that you’ll need an even number of rungs, one for each side.[7]
- If you are spacing your rungs at 6" (15 cm), then you will need to draw your lines every 6" (15 cm) instead of 12" (30 cm). You should still draw them at a 30-35 degree angle.
- You may need additional lumber to produce a full set of rungs, depending on how high your want the obstacle to be.
-
5Fasten the rungs to the posts. Position the rungs over the marks you made earlier, and line up one of the angled ends with the backside of the frame’s interior edge. Then, nail or screw the rungs into place. Install 2 opposing rungs at a time, rather than working straight up the posts, so you can check their placement as you go.
- Use multiple nails or screws to make sure the rungs are secure.
- Once they’re attached, each rung will have a 30-35 degree incline, perfect for catching the bar as you work your way up the ladder.[8]


Adding Other Features
-
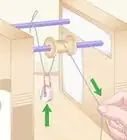
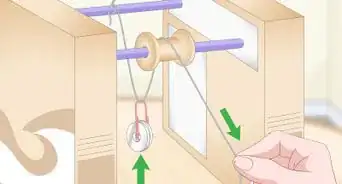
1Find a suitable bar for climbing the rungs. A length of galvanized metal conduit piping should be strong enough to support most adult athletes without bending or warping. For lighter weight athletes, some sturdy PVC pipe might even suffice. Whatever material you go with, it’s important that it be at least as long as the total distance between the posts so it will fit into place over the rungs without slipping.[9]
- Try hanging from the bar to see how it feels before you start training. If the material is too heavy, it will make it difficult to move quickly. If it’s too light, it may be in danger of snapping after a few big jumps.
-
2Devise some way to break your fall. Sooner or later, even the most experienced athlete will miss a rung. When this happens, you’ll want to have some type of protective surface in place to soften the impact in case you don’t land on your feet. The simplest option is to buy a cushioned tumbling mat or an old futon and place it directly beneath the ladder. You’ll then be able to focus on training and not on what might happen should you lose your grip.
- Most tumbling mats are segmented, which means they can be folded up and put away when they’re not in use.
- You could also dig a shallow depression under the frame of your Salmon Ladder and fill it with foam blocks, sand, water, wood chips, or some other substance that will offer a little give. Create an 8"-12" (20-30.5 cm) deep cushion.
-
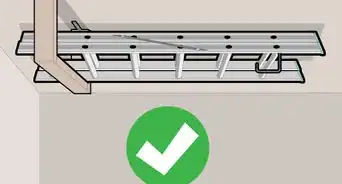
3Incorporate other obstacles. If you’re planning on making your Salmon Ladder one part of a larger course, set it up so that you can make a fluid transition once you reach the top. You’ll be high up off the ground, so the obstacle that comes next should be one that relies on elevation, such as a peg board, rope swing, or monkey bars.[10]
- Draft a blueprint for your comprehensive course before you begin building to get a sense of how each obstacle should fit together.
- For a true test of endurance, save the Salmon Ladder for the tail end of the course.


Expert Q&A
Did you know you can get expert answers for this article?
Unlock expert answers by supporting wikiHow
-
QuestionHow many people can get on this at once?
 Michele DolanMichele Dolan is a BCRPA certified Personal Trainer in British Columbia. She has been a personal trainer and fitness instructor since 2002.
Certified Fitness TrainerOnly one person can use it at a time. If more than one person gets on, you risk injury.
Support wikiHow by unlocking this expert answer.
Warnings
- Avoid all of the complications of a concussion by making sure you have a soft landing if something goes wrong.⧼thumbs_response⧽
- Train safely. No matter how well-constructed your Salmon Ladder is, there’s always a chance that you could fall, smash your fingers, smash your face, pick up splinters from the frame, or meet with other minor accidents.⧼thumbs_response⧽
- Be responsible when handling your tools, especially nails, saws, power drills, and other potentially dangerous items.⧼thumbs_response⧽
Things You'll Need
- 2 12'-15' (3.7-4.6 m) 4x4 posts
- 1 10' (3 m) 2x6 board
- 1 12' (3.7 m) 2x4 board
- Hammer
- 3" (7.6 cm) nails
- Electric drill
- Heavy-duty wood screws
- Post hole digger
- 1 bag Quick Set concrete mix
- Water
- Tape measure
- Straight edge
- Pencil or felt-tipped pen (for marking measurements)


References
- ↑ https://www.youtube.com/watch?v=m_EPeri3Dc8&feature=youtu.be&t=25
- ↑ https://www.dropbox.com/s/0t37h9xooi5vgs6/Salmon%20Ladder%20Instructions%20v1.1.pdf?dl=0
- ↑ https://www.bobvila.com/articles/setting-fence-posts/#.WfOQcWhSzIU
- ↑ https://www.dropbox.com/s/0t37h9xooi5vgs6/Salmon%20Ladder%20Instructions%20v1.1.pdf?dl=0
- ↑ https://www.youtube.com/watch?v=m_EPeri3Dc8&feature=youtu.be&t=90
- ↑ https://www.dropbox.com/s/0t37h9xooi5vgs6/Salmon%20Ladder%20Instructions%20v1.1.pdf?dl=0
- ↑ https://www.dropbox.com/s/0t37h9xooi5vgs6/Salmon%20Ladder%20Instructions%20v1.1.pdf?dl=0
- ↑ https://www.dropbox.com/s/0t37h9xooi5vgs6/Salmon%20Ladder%20Instructions%20v1.1.pdf?dl=0
- ↑ https://www.remodelaholic.com/build-diy-american-ninja-warrior-training-course/
About This Article

To build a salmon ladder, start by digging holes to set the support beams. As you insert the posts, use a level to make sure they sit evenly and stretch a separate board across them to test if they sit flush. Once everything is set, pour concrete in the holes. Next, mark the posts where the rungs will go, starting with a point that is just barely within your reach. After you set the starting rung, space the next sets 12 inches apart. Then, fasten the rungs to the posts at a 30-35 degree incline. For more tips from our Personal Trainer reviewer, including how to cut the rungs to the appropriate size and shape, keep reading!