This article was co-authored by Benjamin Hansen. Benjamin Hansen is a Landscape Contractor and the Owner of Artscape Gardens, a boutique landscaping company in Los Angeles, California. With over 12 years of experience, Benjamin specializes in transforming properties into aesthetic, functional, and drought-tolerant oases. Benjamin uses color scheme, dimension, and water conscious spaces to inspire the design and installation of soft scape, hardscape, patios, pathways, irrigation, drainage, fencing, concrete, lighting, and electrical work. Artscape Gardens covers all areas of the C-27 landscape contractor classification.
There are 17 references cited in this article, which can be found at the bottom of the page.
wikiHow marks an article as reader-approved once it receives enough positive feedback. In this case, 100% of readers who voted found the article helpful, earning it our reader-approved status.
This article has been viewed 161,373 times.
Installing a synthetic grass lawn and making it look good takes some patience, but it's well within the ability of anyone who enjoys a good DIY home project. Read through the whole process before you begin so you know exactly which materials and tools to gather. And if you're tired out at the end of the project, think of all the scorching summer days you'll get to spend in the shade instead of mowing the lawn!
Steps
Creating a Sub-Base
-
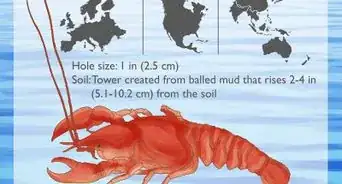
1Dig up grass, weeds, and topsoil to a depth of 1.5–4 inches (3.8–10.2 cm). The minimum depth for a decent gravel sub-base is 1.5–2.5 inches (3.8–6.4 cm).[1] If the soil is unstable, or the lawn will be heavily used, it's best to allow enough room for a 3–4 inches (7.6–10.2 cm) sub-base instead.[2] To dig up an existing lawn more quickly and evenly, rent a sod cutter from your local tool rental company or home good store.
- The artificial turf itself is usually about 1 inch (2.5 cm) thick.[3] If you want the final lawn to be perfectly level with the surrounding walkways, dig an extra 1 inch (2.5 cm) to allow for this as well as the sub-base.
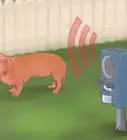
- Pull up or cap any sprinkler heads. Alternatively, you can keep them installed and set them to a low-volume setting to cool the turf on hot days or wash it after your pet's used it.[4]
- If you are installing the synthetic lawn over a hard surface instead of over soil, the surface needs to be completely waterproof and damage-resistant. You might need to install a custom drain.[5]
-
2Install a bender board border for more stability. Use a plastic or metal bender board, which won't corrode like wood. Choose bender board 4 inches (10 cm) tall for a flat lawn, or 6 inches (15 cm) for a lawn with elevation changes. To install it, dig a trench along the lawn border, about 3/4 the height of the bender board. Put the bender board in the trench and keep it in place with heavy stakes, hammered until their top is below the surface of the board. Backfill the trench with gravel or dirt and compact thoroughly.[6]
- You can make a border with decorative stones or bricks instead. Spread a layer of wet mortar around your lawn, place bricks onto the mortar, then tap gently with a rubber mallet to make them even. Let the mortar dry for a couple days before standing on the bricks.[7]
Advertisement -
3Lay weed-resistant landscape fabric over the area. You can buy this material from a home improvement store or gardening center. Stretch out the fabric over the whole area, following label instructions for which side faces down (usually the fuzzy side), then cut off the excess with scissors or a utility knife. Nail down the perimeter with 4 inches (10 cm) nails or landscape staples, at 8–12 inches (20–30 cm) intervals.
- If one roll isn't large enough to cover the whole area, lay down additional pieces with a 6–12 inches (15–30 cm) overlap, so there are no gaps for weeds to grow through. Nail the pieces together the same way that you nailed the fabric around the lawn perimeter.[8]
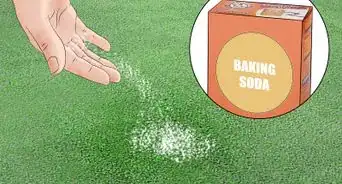
- This barrier helps prevent weeds from growing through your synthetic lawn. This is especially important if you previously had a lawn with hardy grasses such as paspalum, zoysia, or bermuda, which may grow back without this barrier to block them.
-
4Cover the area with a gravel sub-base. Gravel or crushed stone, ideally self-compacting and sized around 1⁄4 inch (6.4 mm), adds a firm foundation. This also gives your lawn much-needed drainage, since an artificial lawn can't process water.[9] Add enough gravel to cover your lawn to a depth of at least 1.5 inches (3.8 cm), for lightly-used lawns on a firm surface, or up to 4 inches (10 cm) for heavily-used lawns over loose soil.
- Skipping this step can lead to sinking lawns and drainage problems, so it's not recommended unless the lawn doesn't get much traffic and the existing surface underneath is firm but also has a good drainage system installed.
- One cubic yard of gravel will cover 300 square feet one inch thick.
-
5Use a landscape rake to create at least a 0.5% grade. Completely flat synthetic turf has a tendency to look fake, and can settle into a pit over time.[10] Use a landscape rake to spread out the gravel, then use the flat grading blade on the back of the rake to grade the gravel to a slight mound or ridge in the center. Even if your property is completely flat, you'll want a slight grade to help with water runoff, rising from the edge to the center about 1 inch (2.5 cm) for every 10 feet (3.0 m) of distance (a grade between 0.5 and 1%).
- For home lawns that won't be used for sports, feel free to grade the area more steeply to match the surrounding terrain, or to direct water to areas with better drainage.
-
6Water the gravel and compact it with landscaping tools. Water the area moderately with a hose. Starting from the outside in, compact the gravel with a hand tamper, garden roller, or vibrating plate compactor (another rentable machine). After compacting, go over the gravel again with the rake to brush away gravel where it's piled up, and to fill in any depressions. Do one final pass with a gentle tool like a hand tamper or landscape roller.[11]
- A vibrating compactor is especially useful for large, level areas.[12]
- You may need a fine broom to remove the excess gravel where it's piled up against the border.
-
7Add a shock pad if you want a cushioned feel. This optional step makes your lawn feel more realistic, and makes it a more comfortable play surface for children and athletes. To install it, simply cut the pad to the shape of your lawn and lay it down over the gravel.[13]


Adding the Synthetic Turf
-
1Unroll the synthetic turf sections so the blades face the same direction. The synthetic turf usually comes in standard sizes, for instance 15 ft x 20 ft in the United States, or 4m x 25m in the UK. Unroll the sections across your lawn side-by-side, facing the same way.[14]
- For example, if your area is 20 feet (6.1 m) by 20 feet (6.1 m) and you are buying turf in standard US sizes, for example, you will need one 15 ft wide section that is 20 ft long, and a second section that is 5 ft wide and 20 ft long. Unfortunately, the remaining 10 ft wide by 20 ft long section will go unused.
-
2Cut the turf where sections touch with a utility knife. Extend the blade far enough to reach past the blades and cut directly through the backing. Start at the seams where two turf sections touch, and cut along the whole edge to remove two or three rows of grass tufts from each section. Repeat at each place where turf sections meet, then adjust their position to cover the whole lawn.[15]
- The last couple rows of grass tufts tend to bend outward. Cutting these off where they touch another section of turf will make it so the grass blades stand up straight and parallel to each other, instead of awkwardly pressing against each other.[16]
-
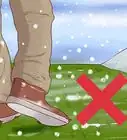
3Cut off extra turf with a series of small cuts from below. Now that everything is in place, use the utility knife to cut off extra turf where it goes past the edge of the lawn. Where the turf hits a wall, lift it back and make a cut from the underside about 6 inches (15 cm) long. Lay it back down against the wall to check your cut is aligned right, then lift it again and repeat. Cutting with these small, patient cuts helps avoid mistakes, especially if the edge of the lawn isn't a perfectly straight line.[17]
- If you have a large lawn that needs several pieces of turf to cover it, you might want to delay this step until you've finished connecting all the turf together.
-
4Nail each section of turf down for a quick and easy installation. Line up the seams perfectly, then drive them into the ground with a landscape spike at least every 2 feet (0.61 m). Smooth out the turf before placing each spike to avoid wrinkles.[18]
- This approach works, but it risks creating wrinkles or an imperfect seam. It's also not ideal to leave nails in the turf if children will be playing on the lawn.
-
5Use seaming tape instead for a more professional lawn. Line up two pieces of turf together, then fold each edge back so you have room to lay a piece of seaming tape down the length of the gap between them. Use a trowel to spread the glue over the tape in a thin, even layer, then fold the turf sections back over the tape.[19] Weigh down the turf with sandbags or anything else heavy to keep it in place while it dries.
- Your seaming tape should come with instructions that tell you how long it takes the glue to cure, or (if it didn't come with glue), which type of adhesive works best for that product.
- Gluing the sections of turf together with professional seaming tape takes more work, but makes a less obvious seam and doesn't leave any nails in the middle of the lawn. It also lets you stretch the entire lawn out afterward for a smoother, less wrinkled surface.
-
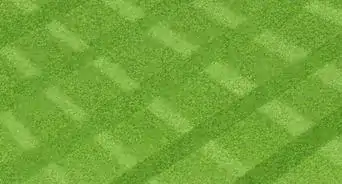
6Stretch the turf and nail the edges. Nail the edge of your turf along one of its shorter sides with 6 inches (15 cm) nails, spaced roughly every 2.5 feet (76.2 cm).[20] Stretch the next 3 feet (0.9 m) or so of turf by hand or using a carpet kicker. Once it's stretched out and free of wrinkles, nail down that section. Repeat until the artificial turf is completely stretched out. Once the nails at either end are in, you can remove the nails in the middle and cut off any excess turf.
- If the area is under 400 square feet (37 m2), you can get away with stretching only in the longest direction. For larger lawns, stretch both lengthwise and widthwise.
- To use a carpet kicker, put the teeth of the tool onto the edge of the lawn, without pushing deep enough to cut through the turf. Kick the padded end with your knee until the turf is stretched out evenly.[21]
-
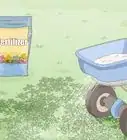
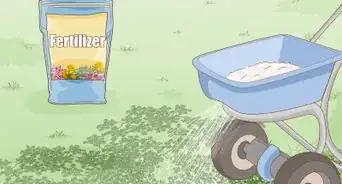
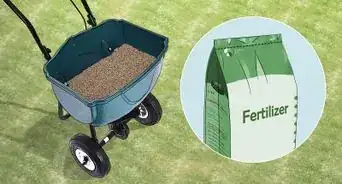
7Add infill between the blades of grass. Silica sand is a good, cheap infill option for most home lawns.[22] Prep your lawn first with a power broom (or a heavy duty push-broom and lots of elbow grease) to make the blades stand upright. Then use a drop spreader or a flat shovel to add the sand infill to the turf at a rate of 1.5 lbs per square foot (7.3 kg per square meter), or in the amount your grass manufacturer recommends. After applying, brush the lawn again until the infill is evenly distributed.
- Use a specialized infill sand only, since other types of sand can damage your turf. You can also look into alternative infill products. Some are designed specially to handle pet urine. Others, like crumb rubber or coated rubber, are often used for athletic fields, but can be more expensive or harder to maintain.[23]


Expert Q&A
-
QuestionWhat kind of synthetic grass should I get if I have pets?
 Benjamin HansenBenjamin Hansen is a Landscape Contractor and the Owner of Artscape Gardens, a boutique landscaping company in Los Angeles, California. With over 12 years of experience, Benjamin specializes in transforming properties into aesthetic, functional, and drought-tolerant oases. Benjamin uses color scheme, dimension, and water conscious spaces to inspire the design and installation of soft scape, hardscape, patios, pathways, irrigation, drainage, fencing, concrete, lighting, and electrical work. Artscape Gardens covers all areas of the C-27 landscape contractor classification.
Licensed Landscape ContractorYou want to get pet turf. It has holes in the actual turf that allow you to wash it. You'll need to be able to easily wash the turf since your pets will be going to the bathroom on it. -
QuestionIs synthetic grass more expensive than real sod?Benjamin HansenBenjamin Hansen is a Landscape Contractor and the Owner of Artscape Gardens, a boutique landscaping company in Los Angeles, California. With over 12 years of experience, Benjamin specializes in transforming properties into aesthetic, functional, and drought-tolerant oases. Benjamin uses color scheme, dimension, and water conscious spaces to inspire the design and installation of soft scape, hardscape, patios, pathways, irrigation, drainage, fencing, concrete, lighting, and electrical work. Artscape Gardens covers all areas of the C-27 landscape contractor classification.
Licensed Landscape ContractorYes, it's much more expensive than sod, but there's no need for irrigation or maintenance really, so you save on that in the long run. There's also usually a warranty of up to 16 years for most manufacturers. -
QuestionIf nails rust, aren't the nails no longer holding the turf?
 Community AnswerGet rust-proof nails.
Things You'll Need
- Shovel or sod cutter
- Wheelbarrow
- Bender board, heavy stakes, and sledgehammer
- Trench excavation tools (for instance, trenching pick and trenching shovel)
- Gravel
- Grading rake
- Hand tamper, plate compactor, and/or landscape roller
- Shock pad (optional)
- Synthetic turf
- Utility knife
- Artificial grass infill (round silica sand)
Warnings
- Before starting any digging project, make sure you know the location of buried power lines and pipes. In the United States, you can call 811 a few days in advance to ask for this information.[24]⧼thumbs_response⧽


References
- ↑ http://artificialgreens.org/how-to-lay-install-artificial-grass/
- ↑ https://www.acmesand.com/wp-content/uploads/2013/10/Artificial-Turf-Installation-Ground-Preparation-PDF.pdf
- ↑ https://www.acmesand.com/wp-content/uploads/2013/10/Artificial-Turf-Installation-Ground-Preparation-PDF.pdf
- ↑ https://www.popularmechanics.com/home/how-to-plans/how-to/a23626/how-to-lay-artificial-grass/
- ↑ http://artificialgreens.org/how-to-lay-install-artificial-grass/
- ↑ https://homefixated.com/how-to-install-bender-board-edging/
- ↑ https://www.gardenersworld.com/how-to/diy/how-to-edge-a-lawn-with-bricks/
- ↑ https://www.lawnstarter.com/blog/landscaping/how-to-install-landscape-fabric/
- ↑ http://artificialgreens.org/how-to-lay-install-artificial-grass/
- ↑ https://youtu.be/AVpPTiM2DB4?t=138
- ↑ https://www.acmesand.com/wp-content/uploads/2013/10/Artificial-Turf-Installation-Ground-Preparation-PDF.pdf
- ↑ https://www.acmesand.com/wp-content/uploads/2013/10/Artificial-Turf-Installation-Ground-Preparation-PDF.pdf
- ↑ http://artificialgreens.org/how-to-lay-install-artificial-grass/
- ↑ https://youtu.be/AVpPTiM2DB4?t=8
- ↑ https://www.youtube.com/watch?v=u8slTtG-XIE
- ↑ https://youtu.be/u8slTtG-XIE?t=22
- ↑ https://youtu.be/u8slTtG-XIE?t=56
- ↑ https://youtu.be/aDHEgZ1bG_E?t=87
- ↑ http://artificialgreens.org/lay-artificial-grass-soil/
- ↑ https://youtu.be/AVpPTiM2DB4?t=295
- ↑ https://www.machinemart.co.uk/AspSiteAssets/download_files/chT403.pdf
- ↑ https://www.parksandrecbusiness.com/articles/exploring-the-options
- ↑ https://www.parksandrecbusiness.com/articles/exploring-the-options
- ↑ https://call811.com/
About This Article