This article was co-authored by Mark Spelman. Mark Spelman is a General Contractor based in Austin, Texas. With over 30 years of construction experience, Mark specializes in constructing interiors, project management, and project estimation. He has been a construction professional since 1987.
wikiHow marks an article as reader-approved once it receives enough positive feedback. In this case, 91% of readers who voted found the article helpful, earning it our reader-approved status.
This article has been viewed 563,208 times.
Door hinges play an important role in our everyday lives; they provide all of your doors with support. Hinges on exterior doors provide the first line of safety for the family inside, and offer protection from the elements. Inside the home, they offer privacy to family members. Installing door hinges, whether new or replacement ones, is an easy skill to master and can be invaluable for many homeowners, especially ones who enjoy D.I.Y. projects.
Things You Should Know
- Trace the outline of new hinges on the door and jamb (if you’re replacing hinges, use the old outlines). Use a hammer and chisel to cut the mortise.
- Put the hinge into the mortise and mark the location of the pilot holes. Remove the hinge and drill holes over your markings.
- Screw the hinges into place and connect the door to the jamb, making sure the knuckles of the door-hinge and jamb-hinge are interconnected.
Steps
Installing Door Hinges
-
1Place your hinges in the correct location. Assuming you're installing a new door, you'll need to find the precise location on the door frame for your hinges. Most doors require a minimum of two hinges: one hinge is located 7-inches from the top of the door frame, and the other hinge is located 11-inches from the bottom of the door frame. Measure this distance and mark the location on the frame, and then do the same on the door that you're hanging.
- If you have a third hinge (typically used for heavy doors), it will be placed directly in the middle of the other two hinges (this will put it slightly off-center).
-
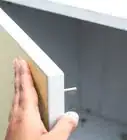
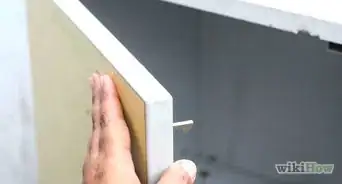
2Trace around the hinge. Put your hinge in place on the door and the jamb, and use a carpenters pencil to carefully trace around the hinge. The depth of the hinge on the jam should always be as thick as the hinge is. Double check to make sure that your outlines match the same location on the door and jamb, before moving to the next step. Then, use a utility knife to score the outline; this will make it easier to cut the mortise.Advertisement
-
3Cut the mortise. The term 'cut the mortise' is the professional term for cutting out the wood in the jamb in the shape of the hinge, so that the hinge will be inset in the jamb and provide more strength and aesthetic appeal. To cut the mortise, you'll need a very sharp chisel and a hammer. While carefully angling the chisel, tap gently into the jamb from the side to remove thin strips of wood. Make sure not to cut the mortise too deep, as this will cause the hinge to become loose over time. Cut out only the outlined area and the marked depth.[1]
- Using a dull chisel will make it more difficult to cut the mortise, and cause you to use more pressure with the hammer (which could cause a slip).
- If you cut the mortise too deep, you can use wood filler or place a thin piece of wood in it before installing the hinge.
-
4Mark the location of the screws. Replace the hinge back in the jamb where you cut the mortise. Use your pencil to mark the location of the screws in the jamb. Do the same with the location of the hinge on the door. Remove the hinges when you're done marking.
-
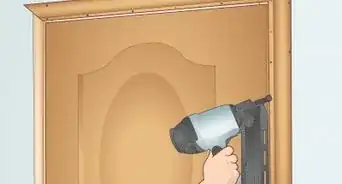
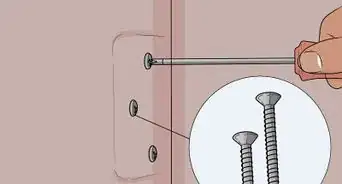
5Drill the pilot holes. Use a drill or screwdriver to drill very narrow pilot holes in the location of the screws you marked on the jamb. Tap them lightly in first, to make sure the screws don't accidentally move out of place. Use a screw guide to keep the screws straight as they go into the wood.
-
6Install the individual hinges. Put the hinges back in their places, and use a drill or screwdriver to secure them individually into the jamb and the door.
-
7Connect the door to the jamb. Hold the door in place, using blocks under the bottom to support it if necessary. Line up the two hinge plates so that the ones on the door match the ones in the jamb. Slide the hinge pins into place, and remove the blocks from the door. Test the door to make sure it works, and you're finished![2]
Replacing Door Hinges
-
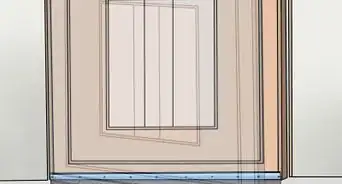
1Use blocks of wood to steady the door. Move the door so that the entire hinge is exposed, and place blocks under the door to steady it. When replacing a door hinge, you won't remove the door. Placing blocks underneath will help support the door and prevent it from falling over.
-
2Compare the hinges and measure the door. Make sure that your new hinges match the old hinges in size and edge shape. Additionally, use a measuring tape to verify that the current hinges are in the right locations. The hinges should be placed so that one is 7-inches from the top of the door frame, and the other is located 11-inches from the bottom of the door-frame. If these are incorrect, you'll need to go about the aforementioned steps on cutting the mortise and preparing the door jamb for the new hinge.
-
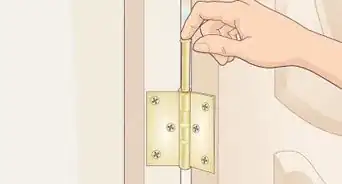
3Remove one of the old hinges. Start at the top hinge, and remove the screws holding the hinge leafs in place. Carefully pull them away from the door and the jamb, and check to make sure the wood under the hinges is in good condition. You may want to plug some of the old holes with a small wood wedge, especially if some of the holes have stripped out.
-
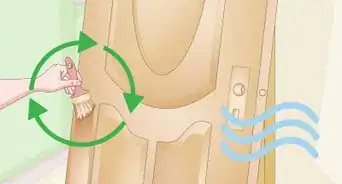
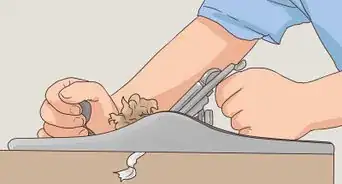
4Prepare the jamb and door for the new hinge. If the old door hinge had been attached for some time, you may need to do a little repair work on the jamb and door. Sand down the wood if necessary, and add a new coat of paint or stain to match the pre-existing wood.
- If the replacement hinges are sized differently from the old ones, fill in the mortise holes in both the door and the door frame with wood putty. Use a metal scraper to fill in the screw holes or plug them with a small wood wedge.
- Allow the putty time to dry, and sand it smooth and flush with the surface.
- Paint or stain the repair to match the rest of the door and trim.
-
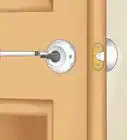
5Install the new hinge. Place your new hinge over the location of the old one. Use a drill or screwdriver and the package screws to secure the two sides of the hinge to the jamb and the door. Place the hinge pin in the hinge to secure the new hinge.
-
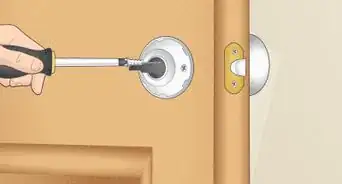
6Repeat the process on the second hinge. Move to the next hinge, and use a drill or screwdriver to remove it. Replace it with the new hinge and new screws, holding it in place to make sure the hinge doesn't get jostled out of location. Insert the new hinge pin when the new hinges are secured.
- If you have a third center hinge, you should replace it at this point as well.
-
7Test the new hinges. Remove the blocks from under the door, and try opening and closing it multiple times. If the door opens without any problems, then your job is finished!
Expert Q&A
-
QuestionWhat if you need to move the upper hinge either up or down from the 7" mark?
 Mark SpelmanMark Spelman is a General Contractor based in Austin, Texas. With over 30 years of construction experience, Mark specializes in constructing interiors, project management, and project estimation. He has been a construction professional since 1987.
Construction ProfessionalIf you need to move the hinge, mortise more material as needed and then add wood filler or caulking to fill the void. -
QuestionI want to put siding on a shed door. How do I install hinges in a way that will allow the door to open without creasing the siding?Mark SpelmanMark Spelman is a General Contractor based in Austin, Texas. With over 30 years of construction experience, Mark specializes in constructing interiors, project management, and project estimation. He has been a construction professional since 1987.
Construction ProfessionalIn order to prevent the siding from creasing, I recommend beveling the siding edges. -
QuestionCan I put hinges on the outside of a door?Mark SpelmanMark Spelman is a General Contractor based in Austin, Texas. With over 30 years of construction experience, Mark specializes in constructing interiors, project management, and project estimation. He has been a construction professional since 1987.
Construction ProfessionalFor security reasons, you probably shouldn't put hinges on the outside of a door. If you did, then people could break in easier because they could just pop the pins out.
Warnings
- Make sure that the knuckles of the door hinges on exterior doors are located inside the house.⧼thumbs_response⧽
Things You'll Need
- Hinge kit with screws
- Drop cloth
- Sawhorses
- Wood putty
- Putty knife
- Metal scraper
- Paint or stain if needed
- Sandpaper
- Utility knife
- Sharp chisel
- Hammer
- Screwdriver
- Drill and drill bits (optional)


References
About This Article

To install door hinges on a new door, measure and mark where your hinges need to go on the door frame and on the door you’re hanging. Next, place your hinge on the door and trace around the hinge with a pencil. Use a utility knife to score the outline. With a sharp chisel and hammer, cut the wood in the shape of the hinge. Then, mark the location of the screws so you can drill pilot holes. Now you’re ready to install the hinges and connect the door to the jamb. For advice on how to replace a door hinge, keep reading tips from our General Contractor reviewer!