This article was co-authored by Jen Webber. Jen Webber is a Knitting Specialist and the Manager of The Quarter Stitch, a crafting store based in the French Quarter of New Orleans, Louisiana. With over 17 years of knitting and crafting experience, Jen helps educate customers and the public on best knitting practices for their DIY projects.
wikiHow marks an article as reader-approved once it receives enough positive feedback. This article received 18 testimonials and 92% of readers who voted found it helpful, earning it our reader-approved status.
This article has been viewed 462,821 times.
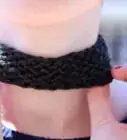
Cable knitting refers to a style of knitting where you cross multiple layers of yarn over each other to create a fancy weaved texture. Though the end result looks quite complex, the process is very simple once you know what to do.
Steps
Casting On and Getting Started
-
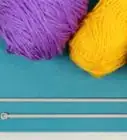
1Cast on 18 stitches onto the left needle. Make sure that you use a needle that matches the gauge of your yarn. You can find the gauge on the back of the yarn's label.
-
2Use the following pattern for the next four rows. At the end of each row, flip your knitting work, so that the needle with all the stitches is in your left hand, and the empty needle is in your right hand.

Knitting the Cable Row
-
1Purl the first six stitches. After you have finished the cast on and the initial four rows, you are ready to start your cable row. Start by purling the first six stitches. Be sure to give a slight tug after each one. This will help take some of the strain off of the cable stitches, and prevent any holes, tension issues, etc.[1]
-
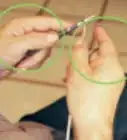
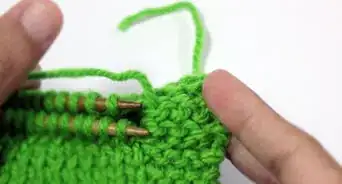
2Slip the next three knit stitches off the knitting needle and onto a cable needle. Try to get a cable needle in the same size as your knitting needle, otherwise, your gauge might not turn out right.
- If you don't have a cable needle, you can use a double-pointed knitting needle, but using a cable needle is easier.[2]
-
3Move the cable needle to the front or back of your work. You'll create the cable by creating extra stitches, then bringing them to either the front or back of the work. That will twist the stitches around each other.[3] Where you place the cable needle will determine which way the cable will twist:[4]
- If you want your cable to twist to the left, leave the cable needle in front of your work. This is known as the front cable.
- If you want your cable twist to the right, place cable needle behind your knitting kneels; this is known as the back cable.
-
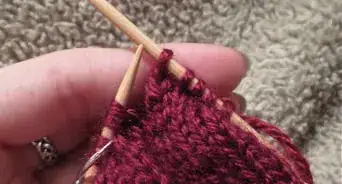
4Knit the next three stitches off of your knitting needle. Leave those first three stitches on the cable needle. You will knit them in the next step; this will create the "twist."
-
5Knit the three stitches off of the cable needle. Avoid pulling too tightly. Instead, try to keep your cable needle as close to your project as possible. This will make it easier to knit later on.[5]
-
6Purl the last six stitches, and flip your work. Put the cable needle off to the side, and purl the final stitches off of your knitting needle. Once you have finished, flip your work, so that the needle with all the stitches is in your left hand, and the empty needle is in your right hand.
Continuing the Pattern
-
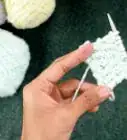
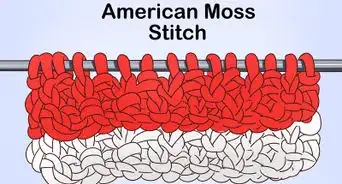
1Use the following pattern for the next three rows. You will not be using the cable during these three rows. This will create the curved part of the cable, and is known as the "working rows"
- Row 1: knit six stitches, purl six stitches, and knit six stitches.
- Row 2: purl six stitches, knit six stitches, and then purl six stitches.
- Row 3: knit six stitches, purl six stitches, and knit six stitches.
-
2Repeat a cable row. Purl six stitches and insert the cable into the next three stitches. Knit three stitches off of the knitting needle, then knit the stitches off of the cable. Finish off with six more purl stitches.
-
3Repeat the three "working rows." After each set of three working rows, do a cable row. Remember to place the cable needle on the same side each time (front or back).
-
4Finished.

Expert Q&A
Did you know you can get expert answers for this article?
Unlock expert answers by supporting wikiHow
-
QuestionIs cable-knitting hard to do?
 Jen WebberJen Webber is a Knitting Specialist and the Manager of The Quarter Stitch, a crafting store based in the French Quarter of New Orleans, Louisiana. With over 17 years of knitting and crafting experience, Jen helps educate customers and the public on best knitting practices for their DIY projects.
Knitting SpecialistCable-knitting looks impressive, but it's actually relatively easy. Basically what you're doing is as you knit along, you stop and you're taking some stitches and bringing them either to the front or to the back. Then, you just hold them there and knit a couple more stitches, which twists the stitches around each other. It's easiest if you use a tool called a cable needle, but you can use a double-pointed needle if you don't have one.
Support wikiHow by unlocking this expert answer.
-
QuestionHow do I start a traveling cable that doesn't cross over itself and will be in the shape of an "S"?
 Community AnswerAlternate which way you take the stitches out on the worked row. The first time, put the three stitches in front of your work, on the second put them behind. This constant switching between a left cable and a right cable will give you the "S" shape you've described.
 -
QuestionThe pattern says purl 3 cable, 4 back cable, 4 front. Please explain.Community AnswerIt seems to be saying that you purl 3, followed by a cable 4 stitches, by slipping stitches #1 and #2 to a cable needle, hold 2 stitches on the cable needle to the BACK, knit the 3rd/4th stitches and then 1st/2nd stitches off the cable needle and then proceed to cable the next 4 stitches, by slipping stitches #1 and #2 to a cable needle, hold 2 stitches on the cable needle to the FRONT, knit the 3rd/4th stitches and then 1st/2nd stitches off the cable needle. Cable knitting instructions are often confusing, especially if the writer doesn't use 'standard' knitting terminology.
Warnings
- Don't let your stitches slip off your cable needle while you're knitting.⧼thumbs_response⧽
- Cable patterns end up narrower than basic stockinette patterns with the same number of stitches. Take this into account if you are adding a cable to a pattern that does not have a cable.[8]⧼thumbs_response⧽
Things You'll Need
- Knitting needles
- Yarn
- Cable Needle
References
- ↑ http://knitty.com/ISSUEwinter07/FEATwin07TT.html
- ↑ Jen Webber. Knitting Specialist. Expert Interview. 4 August 2020.
- ↑ Jen Webber. Knitting Specialist. Expert Interview. 4 August 2020.
- ↑ http://www.lionbrand.com/cgi-bin/faq-search.cgi?faqKey=90
- ↑ http://www.craftsy.com/blog/2014/01/cable-knitting-for-beginners/
- ↑ http://knitty.com/ISSUEwinter07/FEATwin07TT.html
- ↑ http://www.craftsy.com/blog/2014/01/cable-knitting-for-beginners/
- ↑ http://howdidyoumakethis.com/five-cable-knits/
About This Article

To knit a cable, start by casting 18 stitches on your left needle. Then, alternate between purling 6 stitches and knitting 6 stitches for the next 4 rows. Next, start your fifth row by purling 6 stitches, and then transfer the first 3 knit stitches from your regular needle to a cable needle. Once you've done that, move the cable needle to the front or back of your work, and knit the next 3 stitches on your knitting needle followed by 3 more on the cable needle. Finally, purl the last 6 and turn your work. To learn how to choose the right needle for knitting a cable, keep reading!