This article was co-authored by wikiHow Staff. Our trained team of editors and researchers validate articles for accuracy and comprehensiveness. wikiHow's Content Management Team carefully monitors the work from our editorial staff to ensure that each article is backed by trusted research and meets our high quality standards.
There are 8 references cited in this article, which can be found at the bottom of the page.
This article has been viewed 41,507 times.
Learn more...
If your floors are uneven, a latex self-leveling compound (sometimes called latex screed or mortar) can help smooth over areas that are not level. This is usually done before painting, tiling, or carpeting a subfloor. Before you begin, you will need to identify where your floor dips or rises. Clean the floor before applying a thin layer of latex mortar to the floor. Latex only takes a day to dry, so you can continue with your project the very next day.
Steps
Assessing the Floor
-
1Remove any carpeting or tile. If you already have carpet or tile on your floor, you will need to remove it before you can examine the subfloor. If the floor is concrete, clear away any furniture or rugs on top of it.[1]
- For carpet, you can cut off pieces with a utility knife and pull it up using a pry bar.
- To remove tile, cut the grout with a utility knife and lift up each piece with a chisel.
-
2Place a level on various areas of the floor. A level contains a liquid with an air pocket. Place the level in areas where you suspect the floor is uneven. If the air bubble settles in the center, it is even. If it slides to one side, it is uneven.[2]
- Latex screed works best on dips that are no more than 2 inches (5.1 cm) lower than the floor.
Advertisement -
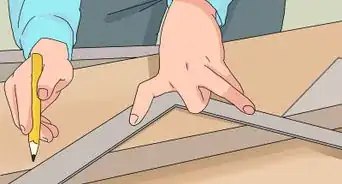
3Set a straightedge across the floor. If the straightedge tips to one side, your floor may have a raised bump in it. If you notice a gap between the straightedge and the floor, your floor is dipping in that area.[3]
-
4Run a string across the ground. Tape or tie the string to one side of the room. You can also have a partner hold it. Walk across the room, and hold the string tightly so that it is taut. It should just barely skim across the top of the floor. Look for any places where the floor dips below the string or pushes it up.[4]


Cleaning the Floor
-
1Scrape off any residue. The floor will need to be completely clean before you begin. If there is any glue, mortar, or residue left over from taking out the tile or carpet, remove it with a scraper. Sweep up any leftover debris afterwards.[5]
-
2Vacuum up the dust. After all of the visible debris is gone, vacuum to remove any dust or dirt. If vacuuming doesn’t remove all of the dust, try taking a wet sponge and washing it away. Let it dry before you continue.[6]
-
3Attach a metal lath to a wooden floor. If you have any type of wooden subfloor, you cannot use latex self-leveling compound directly on it. Instead, roll out and staple a metal lath over the entire floor first.[7]
- A metal lath is a net of enmeshed metal. You can buy it at hardware stores.
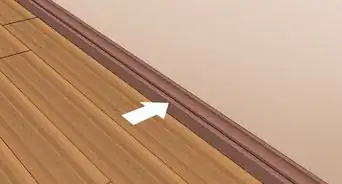
- Latex self-leveling compound can be applied directly to concrete, cement board, or HardieBacker floors.


Applying the Latex
-
1Mix the compound in a five-gallon bucket. Most compounds will have two components: a liquid latex solution and a bag of dry mortar mix. Prepare the compound right before you are ready to cover the floor.[8]
- How much you mix will depend on the size of the room and the height of the dips. Your self-leveling compound should have instructions on the side of its label for the amount you will need.
- You can buy the self-leveling compound at hardware stores or online. Some latex solutions come premixed. These will be sold in a bottle.
- The self-leveling compound will be spreadable for about an hour after mixing.
-
2Start pouring the compound in the corner farthest away from the door. Work your way towards the door so that you do not have step over the wet latex when you are done. The latex will settle in the dips of the room, creating a smooth surface.[9]
-
3Smooth out the latex with a screed. A screed is a long, flat tool used to make mortar even. After you pour the self-leveling compound, scrape the screed over the latex to spread it evenly over the floor. Make sure to fill in any dips in the floor.[10]
- You can also use a paint roller or finishing trowel if you don’t have a screed.
-
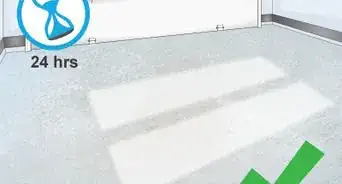
4Let the latex dry for 24 hours. Test that it is completely dry with a gloved finger or a dry stick. Give it another day if it isn’t dry. If it is dry, you can continue with your project by applying tile, vinyl, paint, or carpeting on top of the floor.[11]


References
- ↑ http://cabindiy.com/how-to/level-a-floor/
- ↑ http://www.oneprojectcloser.com/how-to-even-a-floor-in-preparation-for-tile/
- ↑ http://www.oneprojectcloser.com/how-to-even-a-floor-in-preparation-for-tile/
- ↑ http://www.oneprojectcloser.com/how-to-even-a-floor-in-preparation-for-tile/
- ↑ http://cabindiy.com/how-to/level-a-floor/
- ↑ http://www.diydoctor.org.uk/projects/levelling-concrete-floors.htm
- ↑ http://www.tilecleaning.org/self-leveling-compound.htm
- ↑ http://www.oneprojectcloser.com/how-to-even-a-floor-in-preparation-for-tile/
- ↑ http://www.tilecleaning.org/self-leveling-compound.htm
About This Article