This article was co-authored by Alicia D'Angelo. Alicia D'Angelo is a makeup artist based in New York City. She currently works for teams with Dior Makeup, YSL Beauty and Pat McGrath Labs as well as bridal companies Once Upon A Bride and Miss Harlequinn. Her work has been featured in Today.com, New York Live, Forbes.com, VH1, MTV, Vevo, Entertainment Weekly, Refinery 29, and NYXCosmetics.com. She has a Visual Communications degree from FIDM-Los Angeles.
There are 10 references cited in this article, which can be found at the bottom of the page.
This article has been viewed 21,463 times.
Are you layering your beauty products the right way? Layering your skincare products in the correct order gives each product's active ingredients the most exposure to your skin for a healthier, more flawless face. No matter what your makeup style is, we’ll walk you through the smartest, easiest way to upgrade your skincare and beauty routine–from applying cleansers, toners, serums, to SPF products and more.
Steps
Layering Skincare Products
-
1Remove residual makeup and dirt. Before you apply your skincare products to your face, make sure that any makeup or dirt left over from the day (or night) has been completely removed. You can use makeup removal wipes or an oil cleanser for this step. Oil cleanser is better if you have particularly sensitive skin.[1]
- Remove dirt or makeup by wiping from the center outwards, applying gentle pressure. You may need several wipes.
- Repeat the process to make sure you get everything – even stuff that isn't necessarily visible.[2]
-
2Wet your face. Before you begin the rest of your routine, your face needs to be soaked, not just damp. Splash water on your face at least three times, making sure you get every part of your face.Advertisement
-
3Use a cleanser. A cleanser will give your face a deep clean – a deeper clean than makeup wipes can. There are many different types of cleanser available, based on the condition of your skin – normal, oily, or dry. Check the labels to make sure you're using the correct formula.[3]
- Massage in the cleanser using circular motions, beginning at your hairline and working your way down toward your neck.
- Rinse your face thoroughly, rinsing at least 10 times, then pat your face with a towel so that it's damp, but no longer wet.[4]
-
4Apply toner. Toner tightens up your skin and can reduce the visibility of spots and wrinkles. For it to work properly, it needs to be fully absorbed into your skin, so it should go on first after you cleanse your face. As with your choice of cleanser, make sure you choose a toner formula that addresses your particular skin type.
- If you're doing a daytime routine, you can skip applying serum.
-
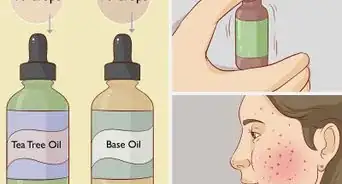
5Press in serum. Not everyone will necessarily need to apply serum as part of their skin care routine, but it's an excellent product to use if you have very specific skincare needs that you want to target. Apply your serum before your moisturizer to ensure that the potent ingredients in your serum absorb properly.[5]
- For acne issues, look for serums that include vitamin C, retinol, zinc, and salicylic acid.
- For dry skin look for formulas that include vitamin E, glycolic acid, and hyaluronic acid.
- To brighten your skin look for serums that include antioxidants like green tea extract.[6]
- If you have very sensitive skin, swap the moisturizing and serum steps. This can help reduce skin irritation and therefore redness by preventing the full effect of your serum's potent ingredients.[7]
-
6Massage in moisturizer. Starting from your neck and working your way up toward your hairline, massage in your moisturizer of choice. Be generous in the amount that you use and make sure you don't skip this step. Moisturizer seals in everything else you've put on your face.
- Massage in your moisturizer using upward strokes to ensure the moisturizer soaks in to your pores.[8]
- Avoid your lashes. Moisturizing cream travels on its own, so avoid massaging moisturizer directly into your lashes. You don't want to risk burning your eyes and the moisturizer will find its way there on its own.[9]
-
7Apply eye cream. If you like to use extra cream on your eyes, use your ring finger to apply minimal pressure, tapping around the orbital bone in small circles. You should use cream if you'd like to reduce the appearance of fine lines or wrinkles around your eyes.[10]
-
8Use sunscreen. You can end your routine with eye cream if you're applying your skincare products at night. If you're beginning the day with your routine, you should end with sunscreen. Some moisturizers already include a sunscreen so you might be able to combine steps.[11]
- You'll have to wait until the rest of your products have dried – about ten minutes – to apply your sunscreen to make sure it soaks into your skin and actually provides protection.
- You should apply sunscreen to both your face and your neck.
- Make sure the sunscreen has fully absorbed into your skin before applying makeup.


Layering Makeup
-
1Apply primer. Starting with primer helps your makeup to stay fresh longer because it gives your makeup a good base to cling to (rather than just your skin). You can use an all over primer that's good for your whole face, or two different primers – one for your face and one especially for your eyes.
- You should use a special eye primer if you're planning on using quite a bit of eye makeup.
- You can also apply lip balm during this step to prep your lips. This step is particularly important if you're using lipstick (rather than a gloss), which can dry out your lips.[12]
- Apply all of your liquid and cream products, like primer, foundation, and concealer, directly on top of your skincare products.[13]
-
2Blend on foundation. Using either a foundation brush, a makeup blender, or your hand, blend on your foundation. Choose a foundation color that matches the skin on your neck – your neck is usually a shade or two lighter than your face, and matching your foundation shade to your neck prevents the rest of your makeup from looking too dark.[14]
-
3Conceal blemishes. Using a concealer, cover any discolored spots and the area under your eyes famous for those blueish bags. You can use either your hand, your foundation blush or a beauty blender to do this.[15]
- Choose your concealer based on the color of the blemishes you want to conceal and by looking for opposite colors on the color wheel. So, for example, if you want to cover up the blue circles under your eyes, look for an orange-hued concealer. Cover up redness with green.[16]
- Use concealer that is a shade lighter than your skin tone to conceal scars, blemishes, and sun damage.
- To properly conceal the bags under your eyes, apply concealer in what's called a “Hollywood V” pattern. Start at one corner of your eye, draw a v under the middle of your eye (about an inch you're your face) and then connect to other corner before filling in.[17]
- Lightly dust translucent powder under your eyes and nose to set your foundation.
-
4Contour your face. Once you have the base for your makeup down, work on contouring with bronzer and highlighter. If you don't normally contour, that's fine, just move right to putting your blush on.[18]
- You generally want to choose a bronzer that's one or two shades darker than your natural skin tone. You want it to look like the natural contours of your face once you're done blending, so don't go too dark.
-
5Dust on blush. Apply blush along your cheek bone and at the apple of your cheeks. If you've contoured, this is the area between where your highlighter and bronzer goes. The apple of your cheeks is the spot right above the corner of your mouth when you smile.
- If you're using a cream blush, apply it before you set your foundation with powder. If you apply a liquid or cream product on top of powder, the product will clump, and it will often change color or texture.[19]
-
6Apply eyeshadow. There are lots of different looks you can achieve by using eyeshadow, and much of the application depends on the look you're aiming for. Generally though, you want to use an eyeshadow brush and work from the outer corner of your eye in toward the center, feathering your shadow onto your eyelid and in your crease.[20]
- Use shadows the opposite color of your eyes to make your eyes stand out. So if you have blue eyes, you should use shadows with orangey undertones. For green eyes use purples. Brown eyes are neutral so most colors look good, but blue and purple work best.[21]
- To add definition to your eyes, use a light bronzer in your crease (the area halfway between your eyebrow and your lash line).
- Use highlighting/contouring technique to address droopy eyes by applying highlighter above your crease and then blend a darker shadow into the fold that you want to recede. Make sure you blend these together well so it looks natural.[22]
-
7Draw on your eyeliner. Once your shadow is set, apply your choice of eyeliner to give your eyes definition. Black will give you the most intense definition, while brown will give you a more natural look.[23]
- Make your eyes look longer by applying black eyeliner to your upper and lower lash lines. Start from the middle of your eye and work your way out to the corner of your eyes. Make sure you connect the lines on your upper and lower lash lines at the corner of your eye.[24]
- If you have very small eyes, only line the outer third of your eyes.[25]
- To naturally define your eyes, use a black or brown pencil on the inner upper rims of your eyes only.
- Don't draw on your eyeliner in one continuous line – your pencil or brush will likely catch on your eyelid and interrupt the line. Instead, apply your eyeliner in a series of short dashes from the inner corner to the middle of your eye and then from outer corner to the middle, meeting in the middle.[26]
-
8Apply mascara. Once your eye makeup is finished, apply your mascara. Curl your lashes with a lash curler before you put on your mascara – this gives your lashes shape and definition before the mascara coats them. Curling them before coating them helps your lashes keep their shape and prevents them for just sticking out straight.[27]
- Apply two to three coats of mascara to ensure adequate coating.
-
9Fill or draw in your brows. The intensity of your eyebrows should match your eye makeup, so you want to save them for last. If you're working on a more intense eye makeup look, go for a darker brow. A more natural look requires a lighter brow.[28]
- If you're applying brow powder, work against the grain of the hair in a powder a shade or 2 lighter than your natural hair color. If you're using a pencil, apply it in light, hair-like strokes to get a natural look.
-
10
-
11Color your lips. The final step in applying your makeup should be to apply lip liner, then lipstick or gloss. Outline your lips, working from the outside corner in, then fill in your lips completely. If you're using lipstick, apply it using downward strokes, moving from your cupid's bow (the point your lips make under your nose) to the outer corners of your top lip. Then move from the outer corner of your bottom lip to the middle.[31]
- You can dab a bit of lip gloss at your cupid's bow and the middle of your lower lip for a natural looking pouty lip.[32]
- Always use lip liner if you're wearing lipstick to keep the color from bleeding outside the lip line and to achieve a vibrant, lasting result. You can skip it if you're wearing gloss.
- You can use a neutral color of lip liner or one that matches the shade of your lipstick.


Expert Q&A
-
QuestionWhat order do you do skin care?
 Laura MartinLaura Martin is a Licensed Cosmetologist in Georgia. She has been a hair stylist since 2007 and a cosmetology teacher since 2013.
Licensed CosmetologistYou should wash your face first, then exfoliate (if you are going to that day), tone, and moisturize. If you have stubborn makeup that requires a makeup remover, use that before cleansing. -
QuestionWhat order do you put on face products?Laura MartinLaura Martin is a Licensed Cosmetologist in Georgia. She has been a hair stylist since 2007 and a cosmetology teacher since 2013.
Licensed CosmetologistYou should start with treatment products like moisturizers or serums. Next, add sunscreen. Then put on primer, foundation, concealer, and any other makeup products you like to use. -
QuestionWhat order do you put your makeup on?Laura MartinLaura Martin is a Licensed Cosmetologist in Georgia. She has been a hair stylist since 2007 and a cosmetology teacher since 2013.
Licensed CosmetologistYou should begin with primer, then foundation, then concealer. Do your eyes next, then cheeks, then lips.
Warnings
- If any products cause reddening or swelling of your skin, stop using them.⧼thumbs_response⧽
- If you have serious skin issues, see a dermatologist.⧼thumbs_response⧽


-Step-9-Version-2.webp)


-Step-1.webp)

References
- ↑ http://www.refinery29.com/how-to-layer-skin-care-products#slide-1
- ↑ http://www.refinery29.com/how-to-layer-skin-care-products#slide-1
- ↑ http://www.refinery29.com/how-to-layer-skin-care-products#slide-1
- ↑ http://www.refinery29.com/how-to-layer-skin-care-products#slide-1
- ↑ http://www.refinery29.com/how-to-layer-skin-care-products#slide-3
- ↑ https://intothegloss.com/2016/03/what-is-serum/
- ↑ http://www.allure.com/story/how-to-layer-your-skin-care-products
- ↑ http://www.refinery29.com/how-to-layer-skin-care-products#slide-4
- ↑ http://www.refinery29.com/how-to-layer-skin-care-products#slide-5
- ↑ http://www.refinery29.com/how-to-layer-skin-care-products#slide-5
- ↑ http://www.refinery29.com/how-to-layer-skin-care-products#slide-6
- ↑ http://coveteur.com/2015/09/15/how-to-layer-makeup/
- ↑ [v161376_b02]. 26 May 2020.
- ↑ http://coveteur.com/2015/09/15/how-to-layer-makeup/
- ↑ http://coveteur.com/2015/09/15/how-to-layer-makeup/
- ↑ http://coveteur.com/2015/09/15/how-to-layer-makeup/
- ↑ http://coveteur.com/2015/09/15/how-to-layer-makeup/
- ↑ http://coveteur.com/2015/09/15/how-to-layer-makeup/
- ↑ [v161376_b02]. 26 May 2020.
- ↑ http://coveteur.com/2015/09/15/how-to-layer-makeup/
- ↑ http://coveteur.com/2015/09/15/how-to-layer-makeup/
- ↑ http://coveteur.com/2015/09/15/how-to-layer-makeup/
- ↑ http://www.cosmopolitan.co.uk/beauty-hair/a31525/what-order-apply-makeup-skincare/
- ↑ http://coveteur.com/2015/09/15/how-to-layer-makeup/
- ↑ [v161376_b02]. 26 May 2020.
- ↑ http://coveteur.com/2015/09/15/how-to-layer-makeup/
- ↑ http://www.cosmopolitan.co.uk/beauty-hair/a31525/what-order-apply-makeup-skincare/
- ↑ http://www.cosmopolitan.co.uk/beauty-hair/a31525/what-order-apply-makeup-skincare/
- ↑ http://coveteur.com/2015/09/15/how-to-layer-makeup/
- ↑ [v161376_b02]. 26 May 2020.
- ↑ http://coveteur.com/2015/09/15/how-to-layer-makeup/
- ↑ http://coveteur.com/2015/09/15/how-to-layer-makeup/
About This Article


-Step-9-Version-2.webp)


