X
This article was co-authored by wikiHow Staff. Our trained team of editors and researchers validate articles for accuracy and comprehensiveness. wikiHow's Content Management Team carefully monitors the work from our editorial staff to ensure that each article is backed by trusted research and meets our high quality standards.
This article has been viewed 82,662 times.
Learn more...
Tape dispensers make packaging boxes easy and efficient. It’s important to learn how to properly use a tape dispenser because shipping companies will send back packages that are not taped well. It can be a bit tricky to load tape into a dispenser, but once everything is set up the dispenser will save you tons of time!
Steps
Part 1
Part 1 of 2:
Putting the Tape Inside the Dispenser
-
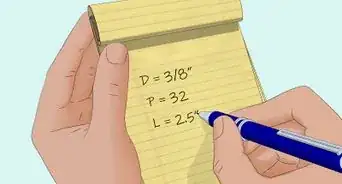
1Locate the end of your roll of tape. If you’re loading a new roll, the end should be clearly marked. If you’re working with a used roll, run a fingernail around the tape to feel for where the end is. Pull 0.25–0.5 inches (0.64–1.27 cm) of tape and fold it back on the roll.[1]
- Folding the tape back on itself simulates what the end of a new roll of tape looks like.
-
2Slide the tape onto the spindle with the sticky side facing down. The tape dispenser handle should be to your right and the non-adhesive side of the tape must be facing up. Have the end of the tape roll facing the roller and cutting blade.
- If you’re having trouble putting the roll of tape on the spindle, lay the dispenser down on a flat, stable surface to make things easier.
Advertisement -
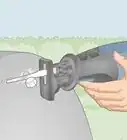
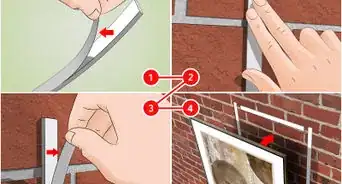
3Thread the end of the tape roll between the roller and guide. There is a small slot in between the dispenser roller and the metal or plastic guide. To give yourself plenty of room to thread the tape through, hold the guide open by pressing down on the tab just below it.[2]
- Remember to check if the sticky part of the tape is facing down. If it’s not, it will stick to the dispenser roller.
-
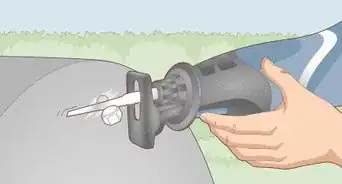
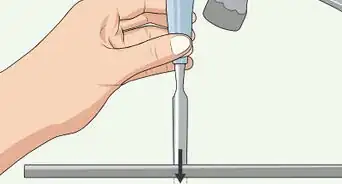
4Pull the tape up so that it goes over the serrated blade. To avoid cutting yourself on the blade, pull the tape 1–2 inches (2.5–5.1 cm) above it. Then, pull the tape back against the cutting edge to make a neat, even cut.[3]
- Throw away the tape that gets cut off by the blade.


Advertisement
Part 2
Part 2 of 2:
Adjusting the Tension of the Tape Dispenser
-
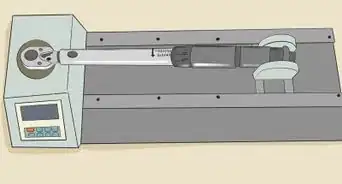
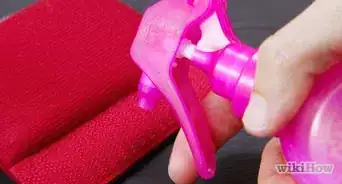
1Test the dispenser’s tension by rolling a small amount of tape out. Use an old box for this trial run. Cut the tape with the serrated blade after rolling out about 5 inches (13 cm) of it. You are looking to see if the tape unwinds smoothly and sticks to the box correctly.[4]
- Do not test your dispenser on packages you want to tape up. Wait until you know the dispenser is properly loaded and adjusted before you start working with it for real.
-
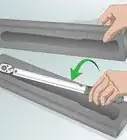
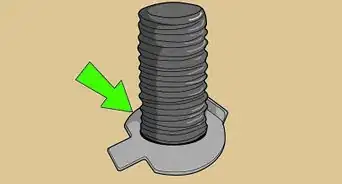
2Tighten the nut on the spindle clockwise to increase the tension. The nut is in the middle of the spindle and lets you adjust the tension of the dispenser. If the tension is too loose, the tape might not wrap tightly enough around the packaging to seal it properly.[5]
- If the spindle is too loose, you could end up using more tape than you had in mind.
-
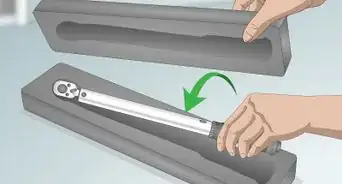
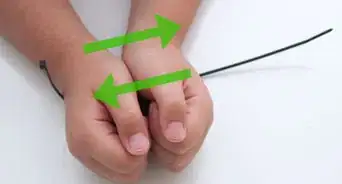
3Loosen the nut counterclockwise to decrease the tension. If you find yourself pulling really hard to roll the tape out, it might be because the spindle is too tight. If there is too much tension, the tape will not roll evenly over your packaging or adhere to the box the way you want it to.[6]
- Keep tightening and loosening the nut until you can smoothly roll out the tape without using excessive force.


Advertisement
References
- ↑ https://bizfluent.com/how-4894787-thread-packing-tape-gun.html
- ↑ https://rapesco.com/load-packing-tape-dispenser/
- ↑ https://bizfluent.com/how-4894787-thread-packing-tape-gun.html
- ↑ https://rapesco.com/load-packing-tape-dispenser/
- ↑ https://bizfluent.com/how-4894787-thread-packing-tape-gun.html
- ↑ https://rapesco.com/load-packing-tape-dispenser/
About This Article

wikiHow Staff
wikiHow Staff Writer
This article was co-authored by wikiHow Staff. Our trained team of editors and researchers validate articles for accuracy and comprehensiveness. wikiHow's Content Management Team carefully monitors the work from our editorial staff to ensure that each article is backed by trusted research and meets our high quality standards. This article has been viewed 82,662 times.
Co-authors: 4
Updated: April 27, 2020
Views: 82,662
Categories: Fastening Tools
Advertisement