This article was co-authored by wikiHow Staff. Our trained team of editors and researchers validate articles for accuracy and comprehensiveness. wikiHow's Content Management Team carefully monitors the work from our editorial staff to ensure that each article is backed by trusted research and meets our high quality standards.
The wikiHow Tech Team also followed the article's instructions and verified that they work.
This article has been viewed 560,912 times.
Learn more...
This wikiHow teaches you how to view a list of your browser's temporary internet files (stored cache data), which are pieces of data that help quickly load frequently visited sites. You cannot view temporary internet files on a mobile item such as a smartphone or a tablet.
Steps
Finding Cache Files on Mac
-
1Open your Mac's Finder. Click the blue smiling face icon on the bottom-left to open your Finder.
- Make sure the menu bar on the top-left says "Finder."
-
2Hold down the Alt or ⌥ Option key on your keyboard. This will allow you to reveal the Library folder on the Go menu.Advertisement
-
3Click the Go tab on the menu bar. While holding down the alt (option) key, click the Go at the top of your screen. It will open a drop-down menu.
-
4Click Library on the menu. This will open your user library folder.
- The Library option only shows up when you press down the alt (option) key.
-
5Double-click the Caches folder. You can find all the internet cache stored on your computer here.
-
6Find and double-click the "com.apple.safari" folder. You can find different types of Safari browsing cache in this folder.
- If you're using another web browser, look for your browser's software company here. For example, look for "Google" if you're using Chrome, and "Mozilla" for Firefox.
-
7Double-click the "fsCachedData" folder. You can find your Safari browsing cache data files here.


Finding Cache Files on Windows
-
1Open your Start menu. Click the Start menu icon on the lower-left corner, or press the ⊞ Win key on your keyboard.
- Alternatively, you can open the search or Cortana from your menu bar.
-
2Type Show hidden files and folders into the menu search. Your file and folder settings will show up at the top of the search results.
-
3Click the Show hidden files and folders option in the search results. This will open your Folder Options window.
-
4Select "Show hidden files, folders, and drives" in the Advanced Settings box. When this option is selected, you can view and browse all hidden and system folders on your computer.
-
5Click the Apply button. You can now view and open hidden folders.
-
6Open the This PC or My Computer app. This app looks like a desktop computer icon. You can find it on your Start menu or on your desktop.
-
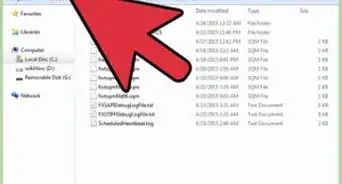
7Double-click your main drive. This is the hard drive where your Windows system is set up.
- This drive is usually named Local Disk and/or the C: drive.
-
8Double-click the "Users" folder. You can find a list of all the users saved on your computer here.
-
9Double-click your user folder. Your user folder is named by your user name. You can find your user files here.
-
10Double-click the "App Data" folder. This is a hidden folder so it looks like a transparent folder icon in your user folder.
-
11Double-click the "Local" folder.
-
12Find and double-click the "Microsoft" folder in Local. You can find your Internet Explorer or Microsoft Edge cache in this folder.
- If you're using a different web browser, look for your browser's software company here. For example, look for "Google" if you're using Chrome, and "Mozilla" for Firefox.
-
13Find and double-click the "Windows" folder in Microsoft.
-
14Find and double-click the "Caches" folder. You can view all your Internet Explorer or Edge browsing cache in this folder.


Firefox
-
1Open Firefox. Firefox's icon resembles a red-and-orange fox wrapped around a blue globe.
-
2Click the address bar. The address bar is at the top of the Firefox window.
-
3Type about:cache into the address bar. This command opens and displays the temporary internet files.
-
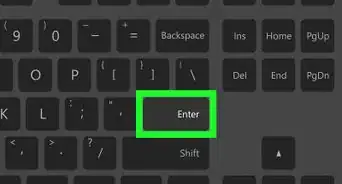
4Press the ↵ Enter key. Doing this will open the "Network Cache Storage Settings" page.
-
5Click the "List Cache Entries" link. It's below the "disk" heading near the middle of the page. Doing so will open a separate tab with all of your Firefox's temporary internet files listed.


Microsoft Edge
-
1Understand how Microsoft Edge stores temporary files. Microsoft Edge stores temporary files in several different folders, all of which are usually inaccessible without knowing the exact file path of the specific file that you want to view. Fortunately, you can download a free app called "IECacheView" to pull up these files.
-
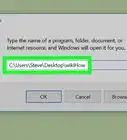
2Download IECacheView. Go to https://www.nirsoft.net/utils/ie_cache_viewer.html in your computer's Internet browser, scroll down to the "Feedback" heading near the bottom of the page, and click the Download IECacheView link below this heading. The IECacheView ZIP folder will download onto your computer.
- Depending on your browser's settings, you may have to specify a download location or confirm the download before the download will commence.
-
3Extract the IECacheView folder. Go to the location to which you downloaded IECacheView's ZIP folder, then do the following:
- Double-click the "IECacheView" folder.
- Click the Extract tab at the top of the folder.
- Click Extract all at the top of the folder.
- Click Extract at the bottom of the pop-up window.
- Wait for the extracted folder to open.
-
4Open IECacheView. In the extracted folder, double-click the blue-and-pink "IECacheView" icon. After a moment, the IECacheView window will open.
-
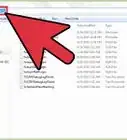
5Scroll right and click the Full Path heading. It's on the far-right side of the window in the upper-right corner.
-
6Review your stored Microsoft Edge temporary files. Any file with "microsoft.microsoftedge_8wekyb3d8bbwe" in the middle of its Full Path address is a Microsoft Edge temporary file.
- You can go to a specific temporary file's location by right-clicking the temporary file and then clicking Open Cache Sub-Folder in the resulting drop-down menu.


Internet Explorer
-
1Open Internet Explorer. Double-click the Internet Explorer app icon, which resembles a blue "e" with a yellow circle around it.
-
2
-
3Click Internet options. You'll find it toward the bottom of the drop-down menu.
-
4Click Settings. It's toward the bottom of the "Internet Options" window in the "Browsing history" section.
-
5Click View files. This option is near the bottom of the window.
-
6Review your temporary files. Any files in this folder are cached from sites you've visited in Internet Explorer.


On Safari
-
1Understand how Safari stores its temporary Internet files. Similarly to Microsoft Edge, Safari stores temporary files in a variety of different folders. In order to view all of the temporary Internet files in one location, you can use a free app called "SafariCacheExplorer".
-
2Download SafariCacheExplorer.
-
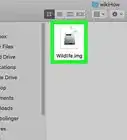
3Install SafariCacheExplorer. Double-click the SafariCacheExplorer DMG file, verify the software if needed, and then click and drag the SafariCacheExplorer icon onto the Applications folder icon.
-
4
-
5Click Display all cached files. This tab is in the upper-left side of the window. Doing so will ensure that SafariCacheExplorer is displaying all temporary Internet files for your Safari browser.


Community Q&A
-
QuestionHow do I delete temporary Internet files in Chrome?
 Community AnswerWithin Chrome: CTRL-H Click on Clear Browsing Data Check what you want deleted and select how far back Then click Clear Browsing Data
Warnings
- Neither Chrome nor Firefox stores usable files on your computer.⧼thumbs_response⧽
- Some temporary Internet files will be impossible to open without the context of the website for which they were designed.⧼thumbs_response⧽


About This Article

1. Open Finder.
2. Press the Option key and click Go.
3. Click Library.
4. Double-click Caches.
5. Double-click com.apple.Safari.
6. Double-click fsCachedData.