This article was co-authored by wikiHow staff writer, Nicole Levine, MFA. Nicole Levine is a Technology Writer and Editor for wikiHow. She has more than 20 years of experience creating technical documentation and leading support teams at major web hosting and software companies. Nicole also holds an MFA in Creative Writing from Portland State University and teaches composition, fiction-writing, and zine-making at various institutions.
The wikiHow Tech Team also followed the article's instructions and verified that they work.
This article has been viewed 148,665 times.
Learn more...
This wikiHow teaches you how to prevent Windows and macOS from rearranging your desktop icons without your permission. If you're using Windows, you can turn off the auto-arrangement feature to keep your desktop icons in your preferred order, or try a third-party app called DeskLock that actually prevents your icons from moving at all. If you have a Mac, you can keep your icons organized to your liking by setting your desktop sorting method to "None."
Things You Should Know
- If you’re using Windows, disable ‘auto-arrange’ and enable ‘align icons to grid’ on the desktop.
- Try the DeskLock program if you want an app you can toggle on and off to lock desktop icons in place.
- If you’re using macOS, change your desktop ‘Sort By’ setting to ‘None.’
Steps
Disabling Auto-Arrange on Windows
-
1Right-click on an empty space on your Windows desktop. This will open a small drop-down window.
- Windows does not come with a feature that locks the desktop icons in place. You can, however, turn off "Auto-Arrange" option so that Windows doesn't reorganize your desktop icons automatically each time you add files to the desktop.[1]
-
2Click the View menu. It's the first option at the top.Advertisement
-
3Remove the checkmark from "Auto arrange icons." If you remove the checkmark from this option, Windows will not be able to automatically change the order of your icons.[2]
- If you place a checkmark next to "Auto arrange icons," Windows will manage the order of your icons for you as you install new programs and save files to the desktop. This could cause your desktop icon order to shift when you don't expect it to.
-
4Select "Align icons to grid" so there is a checkmark next to it. Choosing this option will keep your icons neatly spaced and lock them to a grid layout.
-
5Arrange your icons how you want. Now that you've disabled auto arrange, you can click and drag your icons anywhere on your desktop without worrying that Windows will rearrange them.
- If you want Windows to organize your icons alphabetically by name, date modified, size, or type, you can easily sort your icons. Just right-click the desktop, select Sort by, and choose a pattern.
Using DeskLock on Windows
-
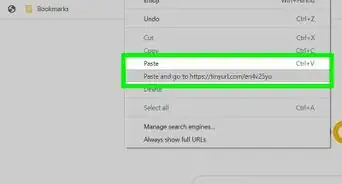
1Download DeskLock from https://www.majorgeeks.com/files/details/desklock.html. DeskLock is a free, lightweight tool that keeps your Windows desktop icons in place. You can easily toggle the app on and off using its icon on the system tray. To download the app, just click the Download Now button near the top of the page and save the ZIP file to your computer.
-
2Install DeskLock. You should now have a file called DeskLock.zip in your downloads folder. Here's how to install DeskLock from that file:
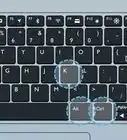
- Press Windows key + E on the keyboard to open File Explorer.
- Double-click the Downloads folder.
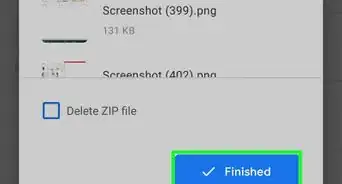
- Right-click DeskLock.zip and choose Extract All…
- Choose a location to store the new DeskLock files. You can keep the default location in your Downloads folder if you'd like.
- Click Extract.
- Double-click the DeskLock folder to open it.
-
3Arrange your icons how you want them to stay. You can do this by clicking and dragging the icons to the desired positions.
- If your icons keep switching back to their previous positions, right-click the desktop, select View, and remove the checkmark from "Auto arrange icons."
-
4Double-click DeskLock.exe to run DeskLock. The app will start immediately. You'll know the app is running when you see an icon of a computer screen with a padlock on it in the system tray (near the clock).
- If you don't see this icon in the system tray, click the up-arrow (^) left of the clock and volume icons to see those which are hiding.
- If you restart your computer, you'll need to restart DeskLock, as it won't start up immediately.
-
5Right-click the DeskLock icon in your taskbar. It's that computer screen with a padlock near the clock at the bottom-right.
- DeskLock should be enabled by default. If it's disabled you'll see a green icon with an "S" inside instead of the computer screen with padlock. If that's what you see, right-click that instead.
-
6Click Enabled toggle DeskLock on or off. If there is a checkmark next to "Enabled," the icons on your desktop are locked. If you remove the checkmark, DeskLock will disable and you'll be able to move your desktop icons.
Using a Mac
-
1Right-click a blank area of the desktop. A menu will expand. If you've found that the icons on your Mac are changing positions or are completely rearranged each time you reboot, you can correct the issue by changing your sorting preferences.[3]
- There is no way to completely lock your icons in one position on a Mac—you'll always be able to click and drag your icons to another position. However, if you choose to sort your icons in a particular order, they'll remain in that order unless you change your sorting preferences.
-
2Select the Sort by menu. Now you'll see options for sorting your icons.
-
3Select None to prevent your Mac from automatically sorting your icons. If you choose this option, your Mac will not try to rearrange your icons automatically.[4]
- To keep your icons arranged neatly into a grid, select Snap to Grid under "None" at the top of the menu.
- If you'd rather your Mac sort your icons in a particular order and keep them in that order indefinitely, you can choose another sorting method, such as Name (which keeps your icons in alphabetical order) or Date added (which will always add newest icons to the last position on the desktop). Keep in mind that if you add new icons to the desktop, macOS will move them into the sorting order automatically.
-
4Arrange your icons how you'd like them to appear. Now that your Mac won't rearrange your icons automatically, the order you choose will stay in that order.


References
- ↑ https://support.microsoft.com/en-us/topic/how-to-arrange-or-move-icons-on-the-desktop-70e4d22a-d760-5585-449f-2a14c417f84c
- ↑ https://www.dell.com/support/kbdoc/en-us/000140673/desktop-icons-rearrange-themselves
- ↑ https://support.apple.com/guide/mac-help/ways-to-organize-files-on-your-mac-desktop-mh35951/mac
- ↑ https://www.imore.com/how-clean-mac-desktop
About This Article

1. Right-click the desktop.
2. Select View.
3. Remove the checkmark from "Auto arrange icons."