X
wikiHow is a “wiki,” similar to Wikipedia, which means that many of our articles are co-written by multiple authors. To create this article, 9 people, some anonymous, worked to edit and improve it over time.
This article has been viewed 26,093 times.
Learn more...
Instead of hiding your spare and beloved buttons in the sewing basket, tip them out and turn them into wearable masterpieces. Button bracelets are easy to make and they're always fun to wear. There are different ways of transforming your buttons into bracelets, it just depends on what you find most suitable.
Steps
Method 1
Method 1 of 3:
Simple button bracelet
-
1Gather your spare buttons. Select the ones that you think will make a nice bracelet. This may be by color, by sizes, by shape, etc., or a combination of these. Planning the layout is half the fun.
-
2Cut a long piece of string. It should be a bit longer than your wrist, so measure that first.Advertisement
-
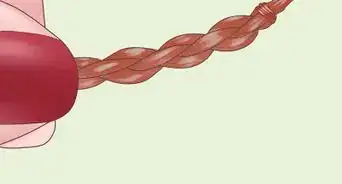
3Thread the string through the button holes. Be creative and make patterns as suggested to you by the buttons you have.
- You can also add knickknacks such as beads, charms, etc.
-
4Measure the progress of the bracelet by holding it around wrist now and then. When you get near to the end, you'll probably find that you need to add or take off buttons accordingly. Continue until the bracelet fits your wrist comfortably.
-
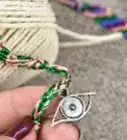
5Tie the string tightly, and there you go! An easy -to-make button bracelet. Show it off to your friends and family.
- You may want to burn the ends of the string to prevent fraying. Be careful if you do this.


Advertisement
Method 2
Method 2 of 3:
Stretchy button and bead bracelet
-
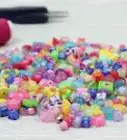
1Select the buttons and beads. For a standard size bracelet, you'll need around 20 or so buttons, and a matching amount of beads. Choose the buttons and beads according to your pattern preference; some suggestions are:
- Choose all one color or a varying range of the same color.
- Choose buttons in one color, beads in another color.
- Choose multiple colors, such as changing color patterns or a rainbow spectrum.
- Choose all the same size or choose differing sizes. These can be placed on randomly or in a set size order but do plan this ahead. (It is recommended that the bead size remain the same, to provide a pleasing consistency to the eye.)
-
2Prepare the elastic cord. Cut the cord to about 25cm (10 inches) in length. Tie a knot at one end, to prevent the buttons and beads from slipping off as you make the bracelet. Tie this about 5cm (2 inches) in from one end of the elastic cord.
-
3Thread the button, then a bead, onto the elastic cord. Thread the button so that it stands upright, rather than sitting flat along the cord; use the bead to help keep it in this position. Continue doing this according to any pattern (colors or sizes) you've chosen to follow, making sure that you alternate between a button and a bead.
-
4Keep threading until the buttons and beads fit neatly around your wrist. You'll need to check this now and then as you get closer to the end of making the bracelet. If you don't need all of the buttons and beads, that's fine––use them for your next project. Leave at least 5cm (2 inches) at the finishing end of the elastic.
-
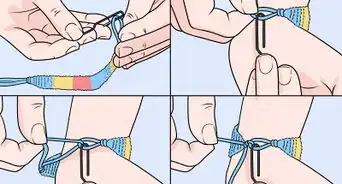
5Tie the two elastic ends together. Use a double knot or even a reef knot, for certainty. If the bracelet is not tied together properly, and it breaks, it can be hard to retrieve all of the lost pieces.
-
6Snip off any excess elastic ends that stick out after you've tied the knot. The bracelet should now sit tight and neat, with all of the buttons and beads arranged snugly around the cord.
-
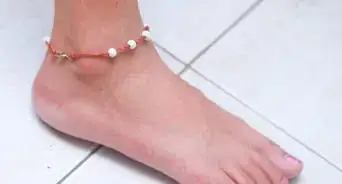
7Wear. To put on, simply stretch it gently and only enough to get it over your hand. Wear with pride; you made this!


Advertisement
Method 3
Method 3 of 3:
Button charm bracelet
-
1Select the buttons. For this piece, choose a very eclectic mixture of your finest, most fun and funkiest buttons. This is a showpiece, to show off buttons in the same manner as a charm bracelet.
-
2Choose a lineup for the buttons. On a flat surface, work out the order in which you'd like the buttons to be placed. It is important to do this now, so that you can switch buttons around and out until you're happy with how the bracelet looks.
-
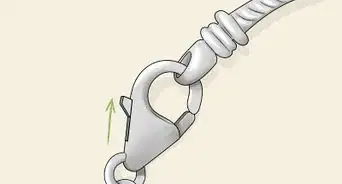
3Thread the needle. Sew a clasp finding onto the thread first. Tie a knot either side to keep it in place.
-
4Pull the needle through the first button, up through one hole, then down the next. It should sit firmly in place next to the clasp finding.
-
5Thread the next button in place in the same way. Continue following the pattern you've arranged from the buttons.
-
6Check the fit now and then. When you reach the end, be sure to leave enough thread in place for finishing with the other part of the clasp finding. Stitch it on and the bracelet is complete.
-
7Try the bracelet on. Check that it is secure and push the buttons into place, as desired.


Advertisement
Community Q&A
-
QuestionWhere can I get end pieces?
 Community AnswerYou could get them online, at craft stores, and pretty much any store that sells beading supplies. I'm sure if you look very closely you could find them at a store like Walmart or Target, but your best bet is a craft store.
Advertisement
Warnings
- Keep buttons and jewelry made from buttons away from children under the age of 3; there is a risk of small objects being swallowed.⧼thumbs_response⧽
Advertisement
Things You'll Need
Method 1:
- Buttons
- String
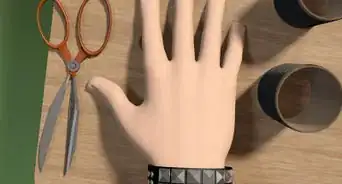
- Scissors
Method 2:
- Elastic cord, approximately 25cm (10 inches) in length
- Scissors
- Buttons, about 20
- Beads, about 20
- Flat, clean work surface
- Something to hold the beads and buttons in
Method 3:
- 35 to 50 buttons of all sorts and kinds
- Needle and embroidery or strong thread (monofilament thread is a good choice too, as it's strong and invisible)
- Scissors
- Clasp finding
About This Article
Advertisement