This article was co-authored by wikiHow staff writer, Amber Crain. Amber Crain has been a member of wikiHow’s writing staff for the last six years. She graduated from the University of Houston where she majored in Classical Studies and minored in Painting. Before coming to wikiHow, she worked in a variety of industries including marketing, education, and music journalism. She's been a radio DJ for 10+ years and currently DJs a biweekly music program on the award-winning internet radio station DKFM. Her work at wikiHow supports her lifelong passion for learning and her belief that knowledge belongs to anyone who desires to seek it.
There are 7 references cited in this article, which can be found at the bottom of the page.
This article has been viewed 32,616 times.
Learn more...
Lit candles can make any home feel warm and cozy. However, if you use them frequently, the cost will start adding up. You can save a lot of money by making your candles at home, since the materials are quite cheap. You can easily add color and scent to your candles, as well. With a little time and practice, you will be able to create many different kinds of candles in any color and scent you desire.
Steps
Making Rolled Candles
-
1Gather your supplies.[1] Rolled candles are one of the easiest and fastest types to make, so this is a perfect first project for beginners. Before you begin, be sure to cover your work area with butcher paper or newspaper. This procedure will create two 8 x 7/8-inch rolled taper candles. You will need:
- One 8 x 16-inch beeswax sheet
- One 10-inch-length braided wick
- 1 to 2 ounces paraffin wax (optional, for priming the wick)
-
2Cut the beeswax and soften it with a hair dryer.[2] Use a straightedge ruler and a craft knife to cut the beeswax sheet into 2 8-inch squares. The wax now needs to be softened slightly, which you can do with a hair dryer.
- Make sure to set the hair dryer on “low” to avoid melting the wax too much.
Advertisement -
3Push the wick down onto the wax square and roll. Locate one edge of the wax square, then press the wick down into it, making sure that 1 inch of the wick extends from each side. Start rolling the wax. As you roll, make sure to keep the edges even and keep the rolling wax tight around the wick.[3]
- For the tightest roll, try placing a piece of waxed paper between your fingers and the beeswax. Keep the waxed paper moving so that it doesn’t get stuck in the rolled beeswax.
- Using the waxed paper will also protect the beeswax from the warmth of your fingers, which can complicate the roll by softening the wax so much that it comes hard to work with.
-
4Seal the candle.[4] After you’ve finished rolling, put pressure on the edge of the wax with your fingers. Push the edge into the candle, which will seal it. If the wax is too hard to work with, use the “low” heat setting on your hair dryer to soften it up.
- The first candle is complete.
- Repeat the exact same actions with the second square of beeswax to create the second candle.
-
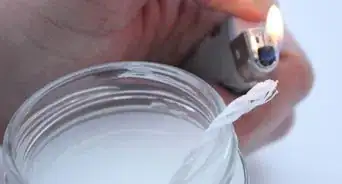
5Prime the wicks.[5] If you aren’t using pre-primed wicks, you’ll need to prime yours before lighting the candles. Priming will keep the wick rigid, which means it will burn better. You do this by soaking the wick in wax, which removes any air bubbles that might exist.[6] The easiest way to prime is to use two small pieces of wax sheet and simply press them around the wicks.
- An alternate method is melting paraffin wax in a double boiler over medium heat.
- Once it’s melted, dip the ends of the wicks into the wax for 5 seconds.
- Allow them to cool completely before lighting them.
-
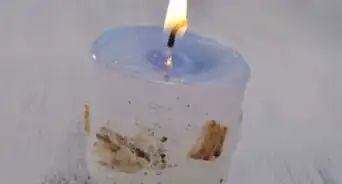
6Trim the wicks.[7] Once the wicks are primed, trim both to ¼ inch. This is the optimal length for burning, so that the flame doesn’t get too large. The candles are now ready to light. When lit, the flames should be about 1 to 2 inches high. The wax should pool around the wick. It should not spill over the side.[8]
- If the wax is spilling over, the wick you’ve used is too small for the diameter of the candle.
- If there is very little wax pooling around the wick and it’s not burning properly, the wick is too large for the diameter of the candle.


Pouring Jar Soy Candles
-
1Gather your supplies. This procedure will create 1 jar candle. If you decide to use a glass receptacle that isn’t a mason jar, be sure that the thickness of the glass is similar. Thin glass can crack once the candle is lit. Before you begin, cover your work area with butcher paper or newspaper.[9] You will need:
- 1 pound bag of soy wax flakes
- Wax colorant; chips, bars or in liquid form
- Candle pouring pot
- Medium sized wicks and wick stickums
- Wick holder sticks
- Wooden spoon
- 1 Pint-sized mason jar – 5 inches (height) x 3 inches (width)
- Scent oil of your choice (optional)
-
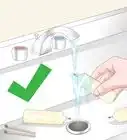
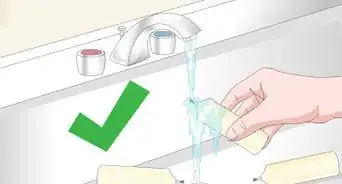
2Prepare your jars. Remove the inner seal part of the mason jar lid, since the finished candles won’t make use of them. Clean your jars with warm water and mild soap. Wipe them completely dry, especially the inside, where the wax will be poured. For best results, the wax should be poured into a clean, dry vessel.[10]
- One pint-sized mason jar will use almost the entire bag of wax flakes.
- If you want to make multiple candles of this size, multiply the supplies accordingly.
- You will need about a pound of wax flakes for each candle.
-
3Attach the stickum to the wick. Run your fingers along the wick to smooth it out, since they often become crinkled in their packaging – you will need the wick to be as straight as possible. Prepackaged wicks will come with a thin, circular metal base already attached to the end.
- The wick stickum, which is essentially a double-sided sticky sheet of paper, will also be circular in shape.
- Peel it off its packaging and stick it directly onto the bottom of the metal base.[11]
-
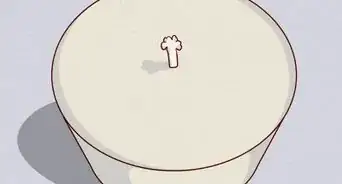
4Drop the wick into the jar. The stickum you’ve just attached will keep the wick and its metal base firmly attached to the bottom of the mason jar. Drop the wick into the jar, metal base first. Aim for the center, but it doesn’t have to be exact.
- Use the end of a spoon or some other utensil to press the metal base securely to the glass.
- Once you pull the spoon away, the stickum will keep the wick and its metal base firmly in place.
-
5Attach the wick holders. Wick holders are two small wooden rods with rubber bands on each end. These will hold your wicks straight up in the middle of the jar during the pouring process and while the wax is setting. Try to balance the wick as close to the center as possible to avoid a crooked wick.[12]
- If a wick is crooked and the wax sets, it won’t burn straight or well.
- Once you put the holders in place, you won’t be removing them for about 24 hours to allow the wax to fully set.
-
6Melt the wax flakes. Pour all of the flakes into a large pot. Place the pot on your stove and turn the burner on the lowest heat possible. You will leave it at this setting during the entire melting process. You will need to keep the wax melted, but never boiling.
- Stir the wax and continue stirring almost constantly as the max melts all the way down.
- White wax flakes will look yellowish when melted down, so don’t be alarmed when you see that.
-
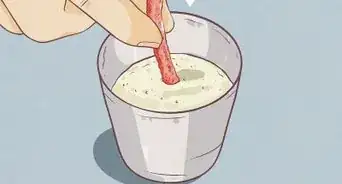
7Add the colorant to the wax. If you’re using chips or blocks for colorant, use a knife to break them up into chunks the size of small marbles. Refer to the packaging of your product, since it may have specific instructions for ratios to achieve specific shades. Otherwise you can experiment. Pour in some of the chips, stir well and then observe the shade. If you want the color to be brighter, add a little more. Stir well.[13]
- You can start by using the primary colorants (red, blue, yellow) straight, or you can mix them to create secondary colors.
- Achieving exact colors and shades will take a bit of practice.
- You can add as much color as you want – the colorant won’t have a negative effect on the soy wax.
-
8Add the scent. Scented candle making oils are sold in all craft stores and come in almost every fragrance you can imagine. Choose your favorite or try something new. The ratio of scent is usually 1 ounce of oil for every pound of wax.
- Since you’re working with about a pound of wax, you will need to measure out 1 ounce of your fragrance oil.
- Pour it in and stir vigorously.[14]
-
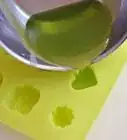
9Pour the candle. Remove the wax from the heat. For best results, allow the wax to cool for about 20-30 minutes before you pour it into the jar. It should be thickened but still pourable. The consistency you want is close to a fruit smoothie in thickness. If you pour the wax too soon, before it’s cooled down sufficiently, the center of your candle may end up sagging or cracking once it has set.[15]
- Pour the wax carefully into the mason jar, stopping just under the base of the lid, leaving about 1 to 2 inches of empty space at the top.
- Work carefully to pour around the wick. Try not to nudge it.
- If you do, move it immediately back into place as best as you can.
-
10Allow the candle to cure for 24 hours. After you’ve poured the wax, leave the candle to set, with the wick holders still holding the wick firmly in place. Unless you live in a very hot climate, your candle will probably be cured slightly sooner than the full 24 hours but for best results, give the wax that much time to set.[16]
- After 24 hours, remove the wick holders.
- Trim the wick to approximately ½ inch.
- Your mason jar candle is now ready to light.


Creating Hand-Dipped Tapers
-
1Gather your supplies.[17] This project requires few supplies, making it a very cheap project to try at home. Make sure you have a place where your tapers can hang, undisturbed, for at least 24 hours. This will allow them time to fully set. You will need:
- 10 to 13 inch wicking
- 1 pound of beeswax
- Nuts or some other small objects to weight the tapers
- 1 coat hanger
-
2Melt the wax in the double boiler. For this project, a large stock pot will work well as the main vessel on the double boiler. This will be your dipping vat. Use a candy thermometer to watch the temperature. Once the wax has reached 165 °F (73.9 °C), it’s ready to use.
- You will need to maintain this temperature throughout the procedure.[18]
-
3Cut the wicks into 16 inch (40.6 cm) pieces and weight them. Each piece of 16 inch (40.6 cm) wick will create 2 tapers. Tie the nuts onto each end of the wick pieces, since the tapers will need to be weighted during the curing process. These weights will hold the wick taut.
- About halfway through the process you will cut these weights off.
- Initially the tapers need to be weighted in order to form correctly.
-
4Construct a makeshift dipping rig. Use coat hanger wire and pliers to create a rig that will allow you to dip the tapers into the wax. If you don’t have the wire, you can use anything you have around that will allow you to drape one piece of wicking over it, with one weighted nut hanging down on each side.[19]
- Each side will be dipped at the same time, so the tapers will be made in pairs.
- Your rig needs to be wide enough (at least 2 inches) to keep the tapers separated from each other during the dipping and curing process.
-
5Dip the weighted wicks into the melted wax. Don’t try to make your tapers any taller than your dipping vat. Allow at least 2 inches of undipped wick at the top, near the rig. Carefully lower your first wick into the melted wax using your rig, dipping the two sides of the string simultaneously. Make sure your motions are smooth and continuous. Dip and then pull out without pausing. Allow several minutes of cooling. Then dip again.[20]
- Repeat this several more times.
- Be sure to wait several minutes between dips to allow the wax time to cool enough.
- If you don’t, the wax will start falling off the wick.
-
6Cut the weights off. After you’ve reached a substantial thickness and the wick doesn’t need a weight to be held taut, snip the nuts off. Repeat the dipping and cooling process 2 to 3 more times after removing the weights. This will seal the bottoms of the tapers.[21]
- If you need a specific thickness to fit a particular taper holder, use a ruler to measure the holder.
- Then dip the taper accordingly, until you reach the desired thickness.
-
7Hang the tapers to cool. After you’ve reached your desired thickness, hang the tapers in a place where they won’t be disturbed and allow them to set. Give them at least 24 hours before trying to use them. When they’ve cured completely, snip the wicks to separate the two tapers and trim each wick to be ¼ inch.
- Your tapers are now ready to light.[22]
- If you won’t be using your tapers right away, leave them hanging in pairs, just as they are, until you’re ready to use them.
- This will help them remain perfectly straight.


References
- ↑ http://www.countryliving.com/diy-crafts/how-to/a2652/rolled-candles-0109/
- ↑ http://www.countryliving.com/diy-crafts/how-to/a2652/rolled-candles-0109/
- ↑ http://www.countryliving.com/diy-crafts/how-to/a2652/rolled-candles-0109/
- ↑ http://www.countryliving.com/diy-crafts/how-to/a2652/rolled-candles-0109/
- ↑ http://www.countryliving.com/diy-crafts/how-to/a2652/rolled-candles-0109/
- ↑ https://www.fromnaturewithlove.com/library/candlewicks.asp
- ↑ http://www.countryliving.com/diy-crafts/how-to/a2652/rolled-candles-0109/
- ↑ https://www.fromnaturewithlove.com/library/candlewicks.asp
- ↑ http://somethingturquoise.com/2011/11/04/diy-poured-mason-jar-candle/
- ↑ http://somethingturquoise.com/2011/11/04/diy-poured-mason-jar-candle/
- ↑ http://somethingturquoise.com/2011/11/04/diy-poured-mason-jar-candle/
- ↑ http://somethingturquoise.com/2011/11/04/diy-poured-mason-jar-candle/
- ↑ http://somethingturquoise.com/2011/11/04/diy-poured-mason-jar-candle/
- ↑ http://somethingturquoise.com/2011/11/04/diy-poured-mason-jar-candle/
- ↑ http://somethingturquoise.com/2011/11/04/diy-poured-mason-jar-candle/
- ↑ http://somethingturquoise.com/2011/11/04/diy-poured-mason-jar-candle/
- ↑ http://www.candletech.com/candle-making/how-to-make-hand-dipped-taper-candles/
- ↑ http://www.candletech.com/candle-making/how-to-make-hand-dipped-taper-candles/
- ↑ http://www.candletech.com/candle-making/how-to-make-hand-dipped-taper-candles/
- ↑ http://www.candletech.com/candle-making/how-to-make-hand-dipped-taper-candles/
- ↑ http://myhealthygreenfamily.com/blog/wordpress/the-simple-art-of-making-taper-candles/
- ↑ http://www.candletech.com/candle-making/how-to-make-hand-dipped-taper-candles/
- Videos provided by simplylaceXO
About This Article