This article was co-authored by wikiHow Staff. Our trained team of editors and researchers validate articles for accuracy and comprehensiveness. wikiHow's Content Management Team carefully monitors the work from our editorial staff to ensure that each article is backed by trusted research and meets our high quality standards.
There are 7 references cited in this article, which can be found at the bottom of the page.
The wikiHow Video Team also followed the article's instructions and verified that they work.
This article has been viewed 156,743 times.
Learn more...
If you're having trouble finding the perfect candle or are just in the mood for a fun do-it-yourself project, consider melting wax to create your own candles. Using soy, bee, or paraffin products, you can melt your wax using a double boiler or microwave, add the fragrance and colors of your choice, and pour them into a container to cool.
Steps
Breaking up Your Wax
-
1Purchase soy or beeswax for your candle wax. Soy waxes mix well with scents and colors and are often naturally composed from soybean oil, although some are mixed with the potentially toxic paraffin—always check the ingredients! Beeswax is completely natural, although it doesn't mix well with other fragrances.[1]
- If you have leftover wax from old jar candles, use a spoon to dig out the wax and divide them up by scent.
- Paraffin waxes are classic candle-making waxes that easily mix with other scents and colors. However, they are petroleum byproducts, meaning they are potentially toxic—avoid using these waxes whenever possible.
-
2Break up your wax into a bowl if it's not in pellet form. If you have larger pieces of wax, take a small, sharp knife and cut your wax up into pieces. Each piece should be about 1 inch (2.5 cm) wide or less.
- If you're wax is in pellet form, you can skip this step.
Advertisement -
3Chop up 3 ounces (85 g) of crayon wax for color. If you want to add some color to your wax, use a cheese grater, pencil sharpener, or knife to create some shavings—enough to fill a 3 ounce (85 g) mason jar should be fine.[2]
- If you want, you can mix multiple colors.
-
4Find the flash and melting point of the wax you're using. Knowing the melting point of your wax before heating it will give you the best results. Never approach the flash point, as this is the temperature that the wax can combust if exposed to flame.[3]
- Beeswax has a melting point range of 144 to 147 °F (62 to 64 °C) and a flash point of 400 °F (204 °C).
- Soy wax melts within the 120 to 180 °F (49 to 82 °C) range depending on the specific blend. Flash points are variable—check the label or supplier.
- Paraffin wax melts above 99 °F (37 °C) and has a flash point of 390.2 °F (199.0 °C) without additives and 480.2 °F (249.0 °C) with additives.


Heating Your Wax in a Double Boiler
-
1Create a double boiler to melt your wax. Place a large pot onto an element. Fill it up with about 2 inches (5.1 cm) of water. Afterwards, place a smaller pouring pot into the large pot with water.[4]
- For safety, always use an electric stove—never gas.
-
2Put 1⁄2 pound (230 g) of wax into your double boiler. This is the perfect amount to fill an 8 ounce (230 g) mason jar. If you're using colors, add your crayon shavings now.[5]
-
3Heat your wax on 320 to 340 °F (160 to 171 °C) for 10 to 15 minutes. This is also known as medium-low heat, or 3 to 5 on a numerical element scale. Keep an eye on the temperature using a cooking thermometer and adjust the heat accordingly. Stir the wax using a wooden spoon every 1 minute or so. Break up any large chunks of wax with your spoon.[6]
- If the water in the large pot begins to evaporate, add more as needed.
- If your wax exceeds 340 °F (171 °C), remove it from heat until it falls back within the proper range.
-
4Add fragrances after your wax is melted. Gently pour the fragrance into your wax as it continues to heat. Stir it with your wooden spoon for approximately 30 seconds to distribute it evenly into your wax.[7]
- If you purchased wax that is specifically designed for candles, they should have instructions for that amount of fragrances required per 1 pound (0.45 kg) of wax.
- If your fragrance isn't mixing properly, try increasing the temperature to 365 °F (185 °C).
- For general wax products, 1 ounce (28 g) for each 1 pound (0.45 kg) is a safe bet.


Heating Your Wax in a Microwave
-
1Put 1⁄2 pound (230 g) of wax into a microwave-safe bowl. This will fill an 8 ounce (230 g) mason jar. If you're adding colors to your wax, pour in your crayon shavings.[8]
- If you're using plastic, be sure to use containers that are marked as "microwave-safe." Ceramic and glass dishes are usually fine, but you should still check for "microwave-safe" or "heatproof" labels on their packaging.
-
2Heat your wax in the microwave for 3 to 4 minutes. After this time, take the wax out and stir it around with a spoon. Take the temperature and determine that it hasn't exceeded the melting or flash point. Continue heating your wax in 2-minute intervals until it's fully melted.[9]
- Be sure to keep checking on your wax about every 30 seconds throughout the process.
-
3Add fragrances once your wax is fully melted. Remove the bowl of wax from the microwave and gently pour your fragrance into the melted wax. Stir it with a small spoon to create an even consistency and to blend the ingredients.[10]
- Check fragrance instructions from your wax supplier prior to mixing it in. Most include instructions for the amount of fragrance required per 1 pound (0.45 kg) of wax, which is typically 1 ounce (28 g).
-
4Reheat the wax for 2 minutes. After you add your desired fragrances and stir them in thoroughly, put the bowl of wax back into the microwave. Heat it for 2 more minutes so all of the ingredients meld together, then carefully remove the bowl of melted wax from the microwave and stir it one more time.


Pouring the Melted Wax
-
1Lay down paper towels or newspaper on a flat surface. Melted wax droplets can be messy, so you need a nice work area. Be sure to have your containers, jars, and wicks ready and within reach—wax droplets can dry in 1 to 2 minutes.[11]
-
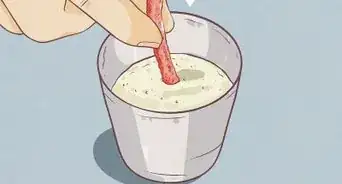
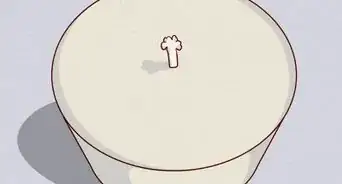
2Stick the wick into your container. If your wick has a sticker attached to the bottom, use this to adhere it to the bottom of your candle container. If not, place a dab of super glue on the bottom and attach the wick's metal tab to it. Hold the wick upwards for 2 to 3 minutes to give the glue time to set and ensure it dries in the proper position.[12]
- If you'd like, you can use your melted wax to adhere the wick to the container.
-
3Take your wax mixture off the heat and cool to 266 to 284 °F (130 to 140 °C). This is the optimal temperature to pour the wax into a container. Place the small pot onto a flat surface and keep an eye on the thermometer. It should cool sufficiently in about 3 to 5 minutes.
-
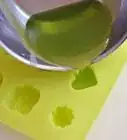
4Pour the wax gently into the container while holding the wick. As you pour the pot, keep a firm hold on the wick so that it remains in the center of the container in an upright position. Leave a bit of wax in the pot for later.[13]
- Don't pull on the wick too hard or you could break it from the container.
-
5Secure the wick using a writing utensil if it's swaying. If your wick is swaying in the wax and not standing up straight, place two pencils horizontally on top of the container and secure the wick in between them. The wick doesn't have to be completely secured—just enough to stay in place while the wax sets.[14]
- Be sure to secure your wick if it's off-center—letting it set in this position means it won't burn properly.
-
6Wait for about 2 to 3 hours for the wax to set. As the wax begins to set, you will notice a sinkhole forming in the center. Once it has completely set, reheat the leftover wax and add some of it to the top of the candle—just enough to fill the sinkhole. Once the hole is filled, stop pouring the wax—too much will create another sinkhole.[15]
- For the best wax setting, leave your candle out set overnight at room temperature.
-
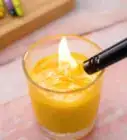
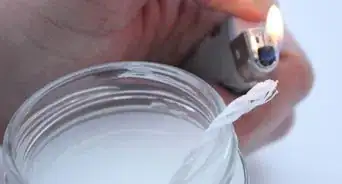
7Trim your wick down to 1⁄4 inch (0.64 cm). Keep your wick at a manageable length so that it doesn't burn too large of a flame. Hold the wick upright with your fingers and snip it down to size using a pair of scissors.[16]
- If you light your wick and the flame is bigger than 1 inch (2.5 cm), your wick is too long.


Expert Q&A
-
QuestionCan you add scent to melted wax?
 Joy ChoJoy Cho is the Founder and Creative Director of the lifestyle brand and design studio, Oh Joy!, founded in 2005 and based in Los Angeles, California. She has authored six books and consulted for creative businesses around the world. Joy has lectured on business, leadership, and entrepreneurship at conferences and companies such as AltSummit, Pinterest, Target, and Hallmark, while her home and studio have been featured in magazines such as House Beautiful, Parents, and Domino. She has also been named one of Time's 30 Most Influential People on the Internet multiple times and has the most followed account on Pinterest with more than 14 million followers.
Designer & Style Expert, Oh Joy!Sure you can! You can use a variety of essential oils to do that, but make sure you're buying candle-grade oils with the fragrances that you wish to add. -
QuestionCan you melt wax on a gas stove?
 wikiHow Staff EditorThis answer was written by one of our trained team of researchers who validated it for accuracy and comprehensiveness.
Staff AnswerwikiHow Staff EditorStaff AnswerYes, but you must use a double boiler in order to do it safely. If you try to melt the wax directly over the fire, it could ignite or release flammable vapors. In general, it is safest to use an electric stove, since the flames from a gas stove are more likely to ignite the wax if some of it accidentally splashes out. -
QuestionCan you melt wax in a glass jar?wikiHow Staff EditorThis answer was written by one of our trained team of researchers who validated it for accuracy and comprehensiveness.
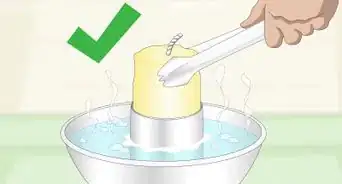
Staff AnswerwikiHow Staff EditorStaff AnswerIf you’re trying to melt old candle wax in its original jar, you can do so by carefully placing the jar in hot water inside a double boiler. Avoid letting the water get into the jar. You can also melt wax in a glass jar in the microwave as long as the jar is made of a heat-safe glass, such as Pyrex.
Warnings
- Don't add too much fragrance! The candle will be over-powering & won't light up.⧼thumbs_response⧽
- Always have a fire extinguisher close-by and be sure you know how to use it.⧼thumbs_response⧽
Things You'll Need
- Wax (soy, bee, paraffin)
- Wick
- Cooking thermometer
- Large cooking pot
- Small cooking pot
- Double boiler
- 8 ounce (230 g) mason jar

References
- ↑ https://www.artofmanliness.com/articles/diy-chandlery-how-to-make-your-own-candles/
- ↑ https://www.apartmenttherapy.com/how-to-make-candles-apartment-therapy-tutorials-217768
- ↑ https://support.candlescience.com/hc/en-us/articles/201390030-What-does-the-fragrance-flashpoint-mean-
- ↑ https://youtu.be/1Vh0A0ny_5E?t=33s
- ↑ https://www.artofmanliness.com/articles/diy-chandlery-how-to-make-your-own-candles/
- ↑ https://www.artofmanliness.com/articles/diy-chandlery-how-to-make-your-own-candles/
- ↑ https://support.candlescience.com/hc/en-us/articles/201389130-How-to-melt-wax-using-a-double-boiler-
- ↑ https://www.artofmanliness.com/articles/diy-chandlery-how-to-make-your-own-candles/
- ↑ https://www.apartmenttherapy.com/how-to-make-candles-apartment-therapy-tutorials-217768
- ↑ https://support.candlescience.com/hc/en-us/articles/201389130-How-to-melt-wax-using-a-double-boiler-
- ↑ https://www.artofmanliness.com/articles/diy-chandlery-how-to-make-your-own-candles/
- ↑ https://www.artofmanliness.com/articles/diy-chandlery-how-to-make-your-own-candles
- ↑ https://www.artofmanliness.com/articles/diy-chandlery-how-to-make-your-own-candles/
- ↑ https://www.artofmanliness.com/articles/diy-chandlery-how-to-make-your-own-candles
- ↑ https://www.candlescience.com/learning/how-to-make-a-soy-candle
- ↑ https://www.candlescience.com/learning/how-to-make-a-soy-candle
About This Article
To melt wax for candles, start by cutting it up into pieces no bigger than an inch wide with a sharp knife to make it easier to melt. If you want to add color to your wax, grate about 3 ounces of crayon wax in too. Then, create a double boiler by placing a large pot filled with about 2 inches of water onto an element and placing a smaller pot inside. Next, put about half a pound of wax into the smaller pot and heat the wax at 320 to 340 degrees Fahrenheit for 10 to 15 minutes. Avoid heating the wax anywhere near 390 degrees to ensure it doesn’t catch fire. You can also add fragrances once your wax has melted if you want your candles to smell nice. For more tips, including how to melt candle wax in a microwave, read on!