This article was co-authored by wikiHow Staff. Our trained team of editors and researchers validate articles for accuracy and comprehensiveness. wikiHow's Content Management Team carefully monitors the work from our editorial staff to ensure that each article is backed by trusted research and meets our high quality standards.
There are 7 references cited in this article, which can be found at the bottom of the page.
The wikiHow Video Team also followed the article's instructions and verified that they work.
This article has been viewed 115,163 times.
Learn more...
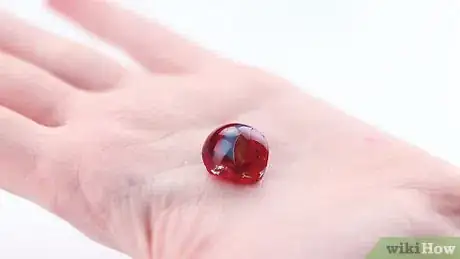
Also called "fried marbles," these beauties have a network of shattered glass inside them. These are just ordinary marbles heated to make the glass expand, then cooled rapidly. The outside of the glass shrinks as it cools, which collides with the hot, expanded interior to crack it.[1]
Steps
Cracking Marbles
-
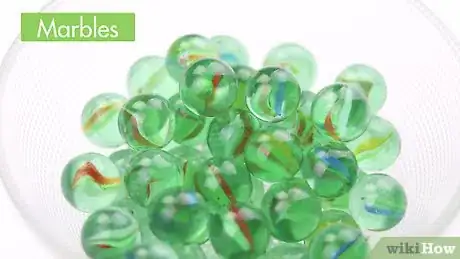
1Choose your marbles. You can use any clear, mono-color marbles, or marbles with a cat's eye pattern. Opaque marbles won't look any different when cracked, and two-tone marbles will just crack in half.[2] You may want to start with five or six marbles to make sure you like the effect.
- You can use "flat marbles" and other decorative glass pieces as well, but they have a higher chance of breaking.
-
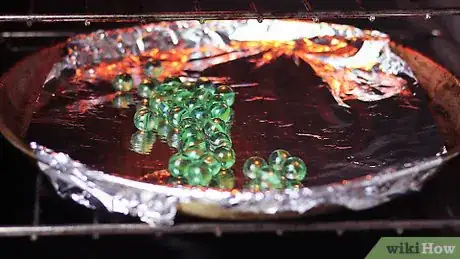
2Place the marbles in an oven or toaster oven. Lay the marbles in a single layer on a baking tray with raised edges. Use a stainless steel pan, not one with a nonstick surface.[3]Advertisement
-
3Bake at 180ºC for 20 minutes. If your oven uses Fahrenheit, set it to 350º instead.
- Some craftspeople prefer heating as high as 260ºC (500ºF).
-
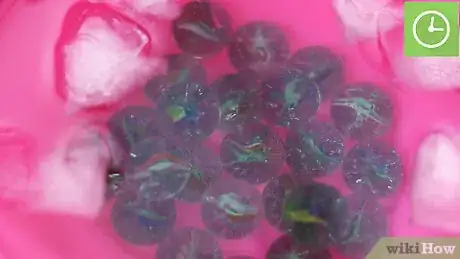
4Set up a bowl of ice water. Fill a bowl with cold water, plus enough ice to keep it chilled.
-
5Transfer the hot marbles to the ice water. Remove the marbles from the oven carefully with oven mitts. Without touching the hot glass, use a spoon or other utensil to place them gently in the bowl of water.
- Warning: although unlikely, the hot glass could explode on contact with the water. Do not put your face over the bowl, and wear safety glasses if you'd like extra protection.
-
6Wait until the marbles crack. You should immediately hear a hissing or crackling noise when the marbles enter the water. Within a minute or so, the inside of the marbles will crack.
-
7Inspect the marbles. The marbles will cool within a couple minutes, so you can take them out by hand. Some of the marbles may have cracked apart, but most will be smooth on the outside, with cracked patterns on the inside.
- If some of the marbles only have tiny cracks, you can dry them off and repeat the process to get more cracks.[4]
Using Cracked Marbles in Jewelry
-
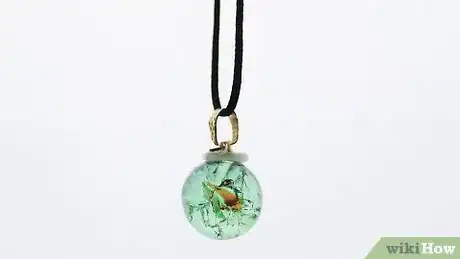
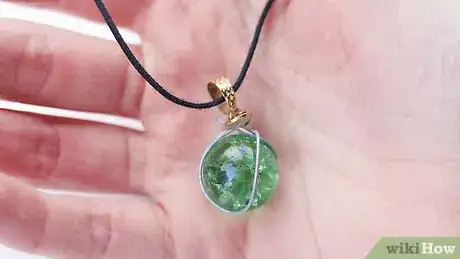
1Make a cracked marble necklace. Glue a bell cap onto a cracked marble using E6000 glue or another high strength glue that adheres to glass. Wait until it dries completely, then push a jump ring onto the ring of the bell cap. You can now fit a necklace chain onto the jump ring.
- Use needle-nose pliers for greater control. You may need two pairs of pliers, so you can grip both sides of the split jump ring and rock them back and forth to "walk" over the necklace chain.
- Find a glue tube with a long nozzle for precise control.[5]
-
2Paint flat marbles with nail polish. This adds an even more colorful sparkle when the polish reflects through the cracks in the glass. Simply coat the flat side of the marble with nail polish and let dry before using in rings or other jewelry. You may need two or three coats, depending on the opacity of the nail polish.[6]
-
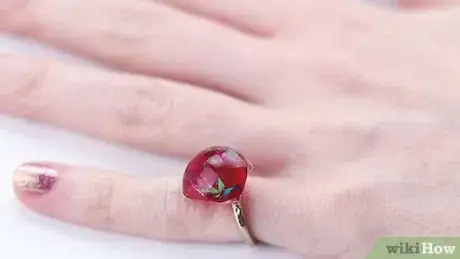
3Turn flat marbles into rings. You can easily glue cracked flat marbles onto a ring base with E6000 glue. To make your own ring base, wrap two wires around a ring mandrel, or any object the same size as your finger. Secure them by wrapping around the ring setting, then spiral the rings around each other to create a flat surface for your marble to rest on. Finish by tucking the wires around the ring beneath.[7]
-
4Make wire-wrapped jewelry. You don't need much practice to make a wire cage. Just make three or four wire loops, and bunch them together at the top by wrapping the ends of a piece of wire tightly around them. Push the marble into the center of the cage, then use pliers and wire cutters to make adjustments and loop the wire around jump rings or other jewelry components.[8]
- If you enjoy this look, there are all kinds of techniques you can learn. Try this classy wrapping pattern.
- Aluminum wire is easy to manipulate and doesn't tarnish. 20- or 22-gauge wire works well for more jewelry projects.[9]
Community Q&A
-
QuestionWhat if I don't have a glue that strong? Is there any other way I can make a necklace without it?
 Community AnswerYou should use a glue that is specifically for glass, such as 9001 High Strength Adhesive. This is not too expensive and can be found at a craft store. You can also use an epoxy, but that's a lot of extra work as you have to mix two adhesives together.
 -
QuestionCan I do it in a microwave instead?
 Community AnswerNo. The tiny air pockets in the marbles, even if they are not noticeable to the naked eye, will expand and the marble may explode.
 -
QuestionHow long do the marbles need to stay in the oven?
 Community Answer20 minutes, according to the article. You might want to check on it every once in awhile, though.
Warnings
- The marbles will be extremely hot out of the oven.⧼thumbs_response⧽
- Be careful with the cracked marbles. They will break easily if you drop them on a hard floor. These are not good toys for young children.⧼thumbs_response⧽
References
- ↑ https://van.physics.illinois.edu/qa/listing.php?id=1820
- ↑ https://www.youtube.com/watch?v=p01-Qupkc0s
- ↑ https://www.youtube.com/watch?v=J7Q4tULGOzY
- ↑ http://blog.consumercrafts.com/jewelry-main/cracked-marble-necklace/
- ↑ https://www.youtube.com/watch?v=J7Q4tULGOzY
- ↑ https://www.youtube.com/watch?v=J7Q4tULGOzY
- ↑ https://www.youtube.com/watch?v=55SNTKRpzyo
- ↑ http://entirelysmitten.typepad.com/entirelysmitten/2011/05/fried-marbles.html
- ↑ https://www.youtube.com/watch?v=J7Q4tULGOzY
- Videos provided by fancy JAPAN
