This article was co-authored by wikiHow Staff. Our trained team of editors and researchers validate articles for accuracy and comprehensiveness. wikiHow's Content Management Team carefully monitors the work from our editorial staff to ensure that each article is backed by trusted research and meets our high quality standards.
The wikiHow Video Team also followed the article's instructions and verified that they work.
This article has been viewed 79,904 times.
Learn more...
Did you ever want to wear earrings for a costume or fun, but couldn't get your ears pierced? Luckily for you, making earrings is easy. Once you know the basics, you can make all sorts of earrings to wear.
Steps
Making Fake Hoop Earrings
-
1
-
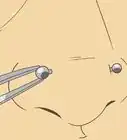
2Use a pair of wire cutters to snip a loop off. If you want to make two earrings, snip another loop off. You will end up with one (or two) metal rings. Be sure to cut the "hook" off the end of end of your metal ring as well.
- If you are using a metal wire, cut about 1 to 2 inches (2.54 to 5.08 centimeters) off with a pair of wire cutters. Wrap it around a pen or marker to shape it.[3]
- Do not use scissors, or you will dull them.
Advertisement -
3Consider slipping a pretty bead onto the wire. For a fancier earring, add a smaller bead to either side of the larger one.
- If you want a dangler use a pendant or charm from a necklace or bracelet instead.
-
4Use a pair of round nose pliers to twist each end of the wire inward. Pinch the cut end of the wire with the pliers, and fold it inward. This will make the earring "softer" and more comfortable to wear.[4] If you added any decorations to your earring, these loops will also keep them from falling off.
-
5Re-shape the earring, if needed. Use your fingers or a pen to curve the earring back into a ring shape. Keep a small gap between the two folded loops.
-
6Wear the earring. Pull the earring apart until you can slide the gap part onto your earlobe. Carefully close the earring until it stays on.


Making Magnetic Earrings
-
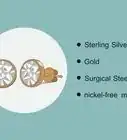
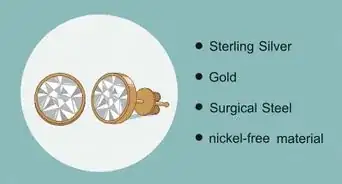
1Choose two matching items with a flat back to use for your earrings. They can be pretty beads, buttons, or even rhinestones. Choose something that is about the size of your earlobe and not too heavy.
- If you are using coat buttons or stud earrings, snip the prong or loop off using a pair of wire cutters. If you are a child, ask an adult to help you with this step.
-
2Choose four small, disk-shaped magnets. Make sure that the magnets are all the same size, and just a little bit smaller than your jewelry pieces. Try to use magnets made specifically for earrings; you can find them in the beading section of an art store. If you can't find them, any small, round magnets will work. Regular black magnets will be the least painful to wear, but they won't be very strong. Silver, "rare earth" magnets will be stronger, but they may also more painful for some people.
- If you have sensitive ears, do not use the silver-colored, "rare earth" magnets. They are too strong, and can pinch your ears.[5]
-
3Spread some glue over the back of two of the magnets. Set the other magnets aside for later.
-
4Press your two items into the glue, flat side down. Position them so that you can't see the magnet sticking out from underneath. Because the magnets are round, it doesn't matter if you glue your item upside down or right side up.
-
5Wait for the glue to dry. This should not take more than a few minutes, but you may want to refer to the glue bottle for specific drying times. Make sure that you keep the magnets far enough apart so that they don't attract each other and stick.
-
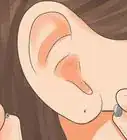
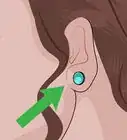
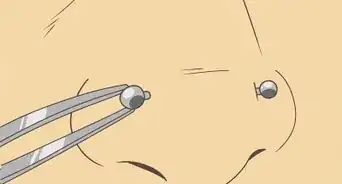
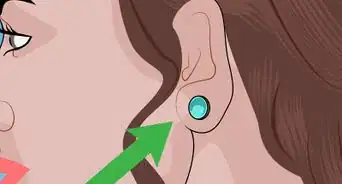
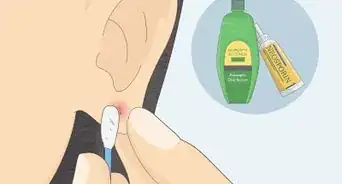
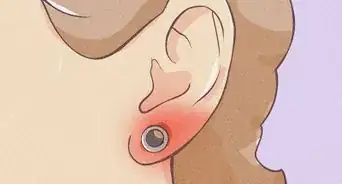
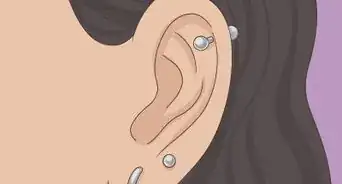
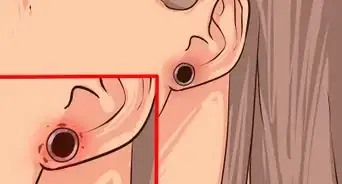
6Wear the earrings. Pick up an earring, and hold it against the front of your earlobe. Pick up one of the plain magnets and hold it behind your earlobe. If the magnets don't stick, flip the plain magnet around. Once the magnets stick, let go and put the other earring on.
- Check your earrings in the mirror, and make sure that they are facing the same direction before showing them off.


Making Clip-On Earrings
-
1Choose two matching items with a flat back to use for your earrings. They can be pretty beads, buttons, or even rhinestones. Choose something that is about the size of your earlobe and not too heavy.
- If you are using coat buttons or stud earrings, snip the prong or loop off using a pair of wire cutters. If you are a child, ask an adult to help you with this step.
-
2Choose a pair of clip-on earring backs. There are two main types of clip-on earring backs: the skinny type with a bar in front, and the larger type that are shaped like a disk. The skinny type may be more discrete, but they will be more painful to wear. The larger ones will be less painful to wear; they will also be easier to decorate.[6]
- Consider getting some clip-on earring pads. You can slip them over the back of your clip-on earrings to make them less painful to wear.[7]
-
3Spread some super glue over the front of the clip-on earring backs. Be sure to cover the entire front evenly. Don't apply any glue to your item.
-
4Press your two items into the glue, flat side down. Make sure that they are right-side-up.
-
5Wait for the glue to dry. This should not take more than a few minutes depending on the brand of glue. For more specific drying times, refer to the label on the bottle.
-
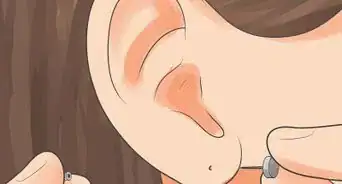
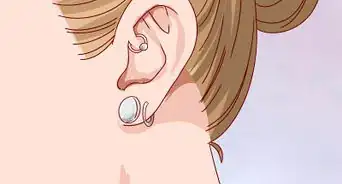
6Wear the earrings. Pull open the earring and position it over your earlobe. Close the earring. When taking the earring off, do not yank or pull it off. This can damage the earring. Instead, open the earring back first, then take the earring off.[8]


Community Q&A
-
QuestionCan I use those rings like a fake piercing?
 Community AnswerYes, just put a little glue on the back so it does not hurt or cut wherever you put it.
 -
QuestionWhere can I find items like the earring backs?
 Community AnswerYou can get them at a jewelry store or craft shop.
 -
QuestionAre there any other techniques I can do?Community AnswerYou can buy stick-on earrings or use puffy stickers. However, this is the last resort method and can end up looking tacky.
Warnings
* Don't wear clip-on and magnetic earrings for too long, or your ears may start to hurt. Give your ears a break every few hours.
Things You'll Need
Making Fake Hoop Earrings
- Spiral notebook or 20 to 24 gauge wire
- Wire cutters
- Round nose pliers
- Marker or pen (optional, for shaping)
- Beads, pendants, or charms (optional, for decorating)
Making Magnetic Earrings
- 4 small magnets
- 2 flat-backed items (beads, buttons, rhinestones, etc)
- Super glue
Making Clip-On Earrings
- 1 pair of clip-on earring backs
- 2 flat-backed items (beads, buttons, rhinestones, etc)
- Super glue
References
- ↑ https://www.youtube.com/watch?v=sfOK0c5vYfY
- ↑ http://www.linkouture.com/2015/01/how-to-make-small-hoop-earrings-diy.html
- ↑ http://www.linkouture.com/2015/01/how-to-make-small-hoop-earrings-diy.html
- ↑ https://www.youtube.com/watch?v=sfOK0c5vYfY
- ↑ https://www.apexmagnets.com/news-how-tos/diy-magnet-earrings/
- ↑ http://www.faboverfifty.com/style/fashion-not-your-mama%E2%80%99s-clip-ons/
- ↑ http://www.faboverfifty.com/style/fashion-not-your-mama%E2%80%99s-clip-ons/
- ↑ http://www.faboverfifty.com/style/fashion-not-your-mama%E2%80%99s-clip-ons/
- ↑ http://www.beadinglife.com/how-to-make/clip-on-earrings.html
About This Article