This article was co-authored by wikiHow Staff. Our trained team of editors and researchers validate articles for accuracy and comprehensiveness. wikiHow's Content Management Team carefully monitors the work from our editorial staff to ensure that each article is backed by trusted research and meets our high quality standards.
There are 12 references cited in this article, which can be found at the bottom of the page.
The wikiHow Culinary Team also followed the article's instructions and verified that they work.
This article has been viewed 328,275 times.
Learn more...
Ginger and garlic are mainstays of many cuisines, especially in South Asia. Instead of chopping them for every dish, blend them into a paste that you can spoon directly into the pan. Treat the paste as you would the original ingredients, heating it to release aroma and flavor before using in a recipe.
Ingredients
- 4 oz / 113g / ~1 cup chopped ginger
- 8 oz / ~20 cloves garlic
- ½ tsp (2.5mL) salt
- ½ tbsp (8 mL) neutral-flavored oil (canola, safflower, corn)
- 1–2 tbsp (15–30 mL) white vinegar (optional)
- 1 tsp (5 mL) turmeric (optional)
Steps
Making a Small Batch
-
1Wash and dry the ginger. Any moisture will shorten the shelf life of the paste. Pat the ginger dry thoroughly before you continue, and make sure your kitchen equipment is dry.
-
2Chop the ginger into rough cubes. If you have mature ginger with wrinkly, brown skin, peel it before chopping. You do not need to peel young ginger with soft, yellow skin.[1] Start with 4 oz (113g) of ginger, or about 1 cup after chopping. Some cooks prefer to add more ginger (up to double this amount), but wait until you taste the final product. It's easy to overpower the garlic.
- Young ginger has a less pungent taste than old ginger. You can use much more without overpowering the garlic.
Advertisement -
3Find the freshest garlic possible. As garlic ages, its aroma and flavor becomes stronger and stronger. Besides overwhelming other ingredients, these aromatic compounds can turn your paste a surprising blue-green color.[2] Start with fresh garlic to avoid these effects.
- Cut out any green sprouts from the garlic, which have a harsh burning taste.[3]
-
4Peel the garlic. You'll need about two large heads of garlic, or roughly 20 cloves. Save yourself some time by peeling them all at once:[4]
- Separate the cloves and drop them in a large, metal bowl.
- Take a second metal bowl the same size. Place it upside down over the first bowl.
- Shake the two bowls vigorously for a couple minutes to remove the peels.
-
5Blend together ginger, garlic, and salt. Combine the ginger and garlic in a food processor or blender. Add a generous pinch of salt so the paste lasts a little longer. Scrape down the sides between pulses.
-
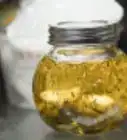
6Drizzle in oil. Pour in about ½ tbsp (8 mL) of vegetable oil near the end of the blending process. Choose an oil without a strong flavor, such as canola, corn, or safflower oil.[5] Slowly pour in more oil if the blender is stuck, a dash at a time.
-
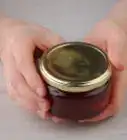
7Store in the refrigerator. Place the paste in a clean, dry jar. Put it in the coldest part of your fridge, usually at the far back.[6] If the jar is sealed against air and moisture, the paste can last two or three weeks.[7] However, even in the fridge, there is a risk of very dangerous botulinum contamination. If you keep the paste for more than three days, make sure to heat it thoroughly for at least ten minutes to destroy this toxin.[8]
- The top surface of the paste may turn brown. This is a harmless reaction with oxygen, and not a sign of spoilage unless the color extends below the surface.
- Keep a clean spoon in the same container as the paste, or make sure every spoon you use is completely clean and dry.


Preserving a Batch for Long-Term Use
-
1Understand the risks. Garlic may be contaminated by botulinum, a potentially fatal bacteria. When the garlic is crushed and stored in a low-acid recipe such at this one, the bacteria produces dangerous toxins even in the refrigerator. Cooking the paste thoroughly for at least ten minutes destroys this toxin. However, since this is such a dangerous toxin, it's best to store only as much paste as you plan to use over the next three days. Freeze the rest as described at the end of this section.[9]
-
2Mix in dry roasted salt. Salt is a good preservative, and you can add a generous handful to the recipe above as long as you remember not to over salt the dishes the paste is used in. To completely remove any moisture that may spoil the paste, roast the salt in a dry pan first over medium high heat. The salt is ready when it has turned a light golden color.[10]
- Let the salt cool to room temperature before adding to the paste.
- A large amount of salt can preserve the paste for as long as two or three months in the refrigerator.[11]
-
3Use vinegar instead of oil. White vinegar is an alternative preservative that doesn't affect the flavor as much as salt. Pour it in instead of oil when blending, adding it in dashes until the paste is smooth or until you've added about 2 tbsp (30 mL).
- Unfortunately, acidic ingredients such as vinegar can turn garlic paste blue-green.[12]
-
4
-
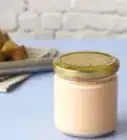
5Sterilize the bottles. To minimize spoilage, sterilize glass canning jars in a pot of boiling water. Dry with brand new paper towels to avoid contamination while removing all moisture.
- This is especially important if you do not have a refrigerator.
-
6Freeze the paste. If you plan to use the paste for more than a month, make a large batch and freeze the extra. Store the frozen paste in glass bottles with 1–2 inches (2.5–5 cm) headspace at the top to allow for expansion. Thaw within 6 months for best quality.[15]


Community Q&A
-
QuestionHow long do I cook the ginger garlic paste?
 Community AnswerCook the garlic ginger paste in oil for a minute or less. The color may change slightly: do not let it brown or burn.
 -
QuestionIs ginger and garlic paste good for health?
 Community AnswerYes! ginger and garlic paste has many health benefits, including: aiding digestion, lowering blood pressure, and treating inflammation.
 -
QuestionWhere are the footnotes for all the footnote references throughout the recipe?
 Community AnswerAs per the typesetting rules, all the footnote will be at bottom of the each page.
Warnings
- When using this paste in cooking, remember that ginger tends to overpower many flavours. Be careful with how much you add — it's easy to add more, but it's virtually impossible to remove it.⧼thumbs_response⧽
Things You'll Need
- Food processor or blender
- Knife
- Two metal bowls of equal size (optional)


References
- ↑ http://www.spiceupthecurry.com/homemade-ginger-and-garlic-paste/
- ↑ http://www.seriouseats.com/2013/08/ask-the-food-lab-why-does-my-garlic-turn-green.html
- ↑ http://www.davidlebovitz.com/2014/01/should-you-remove-the-green-germ-from-garlic/
- ↑ https://www.thekitchn.com/smart-tip-peel-an-entire-head-of-garlic-in-10-seconds-157145
- ↑ http://www.spiceupthecurry.com/homemade-ginger-and-garlic-paste/
- ↑ https://www.youtube.com/watch?v=xdewCXW06Gk
- ↑ http://www.cooklikepriya.com/2013/05/home-made-ginger-garlic-paste-how-to-do.html
- ↑ http://extension.colostate.edu/topic-areas/nutrition-food-safety-health/flavored-vinegars-and-oils-9-340/
- ↑ http://extension.colostate.edu/topic-areas/nutrition-food-safety-health/flavored-vinegars-and-oils-9-340/
- ↑ https://www.youtube.com/watch?v=xdewCXW06Gk
- ↑ https://www.youtube.com/watch?v=xdewCXW06Gk
- ↑ http://www.seriouseats.com/2013/08/ask-the-food-lab-why-does-my-garlic-turn-green.html
- ↑ http://www.ncbi.nlm.nih.gov/pubmed/26396315
- ↑ http://www.ripublication.com/ijafst_spl/ijafstv4n2spl_06.pdf
- ↑ http://www.perisspiceladle.com/2013/03/08/why-ginger-garlic-paste-is-essential-to-indian-food-and-heres-how-to-make-it-at-home/
- ↑ https://ift.onlinelibrary.wiley.com/doi/full/10.1111/j.1750-3841.2008.00986.x
- ↑ http://www.nytimes.com/2006/12/06/dining/06curi.html?pagewanted=2&ref
About This Article

To make ginger garlic paste, wash and dry the ginger, then chop it into rough cubes. Next, peel the garlic cloves, then place the ginger, garlic, and salt in a food processor or blender. Blend the ingredients together, scraping down the sides between pulses. Then, drizzle in the oil and blend the mixture until the oil is thoroughly combined. Place the ginger garlic paste in an airtight container, store it in your fridge, and enjoy it within 2-3 weeks! For tips on preserving your paste for a much longer shelf life, read on!