X
wikiHow is a “wiki,” similar to Wikipedia, which means that many of our articles are co-written by multiple authors. To create this article, 14 people, some anonymous, worked to edit and improve it over time.
This article has been viewed 41,758 times.
Learn more...
Have you ever seen guitar string wraps on your friend's guitar and said,"Hey, I wanna do that"? Well, read this article to learn how to do it yourself!
Steps
Method 1
Method 1 of 2:
Basic Wrap
-
1Wash your hands. If your hands have fat or grease on them, you might make your strings duller in sound.
-
2Take the new guitar string and pull it up to the tuning key.[1]Advertisement
-
3Use your right index finger and place it on top of the tuning key.
-
4Wrap your string around the tuning key 2, 3, or 4 times.[2]
-
5Put the string into the keyhole. Cut of remaining string, so you don't wreck your guitar bag.
-
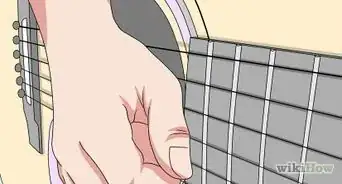
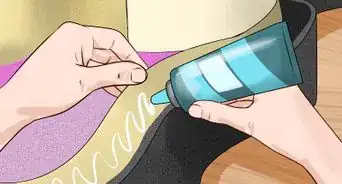
6Stretch the strings. Often strings need to be stretched before they actually stay in tune.
-
7Tune as desired.


Advertisement
Method 2
Method 2 of 2:
Self-locking wrap
-
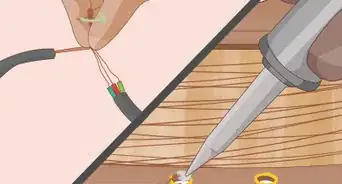
1Thread the string. After securing the eye-side of the string at the bridge of the guitar, bring the straight end up to the headstock and thread it through the eye of the machine head.
- This method is intended for steel-string acoustic or electric guitars, and is not designed for classical guitars' horizontal tuning pegs and nylon strings.
-
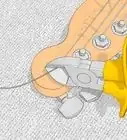
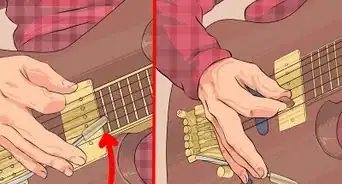
2Loop the string around the machine head. Make sure it passes over the free end of the string for the first pass. Looping the loose string over the machine head and holding it with your right hand is easier than turning the key to get this first loop in place. It allows you to easily make adjustments to the amount of slack, which determines how much string you'll have for the wrap.[3]
-
3Be sure to wind it correctly. Make sure the string is winding around the tuning head so that winding it counter-clockwise will tighten the string (machine heads on the right side of the headstock - usually for higher strings - should turn clockwise instead). This will keep a uniform tuning direction and align the strings properly. It should become pretty obvious if you're doing it wrong.
-
4Tighten the string. Hold the first loop in place with your right hand and wind the machine head to tighten the string (sometimes you have enough slack that you can cheat and throw your second loop over the top, too, but it can be tricky to keep the first one in place when you try this).[4]
- This time, your string should pass under the loose end.
-
5Keep winding, wrapping the string under itself so that each loop pushes the previous loops upward. Three or four loops is enough for the lower strings, but more loops are needed for the plain steel (usually the B and high E) strings to keep them from slipping.
- This might be a good time to mention that it takes practice judge how much slack you needed to start with so you'd have just enough to finish the wrap and tune the string. If you don't have enough string, just back up and try again with a little more slack to start.
-
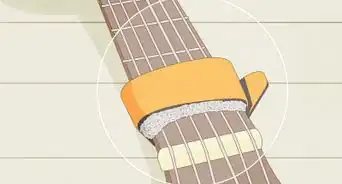
6Check to make sure the wrap looks right. The final result should be a loose end of string sticking out from the machine head, pinned between one loop passing over the top and the rest of the wrap pushing up from below.
-
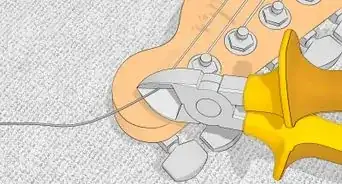
7Do not cut the extra ends of the strings off. Leave them on throughout the stretching process (you can tuck them out of the way to make it easier) and don't cut them until your guitar is staying in tune on its own; you never know when you might need to unstring and restring one or two of them because of something you notice while tuning; it's best to be safe.
- Leave about 3/4-inch of the string sticking out from the machine head so that you can bend the ends of the strings back on themselves (needle nose pliers help a lot). Anyone who's ever gotten the tip of a guitar string accidentally jammed under their fingernail knows why this is helpful.
- This method has the advantage of reducing the amount of string used to make a secure wrap, thus reducing stretching and break-in time. (Plus, you don't have to do as much winding and there's no ugly masses of string on your machine heads.)


Advertisement


References
About This Article
Advertisement