This article was co-authored by wikiHow staff writer, Jennifer Mueller, JD. Jennifer Mueller is a wikiHow Content Creator. She specializes in reviewing, fact-checking, and evaluating wikiHow's content to ensure thoroughness and accuracy. Jennifer holds a JD from Indiana University Maurer School of Law in 2006.
There are 12 references cited in this article, which can be found at the bottom of the page.
This article has been viewed 19,233 times.
Learn more...
Guitar string noise can occur when changing chords or fingering on an acoustic guitar or when doing various effects on an electric guitar. Typically, you can reduce or even eliminate unwanted string noise simply by changing your fretting technique. It can take some practice to get it right — especially if you've been playing for a while and have developed some fretting habits that are less than ideal — but with patience, you'll get there. If you still get unwanted noise, you might want to experiment with different strings or accessories that are designed to reduce this noise.
Steps
Polishing Your Acoustic Fretting Technique
-
1Slow your playing and listen for squeaks. Take a song you're really familiar with and slow down the tempo. Use a metronome to help you keep time. As you play, listen for spots where you squeak. Then you can figure out how you're moving your fretting hand or what you're doing wrong.[1]
- For example, it may be that you only squeak when transitioning between particular chords. If you know which chord transitions are difficult for your hand, you'll have a better idea of what you need to do to improve your technique.
- If you video yourself playing (with the camera focused on your fretting hand), you can more easily pinpoint the areas where squeak is occurring and what your hand is doing to cause it.
-
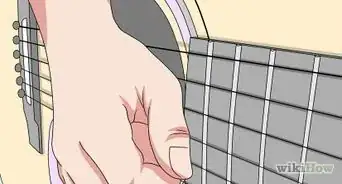
2Release the pressure on the string after you play the note. Immediately after you've played the note, stop pressing down with your finger on the string. Instead, let it rest lightly in position on top of the string. You might also transition from the tip of your finger to the pad of your finger.[2]
- When you remove your finger completely, you risk playing an open string. This way, your finger stays in position but without any pressure.
Advertisement -
3Lift your fretting hand off the strings before you move to a new position. Get in the habit of lifting and moving as 2 separate movements. You may have gotten used to keeping your fingers close to the strings so you don't accidentally fret a string incorrectly. If you know where your fingers are supposed to go, though, this shouldn't be a worry anymore. Trust your muscle memory to know how to move around the fretboard and make different chord shapes.[3]
- Since you already released the pressure on the string before you moved your hand, the string shouldn't squeak when you take your finger off completely.
- Playing slowly can help you develop this habit. If you're bad about sliding your fingers over the strings, it might feel like you're learning how to play guitar all over again. But don't worry — with practice, it will become second nature to lift, then shift.
-
4Move to a new position with your fingers off the strings. Practice transitioning between different chords and positions by lifting your hand straight off the fretboard and then dropping it back into the new position. This is perhaps the most difficult part of this technique, especially if you frequently lose your place on the fretboard if you take your fingers off the strings.[4]
-
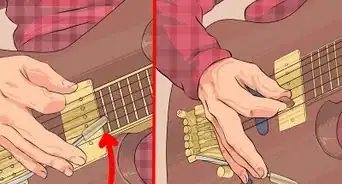
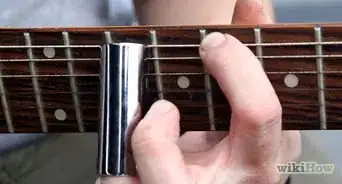
5Use the pad of your finger rather than the tip to shift position. Sometimes, you can't avoid sliding a finger over a string. When you're in this situation, tilt your finger slightly so that you're sliding with the pad of your finger.[5]
- The calloused tip of your finger creates more friction that causes the squeaks, whereas the pad of your finger won't do this as much.


Muting Unplayed Strings
-
1Mute most lower strings with the palm of your picking hand. As you're playing, the palm of your picking hand naturally falls over the thicker strings — especially when you're playing the thinner strings. Let your palm rest lightly on top of the strings above the string you're playing to keep them from ringing out.[6]
- This technique only works if you're playing notes on thinner strings. If you're playing notes on thicker strings, your palm won't be in a good position to mute strings for you.
-
2Cover higher strings with the fingers under your pick. Drop the fingers not holding the pick and lean them against the thinner strings than the one you're playing to mute them as well. Using them in conjunction with your palm, you can successfully mute all the strings except the one you're playing.[7]
- If you're not used to playing this way, it can be challenging at first to get used to resting your hand on the strings. Pick a solo you know well and slow down the tempo so you can practice your picking hand position. After a while, it will become second nature.
-
3Use the index finger on your fretting hand to mute nearby strings. If you find it too awkward to mute strings with the fingers of your picking hand, the index finger on your fretting hand can do the same job. Extend your index finger over the strings that aren't covered or muted by your palm.[8]
- For example, if you're bending a note, you can use the tip of your index finger to mute the string directly above the string you're bending so it won't make any sound and you'll get a clean bend.[9]
- This technique might involve either extending your index finger forward or bending it back to mute strings behind the string you're playing. For a clean sound, you want to mute all strings except the one that you're playing.
-
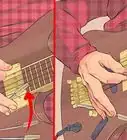
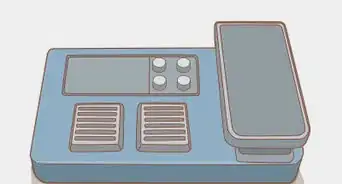
4Practice with the gain turned up so you can hear the noise. If you're playing an electric guitar, the gain setting determines how clean (or dirty) your guitar sounds. Higher gain results in greater noise and distortion, which can also help you practice your muting to eliminate unwanted noise.[10]
- Think about this like baseball players taking practice swings with a weighted bat. If you can eliminate unwanted noise with high gain, you'll have no problem with unwanted noise when you lower it.


Trying Different Gear
-
1Use coated strings for a smoother playing surface. Buy coated strings online or in a guitar specialty shop. Take off your regular strings and restring your guitar with the coated strings. Since coated strings are slicker, your fingers won't squeak as much when you slide across them.[11]
- There are many different brands with different levels of quality, so it's important to compare them before you buy. Guitar techs at music or guitar specialty shops might be able to recommend some for you based on your experience level and playing style.
- Because coated strings are slicker than regular strings, it can take some time to adjust your playing style to accommodate them. When you use them for the first time, you might find that you have a hard time keeping your fingers in the right place. Just play on them and take some time to get used to them.
- Coated or polished strings are also available for classical guitars, although they can be quite pricey. Work on your technique to eliminate as much squeak as possible before you make this investment.[12]
-
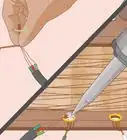
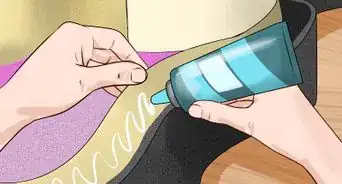
2Lubricate your strings to reduce noise when sliding. Slide a microfiber cloth under one of the strings and pull it through so it wraps the string. Then, rub the string from end to end with the cloth to clean it. Repeat with all of your other strings. Spray the lubricant directly on the strings, wiping off any excess with the cloth.[13]
- Play your guitar immediately after cleaning your strings and see if that makes a difference before you apply lubricant. If you clean your strings after every session, you'll likely notice fewer squeaks.
- Only use a lubricant designed specifically for guitar strings. Other lubricants could damage either your strings or the guitar itself.
- Try working on your technique before you go with a string lubricant. If poor technique is the reason for your string noise, adding lubricant may not help and could even make the problem worse.[14]
-
3Add a string dampener to quiet excess vibrations. Buy a string dampener, a piece of cloth or canvas, at guitar shops or online. Wrap it around the neck of your guitar above the first fret to keep all the strings partially muted. Especially if you're recording, a string dampener can reduce string noise that isn't caused by poor fretting technique on your part.[15]
- String dampeners are most common in a studio setting, where the sensitive audio equipment will pick up sounds you might not even hear yourself when you play. However, many guitarists also use them in a concert setting, especially when playing complex solos.
- While you can buy a string dampener made especially for this purpose, a scrunchy or hair tie will likely work just as well, if you're looking for a DIY solution or just want to try it out before you commit to using a string dampener while playing.


Warnings
- Work on your technique before you try different gear to reduce string noise. Poor technique will limit your ability to play and you'll have difficulty advancing if you're using gear to mask it.[17]⧼thumbs_response⧽


References
- ↑ https://www.classicalguitarshed.com/guitar-squeak/
- ↑ https://www.classicalguitarshed.com/guitar-squeak/
- ↑ https://www.classicalguitarcorner.com/l305-finger-noise-on-the-classical-guitar/
- ↑ https://www.classicalguitarshed.com/guitar-squeak/
- ↑ https://www.classicalguitarcorner.com/l305-finger-noise-on-the-classical-guitar/
- ↑ https://youtu.be/DLQ6fbKISFo?t=291
- ↑ https://youtu.be/NGbCZLgCnbw?t=13
- ↑ https://youtu.be/DLQ6fbKISFo?t=431
- ↑ https://youtu.be/DLQ6fbKISFo?t=177
- ↑ https://youtu.be/DLQ6fbKISFo?t=467
- ↑ http://www.professorstring.com/archives/coated_guitar_strings.php
- ↑ https://www.classicalguitarcorner.com/l305-finger-noise-on-the-classical-guitar/
- ↑ https://guitargearfinder.com/faq/how-to-clean-guitar-strings/
- ↑ https://www.musicradar.com/guitartechniques/how-to-reduce-acoustic-string-noise-492656
- ↑ https://guitargearfinder.com/guides/string-dampeners-and-fret-wraps/
- ↑ https://acousticguitar.com/the-basics-four-ways-to-silence-your-strings/
- ↑ https://www.musicradar.com/guitartechniques/how-to-reduce-acoustic-string-noise-492656
About This Article