This article was co-authored by wikiHow Staff. Our trained team of editors and researchers validate articles for accuracy and comprehensiveness. wikiHow's Content Management Team carefully monitors the work from our editorial staff to ensure that each article is backed by trusted research and meets our high quality standards.
There are 9 references cited in this article, which can be found at the bottom of the page.
This article has been viewed 24,564 times.
Learn more...
Hebel is a soft, stone like material that is wonderful for carving. Whether you want to make bold and abstract pieces or work with fine classical details, Hebel is easy to work with and creates a smooth finish. Sculpting with Hebel is easier than many other types of stone or concrete, but it still takes some special planning and consideration. Take the time to make sure you have a good, flat work surface and appropriate tools. Then, sketch out your design on the Hebel before you carve. If it’s not perfect at first, keep trying. With a little practice, you can master sculpting with Hebel.
Steps
Getting Ready to Carve
-
1Set up a large, flat workspace. Carving Hebel is best done on a flat surface such as a table or workbench. Look for something that is larger than your Hebel block and that will have space for you to keep your tools nearby. The exact size you will need depends upon the overall size of your Hebel block.[1]
-
2Assemble your carving tools. Hebel can be carved with hand or mechanical tools. Generally, beginners are more comfortable with hand tools, as they are easier to use and let you better see what you are doing. For a basic Hebel sculpture, you will want tools including:[2]
- A handsaw
- Chisels
- A mallet
- Tape measurer
- Pencil
- Riffler files
- Sand paper
Advertisement -
3Mock up your design on paper or with clay. Having a visual reference will help you when you go to carve your sculpture. Draw out plans for your sculpture on paper, or make a mock-up in sculpting clay to look at while you work.[3]
- If you don’t draw or sculpt much, you may also choose to print out photos for inspirations, or instructions if you are looking to make a specific project.
-
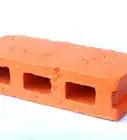
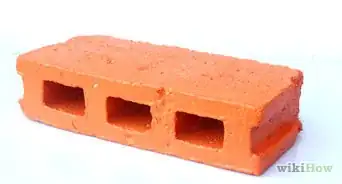
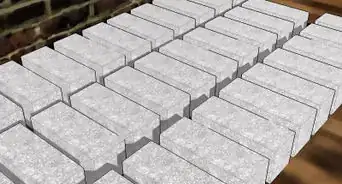
4Buy your Hebel. Once you know approximately what your sculpture will look like and how big it will be, you can buy your Hebel. You can buy Hebel online and in some home improvement stores. If brand name Hebel isn’t available in your area, other autoclaved aerated concrete blocks may be available and are typically just as easy to sculpt.


Shaping your Sculpture
-
1Draw a rough outline on your Hebel block. Once you are ready to start sculpting, make a rough outline of your sculpture on your Hebel. This doesn’t need to be detailed. Instead, focus on outlining the basic shape, including your base. Your outline will serve as a guide when you start carving.[4]
-
2Take away large chunks with a handsaw. With your outline as guide, use your handsaw to carve off any large pieces from your block. You want to leave some excess so that you can refine with your chisels and sandpaper later. The handsaw should be used for roughly cutting away any pieces outside of your sculpture outline.[5]
-
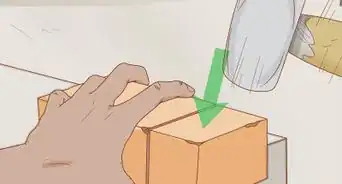
3Chisel down your details. Once you have a rough cut of your sculpture, you can start on your detail work. Use chisels and a mallet to help you refine your Hebel. You may need different sized chisels depending upon the level of detail you want to achieve.[6]
- By the time you are done with your chisel work, your sculpture should only need sanding and fine detail work with your files.
-
4File in fine details. If you are new to working with Hebel, you may want to try more basic sculptures before adding in fine details. Once you feel ready, though, you can start adding details like faces, flora, or other fine work using your riffler files.[7]
- Detail work in any type of sculpture can be difficult. You may want to consider taking a class on stone carving at a local arts or community center to get a better idea of how to use your files.
-
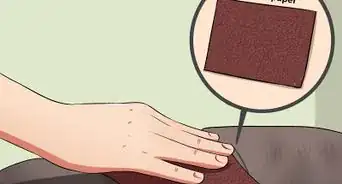
5Sand any rough edges. After you have finished carving, you are ready to sand down your sculpture. Hebel is lightweight and easy to sand, so you should be able to start with a fine grit paper. Start with a fine grit to refine and move to an ultrafine grit to polish your sculpture.[8]
- Grits between 300 and 600 are typically good for finishing wood, stone, and other rough materials.[9]
-
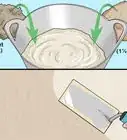
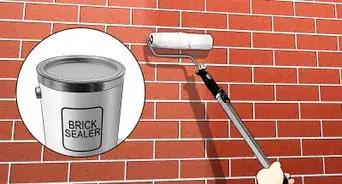
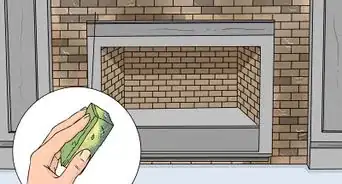
6Seal your sculpture. Rinse off all dust from your sculpture using a hose and allow it to dry for 24 hours. Then, use a soft bristled paintbrush to paint on a masonry sealer such as Rust-Oleum Sealer or LastiSeal. Allow that to dry for another 24 hours before moving your sculpture to an uncovered area.[10]
- Sealer often has fumes, so it is best to seal your sculpture in a covered area outside, or in a well-ventilated area like a garage with the door open.
- Applying a sealing material to your Hebel sculpture will help keep it looking like new, especially if you plan to keep your piece outside.


Creating a Safe Environment
-
1Set up your workstation. While Hebel is generally safe, carving it can lead to inhalable dust and particulates. To keep your living space clean and to prevent inhaling unnecessary dust, setup your workstation in a well-ventilated area outside of your normal living or working environment.
- If possible, set up your workspace outdoors and lay down a tarp for easy cleanup.
-
2Invest in proper safety equipment. Carving and grinding Hebel will always result in some dust. To minimize your exposure to this potentially hazardous dust, it is important to supply yourself with proper safety equipment. This should include safety goggles, a face mask or respirator that covers the nose and mouth, and latex or nitrile gloves.
-
3Set up a dust extraction control unit in your work area. Help manage the silica dust in your work area by setting up a dust extraction unit. These units help control the amount of dust floating in the air. They are commonly available at most home improvement and hardware stores.
- If you can find them, you could also opt to use tools with built-in dust control or dust extraction.


References
- ↑ http://www.learnstonecarving.com/portable-workbench.html
- ↑ http://www.learnstonecarving.com/stone-carving-tools.html
- ↑ https://www.thesculpturepark.com/planning-drawing-sculpture/
- ↑ https://www.bhg.com.au/article/decorating/candle-backyard-sculpture-hebel-block
- ↑ http://www.thestonesculptor.com/Howto.html
- ↑ http://www.thestonesculptor.com/Howto.html
- ↑ http://sciencing.com/carve-rock-stone-4904975.html
- ↑ https://www.todayshomeowner.com/video/how-to-choose-the-right-sandpaper-grit-for-the-job/
- ↑ http://www.nwssa.org/sculpture-northwest/the-stone-corner/828-how-to-finishing-soft-stone
About This Article