This article was co-authored by wikiHow Staff. Our trained team of editors and researchers validate articles for accuracy and comprehensiveness. wikiHow's Content Management Team carefully monitors the work from our editorial staff to ensure that each article is backed by trusted research and meets our high quality standards.
The wikiHow Culinary Team also followed the article's instructions and verified that they work.
This article has been viewed 662,883 times.
Learn more...
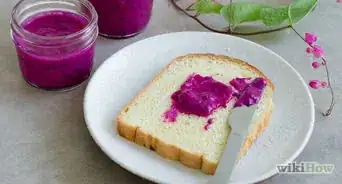
In today's world of all-night supermarkets and ready-made everything, it's easy to forget that jam didn't always come from the store. Homemade jam tastes fresher than the store-bought stuff and it also makes a very thoughtful gift. If you want to know how to make your own, just follow these instructions.
Ingredients
- 8 cups (4 pints) sweet fresh fruit (such as strawberries, blueberries, or apricots)
- One packet MCP pectin powder (optional)
- 4 cups sugar (use 5 1/3 cups for bitter fruits like oranges)
- 1/4 cup lemon juice
- 1/2 tsp. butter or margarine
Steps
Preparing the Ingredients
-
1Decide whether or not to use pectin. You don't have to use pectin to make jam; however, it will help the jam have a jelly-like consistency and can keep it from being runny. You can find it in most supermarkets, in the canning or baking aisles, and it can be bought as a liquid or a powder. However, if you do use pectin, then you should read the instructions for the exact sugar-to-fruit ratio of ingredients you should use. This will make the recipe vary slightly.
-
2Sterilize a dozen canning jars. You can't use any old jars -- you'll need to get jars that are specifically meant for canning. To do this, boil the jars in water for 10 minutes. Then, place them upside-down on a clean towel and drape another towel over them until you are ready to use them. You may not need all 12 jars, especially if you are using larger jars, like pints, but it is much easier to prepare too many than too few.
- It's crucial that you sterilize the jars correctly because the basic principle of canning is to kill all the microorganisms that spoil food, then to seal the jar tight to keep them out.
Advertisement -
3Prepare the fruit. First, wash the fruit under running water and then do whatever you have to do to get it to be ready to eat. Peel it, remove the pits, the stems, or whatever else you need to remove. Then, cut the fruit into small manageable chunks. If you're using raspberries, blackberries or blueberries, you don't need to cut them, but if you're using apricots, figs, strawberries or other fruit larger than berries, then you should cut them into 1/2-inch (1.25 cm) chunks; each strawberry should be cut in half or even quartered, for example.[1]
-
4Crush the fruit. Once you've washed and prepared the fruit and have given it a little bit of time to dry, then you should crush the fruit with a potato masher or a wooden spoon. You don't have to go crazy with this -- the fruit will naturally soften and will become more malleable as you boil it. How long you spend crushing the fruit depends on what kind of jam you'd like -- if you'd like thicker jam with larger chunks of fruit, crush the fruit for 1-2 minutes; for smoother jam, go for 3 minutes.
-
5Prepare the fruit in a stock pot or large saucepan. First, place the 8 cups of fruit in the pot or pan, and then add the lemon juice and butter to the mixture. Add 1/4 cup of lemon juice and 1/2 teaspoon of butter and margarine. Gently stir in the ingredients. You can warm the butter up to make it easier to stir in. The lemon juice will cut some of the sweetness of the jam.
Making the Jam
-
1Bring the fruit mixture to a full rolling boil. A full, rolling boil is one where the bubbles do not stop or lessen when you stir it. Stir constantly and all the way to the bottom to avoid burning the fruit. Boiling the fruit mixture will make the juice come out of the fruit and will keep the pot from burning.
-
2Pour in the sugar. Pour in the sugar, with the heat still on, and stir it in until it dissolves completely. You will notice that the fruit becomes clearer and brighter when you add the sugar. Continue stirring constantly. For this recipe, you should use 4 cups of sugar for 8 cups of fruit a (1:2 sugar to fruit ratio), but know that ratios can vary. If you're using a more bitter fruit, like orange, then the ratio should be more like 2:3 (two cups sugar for every three cups fruit).[2]
- Don't skimp out on the sugar. You may think that this will make the jam healthier, but it will actually ruin the consistency of the jam.
-
3Let the fruit mixture simmer for 5-20 minutes until it reaches a thicker, syrupy consistency. Heat the mixture under low heat until it reaches the right consistency; the time this takes varies by the type of fruit you're using, since some fruit takes longer to soften. If you're using pectin, check out the time required for boiling on the package. Continue stirring constantly.
- You can test the consistency of the jelly with a chilled spoon.
-
4Remove from heat. When the mixture is ready, turn off the heat and remove the pot from the burner.
-
5Use a spoon to skim any foam or bubbles off the top surface. It will be whitish, and some batches will have more than others. You don't have to get every speck, but if you leave it in the jam, it will change the consistency and not taste very good.
Storing the Jam
-
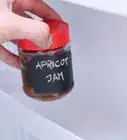
1Ladle the jam or jelly into the prepared jars. Use a canning funnel to guide the jam into the jar. Make sure to leave 1/8 inch of empty space, or "head space", at the top of each jar. Wipe the rims and threads of the jars with a clean, damp cloth to remove any residue or drips. Make especially sure to clean the top surface where the seal will go.[3]
-
2Prepare the seals of the jars. Boil about an inch of water in the bottom of a medium saucepan and remove it from the heat. Place the seals into the water. Push them down so that they sink, and try not to stack them on each other, so that they heat evenly. Allow them to soften for a minute or two. You can do this step while you ladle and wipe rims, if you time it right.[4]
- Place a softened seal on each jar. A magnetic lid wand will help you get them safely out of the boiling water. To release the seal, set it on a jar and tilt the wand. If you don't have a lid wand, you can use a small pair of tongs.
- Screw a clean ring down over the seal and tighten it with snug hand pressure. Don't tighten so much that you press all the seal material off of the rim.
-
3Boil the jars with the jam in them for 10 minutes. To do this, lower the jars onto a rack in a water-bath canner or large stock pot. If you use a large stock pot, place a rack or other spacer on the bottom so that the jars do not rest directly on the bottom of the pot. Add enough hot water to cover them by 1-2 inches. You can measure it to the first knuckle, as shown. Then, cover the canner and bring the water to a gentle boil.
-
4Cool the jars. Remove the jars from the boiling water. Jar tongs are a secure and safe way to do this, or you may be able to raise the entire rack in a water-bath canner. Place the jars on a clean towel to cool. Allow the full jars to cool for 24 hours in a place free from drafts. You may hear the metal lids make a loud plinking sound. That is simply the contents cooling and creating a partial vacuum in the jar.
-
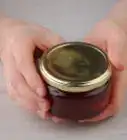
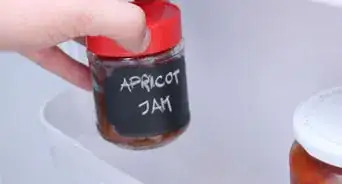
5Make sure that the jars have sealed. The vacuum created when the contents cooled should have pulled the "dome" lid down very tightly. If you can press the center of the lid down, it did not seal. It should not spring back. If any jars have not sealed, you can place a fresh lid on them and process them again or refrigerate those jars and use the contents soon.
- Wash the jars in cool, soapy water to remove any sticky residue on the outsides. You can remove the rings at this point, since the seals should be holding themselves on securely. Allow the rings and jars to dry thoroughly before replacing the rings, to prevent rust.
Community Q&A
-
QuestionWhat can I do to prevent my jam from hardening?
 Community AnswerOverboiling the jam usually causes the jam to harden when cooled. Take care to prevent this by watching it carefully.
 -
QuestionCan I use brown sugar and a lime instead?
 Community AnswerYou cannot use brown sugar, but you can use the lime. Lemon and lime are pretty much the same (apart from the taste), so it taste different, but you could always add less. With brown sugar, it tends to be clumpy and quite hard to boil down, and has a different taste compared to normal sugar.
 -
QuestionHow do I check to make sure my jars are sealed? Your images show glass lids instead of the metal lids the article says to use.
 Community AnswerAn easy test to see if your jars are sealed is to press down on the center of the lid. Once you press the center of the lid down, it should not spring back. If the center can pop in and out, that means that the lid is not sealed.
Warnings
- Do not attempt to double the recipe for jam or jelly. If you have multiple batches to do, do them separately. Doubled batches may not set properly.⧼thumbs_response⧽
- Store in a cool place.⧼thumbs_response⧽
- While you might save jars from purchased products that fit a canning jar ring, real canning jars are best. They are designed with thick enough glass to withstand repeated processing and hand canning. Use those saved jars to store dry goods or your penny collection, instead.⧼thumbs_response⧽
- Home-canned foods can harbor deadly diseases if they spoil or are mishandled. Always process foods for the recommended duration, clean and sterilize jars properly before use, and discard any jar of food that is not sealed. Also discard any jar with contents that smell wrong or appear moldy or discolored.⧼thumbs_response⧽
- Avoid placing cold glass into hot water or vice versa. Sudden temperature changes can shatter the glass.⧼thumbs_response⧽
- "Open-kettle canning," a once-popular method of sealing jars by inverting them so that the hot contents create the seal, is not considered safe. Paraffin methods are also questionable. It is best to use metal lids and process the jars for the recommended amount of time in a boiling water bath.⧼thumbs_response⧽
Things You'll Need
- 6-8 quart saucepan or pot.
- One dozen mason jars, your choice of half-pint, 12 oz, or pint.
- Mason jar rings and seals. New jars come with these, or they may be purchased separately.
- Jar tongs (to remove hot jars from boiling water securely).
- Magnetic lid wand or small tongs.
- Water bath canner or large stock pot.
- Wire heat diffuser, if cooking on electric stove.
- Long-handled wooden spoon.
- Colander.
- Canning funnel.
- Ladle.
- Apron (optional but recommended).
- Small spoon for skimming foam. A soup spoon such as those used at the table is about the right size.
- Small bowl to deposit the skimmed foam.
- Old but clean towels.
- Potato masher.
- Kitchen timer.
- Dishpan and dish soap.
- Measuring cups.


References
- ↑ http://www.bbc.co.uk/food/jam
- ↑ http://www.finedininglovers.com/stories/science-food-jam/
- ↑ http://www.nytimes.com/2012/09/19/dining/canning-jam-from-preparing-the-jars-to-testing-the-seal.html?_r=0
- ↑ http://www.nytimes.com/2012/09/19/dining/canning-jam-from-preparing-the-jars-to-testing-the-seal.html?_r=0
About This Article

To make homemade jam, first sterilize your canning jars by boiling them for 10 minutes. Rinse whatever fruit you want to use, then chop it up and crush it with a spoon. Mix it with lemon juice and butter in a saucepan, then bring it to a boil. Add sugar and let the mixture simmer for 5-20 minutes, until it’s syrupy. Ladle the jam into jars, then seal and boil the jars in a large stock pot for 10 minutes. Remove them with tongs and let cool on a towel for 24 hours. For a thicker consistency, add pectin by following the package instructions. If you want to learn more, like how long you can use your homemade jam, keep reading the article!