This article was co-authored by wikiHow Staff. Our trained team of editors and researchers validate articles for accuracy and comprehensiveness. wikiHow's Content Management Team carefully monitors the work from our editorial staff to ensure that each article is backed by trusted research and meets our high quality standards.
The wikiHow Culinary Team also followed the article's instructions and verified that they work.
This article has been viewed 161,859 times.
Learn more...
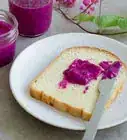
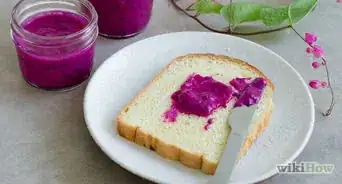
Pineapple jam is a sweet, juicy spread that is slightly more tart than the average berry jam. It’s also quite easy to make at home, even if you’ve never made jam or jelly before. Spread your homemade pineapple jam on a crispy piece of toast in the morning for a sweet and tangy start to your day!
Ingredients
- 1 pineapple
- 1 cup (240 ml) of water
- 5 cups(1200 ml) of granulated sugar
- 2 lemons
- 1 packet of pectin
- 20 ounces (2 ½ cups) canned, crushed pineapple in juice
- 2 cups (480 ml) of granulated sugar
Steps
Making Pineapple Jam From Fresh Pineapple
-
1Remove the skin of the pineapple. Before cutting into the pineapple, give it a rinse in the sink. Then, Peel a Pineapple by laying it on its side and cutting off the top and the very bottom. Set the pineapple upright and slice off the outside skin in strips.[1]
-
2Cut the pineapple into small pieces. Slice the pineapple into small, 1 inch cubes. You don’t have to be precise, as you will be blending the pineapple. Just make sure that the pieces are small enough to put in a food processor or blender.[2]
- Cut out any little knots or seeds that you may come across while cutting the pineapple.
Advertisement -
3Blend the pineapple chunks. Drop the pineapple pieces into a blender or food processor. Blend until the pineapple reaches a smooth, somewhat pulpy consistency. Remove any seeds or rough pieces from the mixture.[3]
-
4Squeeze in the lemon juice. Wash the two lemons and cut them in half. Either in a lemon juicer or by hand, squeeze the lemon juice into the pineapple mixture. Stir with a spoon.[4]
-
5Mix in the sugar. Pour the five cups of sugar into the pineapple mixture. Stir thoroughly so that the sugar is fully incorporated into the pineapple and dissolves. Let the mixture sit for fifteen minutes or so.
-
6Bring the pectin and water to a boil in a saucepan. Combine one packet of pectin and one cup (240 ml) of water in a small saucepan, then bring the mixture to a boil on medium heat. Boil for one minute, then remove the saucepan from the stove.[5]
- Pectin is a fruit extract that helps to thicken and bind jams and jellies.
- Different varieties of pectin sometimes call for different amounts of water to be added. Check and follow the instructions on your packet if you are supposed to use a different amount of water than one cup.
-
7Combine the pectin and the pineapple mixture. Pour the pectin into the pineapple mixture and stir for one minute. You should notice that the mixture has thickened considerably and has a more jam-like texture than before.[6]
- The jam is now ready to be canned or to be eaten once it has cooled down!


Making Pineapple Jam From Canned Pineapples
-
1Combine pineapple and sugar in a saucepan. Open the can of pineapple and pour the fruit and the juice into a large saucepan. Then add the 2 cups (480 ml) of sugar and stir with a large spoon to combine.[7]
-
2Bring the mixture to a boil. Heat the pineapple and sugar mixture over medium heat. Stir regularly to ensure equal heating. Keep stirring until the mixture reaches a boil.[8]
-
3Cook for 20 minutes. Once the mixture has reached a boil, set a timer for 20 minutes and stir the jam constantly. As you reach the 20 minute mark, you should notice that the jam has started to thicken considerably.[9]
-
4Take the jam off the stove when completely thickened. After 20 minutes, spoon up some of the mixture and assess whether it has reached the thickness and consistency of jam. If it is still thin or runny, keep cooking until it has reached an optimal level of thickness.
- You can also stick a thermometer into the jam. If it has reached 220 degrees F (104 degrees C), it has reached the jelling stage and should be ready.[10]


Canning and Storing the Jam
-
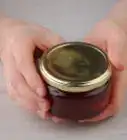
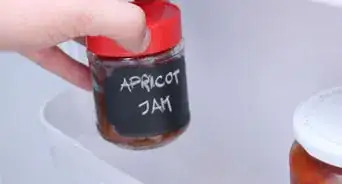
1Sterilize the canning jars. If you plan on canning and keeping the pineapple jam for a long time, you will have to make an environment that will allow the jam to keep. Sterilize Bottles and Jars for Canning to ensure that the jam won’t spoil after a couple months.[11]
- Make sure to use the canning jars that have the rings and the screw-on top. These jars provide an airtight seal and are optimal for canning.
- If you plan to eat the jam within the next few weeks, you don’t have to bother with the canning process: you can simply pour the jam into a jar and keep it refrigerated.
-
2Pour the jam into jars. After you have finished making the jam and sterilizing the jars, pour the jam immediately into the sterilized jars. You can use a funnel or measuring cup to transfer the jam from the pot to the jar if you are worried about spilling.[12]
- Don’t fill up the jars completely. Leave about a ¼ inch (0.6 cm) of space at the top.
-
3Clean the rims of the jars. Because jam is sticky, it can make jars extremely hard to open if it gets stuck on the rim. Before you close the jars, use a clean towel to wipe the rims and remove any excess jam.[13]
-
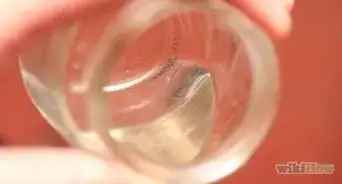
4Close the jars and place them in a boiling water bath. Place the jars in a large pot of water on the stove. Make sure that the jars are completely covered in water, with at least 2 inches of water above the tops of each jar. Boil them for five minutes, then remove the jars using a pair of tongs.[14]
- You should see a small indent at the top of the jars after you take them out of the bath. This means that they are sealed and won’t spoil for about 18 months!
- Again, you can skip this step if you plan on eating the jam within the next month or so.
-
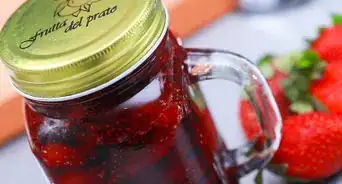
5Store the jam. Let the jars cool on the counter until they reach room temperature. Then store them either on the shelf or in your refrigerator. If you went through the sterilization and canning process, the jam is usually best eaten after two weeks, as it can be a bit runny if eaten in the days following canning.[15]
-
6Finished.


Community Q&A
-
QuestionWhat is a substitute of pectin?
 Community AnswerCornstarch is a very good substitute for pectin. Gelatin can also be used and is arguably more versatile than pectin.
 -
QuestionIs pineapple jam suitable for diabetics?
 Community AnswerSince all jams usually are made with added sugar, they are generally not the best option for diabetics. However, you can substitute stevia or agave nectar for sugar to make a healthier jam for diabetics.
 -
QuestionCan I shelf store my pineapple jam in jars?
 Community AnswerYes, if you have followed the canning process correctly and it's kept cool, dry and out of direct sunlight.


References
- ↑ http://honestcooking.com/deliciously-simple-pineapple-jam-recipe/
- ↑ https://www.madeeveryday.com/recipe-fresh-pineapple-jam-sauce/
- ↑ https://www.madeeveryday.com/recipe-fresh-pineapple-jam-sauce/
- ↑ https://www.madeeveryday.com/recipe-fresh-pineapple-jam-sauce/
- ↑ https://www.madeeveryday.com/recipe-fresh-pineapple-jam-sauce/
- ↑ https://www.madeeveryday.com/recipe-fresh-pineapple-jam-sauce/
- ↑ http://www.food.com/recipe/award-winning-pineapple-preserves-226245
- ↑ http://www.food.com/recipe/award-winning-pineapple-preserves-226245
- ↑ http://www.food.com/recipe/award-winning-pineapple-preserves-226245
- ↑ http://www.food.com/recipe/award-winning-green-tomato-mincemeat-465631
- ↑ http://www.food.com/recipe/award-winning-pineapple-preserves-226245
- ↑ http://www.food.com/recipe/award-winning-pineapple-preserves-226245
- ↑ http://www.food.com/recipe/award-winning-pineapple-preserves-226245
- ↑ http://www.pickyourown.org/pineapple_jam.php
- ↑ http://www.pickyourown.org/pineapple_jam.php
About This Article

To make pineapple jam, start by peeling and slicing the pineapple. Wash one fresh pineapple and use a sharp knife to carefully slice off the top and bottom ends. Slice away the prickly peel and set the pineapple on its side. Then, slice the pineapple into small, 1 inch cubes. You don’t have to be too precise, since you will be blending the pineapple. Add the pineapple chunks to a blender or food processor. Blend until the pineapple reaches a smooth, somewhat pulpy consistency, making sure to remove any seeds or rough pieces from the mixture. Add the juice of 2 lemons to the pineapple mixture and stir with a spoon. Then add 5 cups of sugar to the pineapple mixture. Stir thoroughly so that the sugar is fully incorporated into the pineapple and dissolves. Let the mixture sit for fifteen minutes or so. While the mixture is sitting, combine one packet of pectin and one cup (240 ml) of water in a small saucepan. Bring the mixture to a boil over medium heat and boil for one minute, then remove the saucepan from the stove. Pour the pectin into the pineapple mixture and stir for one minute. You should notice that the mixture has thickened considerably and has a more jam-like texture than before. Once it has cooled, the jam is ready to be poured into jars and canned. Let the jars cool on the counter until they reach room temperature. Then store them either on the shelf or in your refrigerator. If you went through the sterilization and canning process, the jam is usually best eaten after two weeks, as it can be a bit runny if eaten in the days following canning. To learn how to store your jam and why it's important to sterilize your jars, read on!