wikiHow is a “wiki,” similar to Wikipedia, which means that many of our articles are co-written by multiple authors. To create this article, 13 people, some anonymous, worked to edit and improve it over time.
This article has been viewed 215,336 times.
Learn more...
If you have a decorative item that you would like to reproduce, you can make a mold of the item in order to make the reproductions yourself. You do not have to be a professional to get professional results with your molds, and you can make molds of any size, weight or shape. Follow these basic how-to steps for mold making.
Steps
Designing Your Container
-
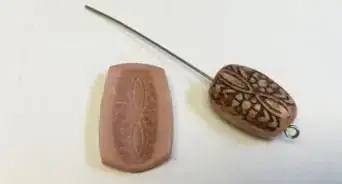
1Decide if you need a 1-part or 2-part mold. If you are making a mold for an object with 1 flat side, then you need a 1-part mold. For complex, 3-dimensional shapes, you will need to make a mold in 2 parts.
-
2Measure your object's height, length and width. How else would you know how big of an area you need? Make sure to get all the dimensions!Advertisement
-
3Make a containment box for your mold using your measurements. This can really be any material you like. If the edges aren't airtight, however, you'll need to adhere the edges to surface with clay or a clay-like substance.
- Add least 1 inch (2.54 cm) to each of your object's measurements before marking cut lines on your box. You'll need the extra space for the mass of the mold.
- Out of foam core board, cut 2 walls for the width and 2 walls for the length, keeping in mind the object's height. Cut 1 square (width measurement by length measurement) for the floor piece.
- Make a box by gluing the 4 walls together and then to the floor section with super glue. Again, if this isn't airtight, it won't do the job.
Setting Your Object
-
1Prepare your object to be set. The method you'll need to undertake varies slightly with the type of mold you're using:
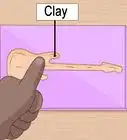
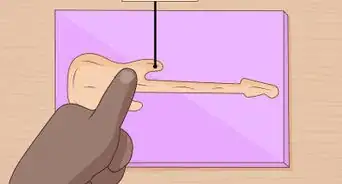
- For a 1-part mold, secure the flat face of the object to the floor section of the mold box using an easy-release adhesive compound. This prevents any of your moldmaking compounds from leaking.
- You may want to stay away from Insta-Mold and stick to modeling clay.
- For a 2-part mold, layer the bottom of the mold box with clay and push the object into the clay, leaving 1/2 of its height exposed for molding. Once you feel you have submerged the lower portion of your object to its approximate half-mark, smooth the top surface of the clay as much as possible before moving on to the next step to make a mold.
- For a 1-part mold, secure the flat face of the object to the floor section of the mold box using an easy-release adhesive compound. This prevents any of your moldmaking compounds from leaking.
-
2Mix your rubber mold compound according to the package directions, or use reusable molding material. There are a number of varieties out there, so it's advised to do your research before you purchase anything.
- Latex moldmaking compounds are cheap and simple, but they take a long, long time to set.
- Silicone RTV moldmaking rubber is a solid bet, regardless of your project.
- Reusable molding material is not for high temperature casting, but can be remelted.
-
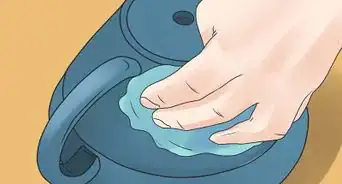
3Prepare the object's surface. Paint a thin layer of the rubber compound on its face right before pouring. Be sure to pay close attention to any crevices or small surface details. This initial thin layer should take care of the details, but still be diligent.
-
4Pour your mold. Be sure to fill your mold box to its full height. The object needs to be fully covered and then some.
- Make sure to give your mold time to set, according to the product's instructions.
Extracting Your Work
-
1Tear the mold making box off, exposing the mold. Pull the object out of the rubber mold. Your mold is ready for use! To make molds in 2-parts, move on to the next step.
-
2Follow the same process for the other half of a 2-part mold after preparing it to set in the following way:
- Tear the mold box off, exposing the half mold/half clay square.
- Carefully remove the clay, leaving the rubber mold half intact.
- Use a hobby knife to cut 3 or 4 pyramid shapes into the face of the mold. These will serve as matching-up joints for the 2 finished mold halves.
- Create a new box to make a mold in, this time to the existing mold's length and width, allowing enough space in the height to pour the second part of the mold on top.
- Set the object, mold side down, in the box. Make sure it fits snugly enough to not allow any new rubber compound to drip down the sides.
- Paint the face of the mold you will be pouring on with mold release compound or thin film of vaseline. This will prevent the 2 mold halves from sticking together.
- Pour your mold, let it set, then remove the box and pull the 2 sections apart. Your 2-part mold is complete.
Community Q&A
-
QuestionWhere can I buy plaster?
 Community AnswerAt any Home Depot or Lowes store, or on an online retailer.
 -
QuestionWhat can I pour into molds?Community AnswerPlaster of Paris for modeling molds or concrete if you want the model to be heavy.
-
QuestionWhat if I need to mold a hollow object?Community AnswerJust make a regular mold, and coat the walls with the molding product. Don't fill the mold, but spread it equally against the inner surface and wait for it to dry.
Warnings
- Take caution that you will possibly ruin or damage the original object when you remove it from the mold. Reconsider making a mold out of any object you can't afford to part with.⧼thumbs_response⧽
Things You'll Need
- Foam core board
- Super glue
- Adhesive compound
- Rubber mold compound
- Hobby Knife
- Clay
- Mold release compound or vaseline
- Paintbrush


References
About This Article
If you want to make a mold of an item with one flat side, measure your object’s height, weight, and length. Add 1 inch to the measurements and make a containment box for your mold out of 5 pieces of foam core board cut to size. Mix up a batch of rubber compound according to the package instruction. Paint a thin layer of the compound over the face of the object, then place the object into the box and fill the box with the rest of the rubber compound. Once the compound sets, tear apart the box and take the object out of the mold. To learn how to make a mold of a 3D object, read on!