This article was co-authored by wikiHow Staff. Our trained team of editors and researchers validate articles for accuracy and comprehensiveness. wikiHow's Content Management Team carefully monitors the work from our editorial staff to ensure that each article is backed by trusted research and meets our high quality standards.
There are 8 references cited in this article, which can be found at the bottom of the page.
This article has been viewed 157,141 times.
Learn more...
Muscadine grapes are perfect for amateur winemaking due to their high acid content and robust flavor. Many of the more tedious steps in winemaking can be skipped when using these grapes. To make wine, purchase winemaking equipment and sterilize it. Next, create your wine recipe from a mixture of crushed grapes, sugar, yeast, and other additives. Let the wine complete its first fermentation and transfer it to a demijohn. Once the wine has stopped foaming, bottle it and let it mature for two to three years.
Ingredients
Will make about 3 bottles of wine
- 3 pounds (1.3 kilograms) of fresh muscadine grapes
- 2.5 pounds (1.13 kilograms) of granulated sugar
- 1 packet of red wine yeast
- yeast nutrients
- 1 crushed Campden tablet
- Wine stabilizer such as potassium sorbate
Steps
Gathering and Sanitizing Your Tools
-
1Purchase winemaking tools. You will need about 28 Campden tablets for sterilization, 2 one-gallon (3.8 Liters) brew bins or food-grade basins, 2 glass or plastic demijohns, a fitted airlock and bung for your demijohn, a straining bag or muslin cloth bag, a 3 foot (1 meter) vinyl siphon tube, 6 glass wine bottles with corks, a corker, a long stirring spoon, and a large funnel.[1]
- These tools can be bought online or at your local winemaking supply store.
-
2Clean the tools with soap and water. If tools are dirty or have been used before, they should be cleaned prior to sanitization. To do so, fill a clean sink with warm water and dish soap. Wash the tools thoroughly to remove any dirt or debris. After they’re clean, rinse them well to remove any soap residue.
- If your tools have never been used, you can skip this step.
Advertisement -
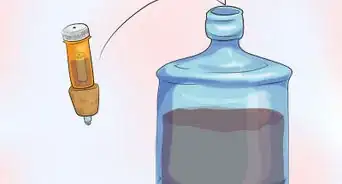
3Create the sanitizing solution. If you don’t sanitize your tools, your wine will spoil long before you get a chance to taste it. Fill the brew bins with water. Leave space at the top to allow for the water level to rise. Next, add about 14 crushed Campden tablets to each bin. Stir them for a few minutes to incorporate the tablets into the water.
- Campden tablets are notoriously hard to incorporate into water. There may be a few stubborn pieces of tablet floating in the water when you’re done.
-
4Submerge your winemaking tools. Gently place your winemaking tools into the two buckets. This includes the glass demijohns, the airlock and bung, the straining bag or muslin cloth, the long stirring spoon, and the vinyl siphon tube. Let them sit for a few minutes to sanitize.[2]
- You can wait to sanitize the wine bottles until you’re ready to bottle your wine. Follow the same procedure to do so.
-
5Remove the tools from the sanitizer. Make sure your hands are clean before touching the tools. Place the wet tools on a dry, clean towel and allow them to air dry. Next, dump the sanitizer out of the buckets and let them air dry as well.
- Swirl the sanitizer in the bucket before dumping it to remove any tablet residue on the bottom.
- Don’t rinse the tools after sanitizing them.


Mixing the Wine
-
1Gather your ingredients. You will need 3 pounds (1.3 kilograms) of fresh muscadine grapes, 2.5 pounds (1.13 kilograms) of granulated sugar, a packet of red wine yeast, yeast nutrients, one crushed campden tablet, and a wine stabilizer such as potassium sorbate.[3] Avoid using frozen muscadine grapes as it will negatively affect the flavor.
- To find out how much of the red wine yeast, yeast nutrients, and wine stabilizer to add, read the back of the packages. Each brand has a slightly different recommendation.
- Remove any leaves, stems, or rotten fruit from the grapes and wash them.[4]
-
2Pop the skins off the grapes. You can either cut each grape manually or freeze them to burst the skin. To do so, dump the grapes into a large clean bowl and place it in your freezer for 3-4 hours. Next, allow them to defrost on the counter for an hour or two. Once the grapes are thawed, crush them with a potato masher or smoosh them with your clean hands.
-
3Create your brewing mixture. Pour three quarts (2.8 liters) of water into one of the sanitized brewing bins. Next, add the sugar, crushed campden tablet, yeast nutrients, and the potassium sorbate. Stir the ingredients together until they’re completely absorbed.
- Make sure the spoon you use to stir the ingredients is clean and sanitized.
- Read the back of the yeast nutrient and potassium sorbate packets to find out how much to add.
-
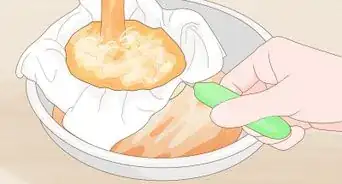
4Pour the grape mixture into the straining bag. To avoid making a mess, work over the brewing bin. Once the straining bag is full, tie it off and gently rest it in the brewing mixture.
- The straining bag will allow you to easily remove the crushed grapes from your wine without having to strain it.
-
5Cover the brew bin with a towel and set it aside. Find a low-traffic spot to place your brew bin so that no one knocks it over. Let sit undisturbed for 24 hours. During this time the campden tablet will sanitize the wine.[5]
- Don’t worry if the wine smells strange. The campden tablets release faint sulfuric fumes while processing the wine.
-
6Add the red wine yeast. After the brewing mixture has been sitting for 24 hours, add the red wine yeast. Sprinkle the yeast over the surface of the wine and stir it in with sanitized spoon. Cover the wine with the towel again and move it to a cool dark spot that stays between 72 and 78 degrees Fahrenheit (22 to 25 degrees Celsuis.)
- Read the back of the yeast packet to find out how much to add.


Completing the First Fermentation
-
1Let the wine ferment for 5-7 days. Stir the mixture daily, using a sterilized spoon to push the fruit bag to the bottom. While you stir, check for any bubbling in the liquid. After 5 to 7 days, the wine won’t bubble when you stir it. This indicates that the mixture has finished its first fermentation.
- Remember to store the wine in a cool dark place that that stays between 72 and 78 degrees Fahrenheit (22 to 25 degrees Celsuis.)
-
2Use a hydrometer or an acid testing kit. These two tests help determine what stage a wine is at. However, the high acid content of muscadine grapes makes it unnecessary to monitor this wine like you might monitor other wines. However, if you’d like to use these kits, purchase them online or from a winemaking supply store.
- If you use a hydrometer to monitor the wine, the first fermentation is done at 1.030.
- If you use an acid testing kit, measure the wine after 24 hours of fermentation and then once daily after that. The acid level should stay below 7 p.p.t. tartaric.[6]
-
3Strain the wine into a clean brewing bin. First, remove the fruit bag and squeeze out every last drop back into the wine. Discard the squeezed-out fruit bag. Next, loosely secure a cheesecloth over the top of a clean brewing bin using an extra-large rubber band or twine. Pour the contents of the first brewing bin into the second, filtering out any debris with the cheesecloth.
- After the wine has been transferred, discard the cheesecloth and any debris inside.
-
4Pour the strained wine into a demijohn. If necessary, ask a friend to help you do this. First, place a funnel in the demijohn. Next, carefully pour the strained wine into the funnel, stopping a few inches from the top. If you’ve made a lot of wine, you may need two demijohns. Next, tighten the bung and airlock over the demijohn.
- If you don’t know how to tighten the bung and airlock, read the manufacturer instructions for the demijohn you purchased.
-
5Ferment the wine for three weeks. Put the demijohn back into the cool dark place you used for the first fermentation. Allow the wine to sit undisturbed for at least three weeks. Every day or so, gently test the airlock and bung to be sure that they’re still secured.
- If the airlock or bung wiggle around, tighten them again. Otherwise, bacteria and debris may get into your wine.
- Use clean hands when touching the airlock or bung.
-
6Examine the wine. After three weeks, closely examine the wine. If you see little to no foam and a layer of dark sediment on the bottom of the jar, your wine is ready for racking. [7] Otherwise, let it sit for another week and check again.


Racking the Wine
-
1Prepare to rack the wine. Place the wine-filled demijohn on a table or flat chair, being careful not to disturb the sediment at the bottom. Next, place a second demijohn on the ground below the first. Make sure the second demijohn is cleaned and sanitized.
- If you disturb the sediment, allow the demijohn to sit undisturbed for a few hours before racking. This will give the sediment a chance to fall back to the bottom.
-
2Insert the siphon tube. Remove the bung and airlock, setting them aside on a clean towel. Next, insert a siphon tube into the jar. The end of the tube should be resting a few inches or centimeters above the sediment.
- If the tube is touching the sediment, it will suck sediment into your new demijohn, defeating the purpose of racking.
-
3Siphon the wine. Suck on the free end of the tube until you taste wine. Next, quickly place the free end into the second demijohn, filling it with wine. Keep an eye on the tube to make sure it doesn’t suck up any sediment.
- If you’re worried about contaminating your wine with mouth bacteria, use a suction bulb to begin siphoning instead.
- Suction bulbs can be bought online or from a winemaking store.
-
4Replace the bung and airlock. Use clean hands to replace the bung and airlock, screwing them on tightly. Put the demijohn back in its cool, dark location to continue fermenting.[8]
- Clean and sterilize the old demijohn after racking. Otherwise, the sediment may stick to the bottom and become difficult to clean.
-
5Continue racking the wine. Every three weeks, check the wine for sediment. If you see any, rack the wine and let it sit for another three weeks. This process can take up to nine weeks.[9] Once the wine is sediment-free, it’s ready to bottle.


Bottling the Wine
-
1Siphon the wine into clean wine bottles. Use a clean and sanitized siphon tube to siphon the wine into clean and sanitized wine bottles. Make sure you work in an easy-to-clean spot as bottling wine can become messy.[10]
- Remember, if you want to avoid contaminating your wine with mouth bacteria, use a suction bulb to siphon the wine.
-
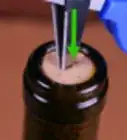
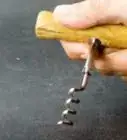
2Use a corker to seal the bottles. Each brand of corker is different. Therefore, follow the manufacturer instructions to cork bottles. Make sure you have enough corks for every bottle of wine.
- If corker has trouble moving, use WD-40 to lubricate moving parts. However, don’t use WD-40 on any parts that will touch the wine or the cork.
-
3Label the bottles with the date and ingredients. Use a label maker or paper and tape to create an interesting label for your wine. Include the ingredients and the date of bottling. This will help you determine when your wine is ready to open.
- Go into detail when listing ingredients. If you like the wine or want to change it, you will instantly know what recipe you used.
-
4Let the wine ferment for two to three years. It’s hard to resist opening a bottle of homemade wine. However, the flavor of this wine is best after two or three years. If you simply can’t wait, the wine is safe to drink at any time, even though the flavor may not be as good.[11]
- Create a new batch of wine every season to ensure that you have a steady supply of muscadine wine each year.


Community Q&A
-
QuestionShould I use regular bottled water or distilled water?
 Community AnswerUse distilled water to make wine.
 -
QuestionCan you use frozen muscadines from the previous year?
 Community AnswerYou can, but it's not recommended as the flavor will be affected. If you choose to use them anyway, allow them to thaw completely before making wine.
 -
QuestionDo I use more than 1 pack yeast and 1 Campden tab. for 25 lb. of scuppernong?
 Community AnswerThis depends on the brand of yeast you use. Read the back of the yeast package to be sure. As for the Campden tablet, one should be enough. Remember to add the yeast at least 24 hours after the tablet has been added.


References
- ↑ http://www.wineturtle.com/homemade-muscadine-wine-recipe/
- ↑ http://www.joyofwine.net/wine101.htm
- ↑ http://www.wineturtle.com/homemade-muscadine-wine-recipe/
- ↑ http://www.grit.com/animals/how-to-make-muscadine-wine.aspx
- ↑ http://www.eckraus.com/winerecipes/muscadinewine.pdf
- ↑ http://www.wineturtle.com/homemade-muscadine-wine-recipe/#tab-con-4
- ↑ http://www.wineturtle.com/homemade-muscadine-wine-recipe/#tab-con-4
- ↑ http://www.eckraus.com/wine-making-racking
- ↑ http://winemaking.jackkeller.net/racking.asp
About This Article

To make muscadine wine, first prepare a brewing mixture by mixing water, sugar, yeast nutrients, potassium sorbate, and a crushed Campden tablet. Then, pour some crushed grapes into a straining bag, tie it off, and rest it over the brewing mixture. Next, cover everything with a towel and let it sit for 24 hours before stirring in some red wine yeast. Finally, ferment the wine for several weeks, transferring it into a demijohn after 7 days, and then rack and bottle it. For tips on how to ferment your homemade muscadine wine, scroll down!