This article was co-authored by Deanna Ranlett. Deanna Ranlett is a Pottery and Ceramics Professional and the Owner of Mudfire Inc. in Decatur, Georgia. With more than 22 years of experience in the ceramics industry and eight years of experience owning a studio, they specialize in glaze formulation, firing ceramic and pottery pieces, general clay projects, and screen printing for ceramics. Deanna holds a BFA in Ceramic Arts and Ceramics from Georgia State University.
There are 22 references cited in this article, which can be found at the bottom of the page.
This article has been viewed 34,661 times.
Making plates isn't the easiest thing to do, but you can handle it if you learn a little ceramics. To make a ceramic plate, you'll need to roll out clay or throw it on a potter's wheel, create a shape, let it dry, and fire it in a kiln. If that's too much for you, you can personalize your own plates by using food-safe paint on white ceramic plates you pick up at the dollar store.
Steps
Creating a Ceramic Plate with the Slab Technique
-
1Throw a 4 by 4 in (10 by 10 cm) piece of clay on the table to thin it out. Lift and throw the clay several times. This will help get out bubbles in the clay. Plus, the thinner you make it before you roll it, the easier the process will be. Try to get it about about 3 inches (7.6 cm) thick.[1]
- You can use a larger or smaller piece depending on the size of plate you want to make.
-
2Place wooden strips on the table to help create an even layer of clay. This step is optional, but it will help you create a more polished piece at the end. Place the strips in front of you going perpendicularly away from your body. Don't make them farther apart than your rolling pin, as you want to roll over these pieces while thinning out your clay.[2]
- You can use strips of any thickness, but a good place to start is 0.2 inches (5.1 mm). Don't go thicker than 0.5 inches (13 mm), as the plate will be very thick and heavy.
- You can find wooden sticks of varying thickness at your local hardware store. You can even use thick wooden rulers. Make sure both sides are the same thickness.
Advertisement -
3Roll the clay out with the rolling pin. Standing up, press down into the clay as you roll the pin away from you. If you're using wooden pieces, balance both ends of the rolling part of the pin on the wooden pieces. That way, you can't go any deeper than that thickness. Pull the rolling pin back towards you. Keep going back and forth across the clay until you get the desired thickness.[3]
- It helps to roll on canvas so you can easily lift the slab off the table.
- If you have one, you can use a slab roller, which is a large rolling press that makes an even slab of clay.
- If your clay is very wet, you should let it dry at this point until it's about the consistency of leather.
-
4Create a smooth surface on the clay with a plastic card. Put the clay on a piece of paper or butcher paper. Smooth out both sides of the clay with something flat, like an old credit card or gym card. Run the edge of the card over the clay, and it will smooth out the fingerprints left behind.[4]
-
5Trace around an uncoated paper plate. Place a plate on top of the clay. Trace around it with a needle tool, keeping the needle perpendicular to the surface to give yourself a clean, square edge. On the second go-round, push the needle all the way through the clay as you move it around the plate.[5]
- A needle tool is a metal tool that has a needle tip on one end.
- You can trace any shape you want, not just paper plates.
-
6Remove the extra clay with your hands. Cut through the border with the needle tool by making a slit from the edge of the plate out to the edge of the clay. Make several similar slits at different points around the plate. Pull the clay up away from the plate.[6]
- Run your finger around the edge to smooth it. You don't need to flatten out the edge completely. However, make the square edge not so sharp by simply applying pressure as you run your finger around the edge.[7]
-
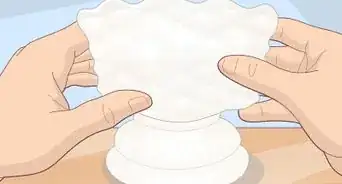
7Leave the plate to dry in a mold. A simple way to do this is to place it on the concave side of a paper plate. Press down with your hands or another paper plate to push it into the mold. Leave it to dry until it's mostly hard.[8]
- You can use other molds for this purpose. For instance, you can place a piece of newspaper on the bottom part of a bowl to keep the clay from sticking then lay the plate over it to give it a curved finish.


Throwing Plates on a Potter's Wheel
-
1Wedge the clay by throwing it against a canvased table. "Wedging" just means getting the bubbles out and making the clay uniform. Take a piece of clay, maybe 4 by 4 inches (10 by 10 cm), and throw it hard against a table covered in canvas. Throw it on different sides of the clay to help push out the bubbles.[9]
- Most clay studios have an area to wedge clay.
- When you're done wedging, shape it into a rough ball by batting at the edges with your hands. Don't fold the edges over, as that will create bubbles.
-
2Center the clay on the wheel. Start by lightly throwing the ball on the wheel as close to the center as you possibly can. Press down to make sure it's firmly attached to the wheel, then start the centering process. Add water to the ball and begin spinning the wheel. Place your hands on the outside edges of the clay on both sides and press them gently together to make the ball taller. Then, use your thumbs and hands to flatten it back out a little. Do this once or twice until the clay doesn't seem to wobble back and forth at all.[10]
- Centering the clay helps you get an even piece at the end.
- Finish with the clay close to the wheel in a hockey puck shape.
- Constantly add water with the sponge as the clay dries out. You want it to be very wet on the outside while you're throwing.
-
3Use your fist to press down in the center and widen the plate. Add water to the clay. Make your hand into a fist and press the bottom of your fist against the center of the clay. As you press down, slowly move your hand outward to widen the disk across the wheel, forming a wide disk.[11]
- You can use the heel of your hand to flatten it out if you prefer. Aim for a thickness of 0.5 to 0.75 inches (1.3 to 1.9 cm) for your disk. It should be perfectly round and flat.
- If you have trouble creating a flat, wide disk, try using something like a piece of PVC pipe. Just press it down gently into the clay as the wheel is spinning to widen your disk.[12]
- If your edge is uneven, grab your wooden knife tool. Trim the edge off by pressing the knife down into the clay just a little bit inside of the edge while the wheel is spinning. It will trim it off and make it even.
-
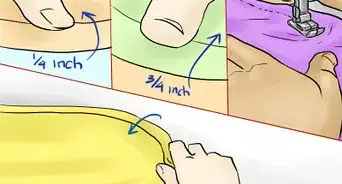
4Shape the edge of the plate with your fingers. Add more water to the clay. Start by pressing your right thumbnail into the clay at the base of the disk on the outside. Push in about 0.5 inches (1.3 cm) or so as you spin the wheel, which will push up the edge of the plate and create a space underneath.[13]
- Pull the edge up by placing your thumb on one side of the edge and your finger on the other. Lightly pinch and lift to bring the edge up a little. Hold your fingers in place for a few seconds so that the edge can center itself as the wheel spins.
-
5Finish shaping the plate by adding a rim or ribbing. Use your fingers or a sponge to gently press into the edge on the inside of the plate while the wheel is spinning. Press in at the base of the edge. Gently lift your fingers and press down on the lip to pull it into the shape you want.[14]
- You can also add ribbing in the center with your fingers or a tool.
- Don't forget to keep adding water as you spin.
-
6Cut the plate off the wheel with a wire tool. Grasp the wire tool at both ends, making sure you don't wrap it around your fingers, as it can cut you. Pull it taut. Spin the wheel very slowly and run the wire under the very bottom of the plate to cut it off the wheel.[15]
- You can use the outside edges of both hands to gently pick up the plate under the rim and move it to a wooden disk or another type of holder that it can dry on.


Finishing Your Plate
-
1Trim your plate as needed once it's at least leather-hard. If you're making a slab plate, you can simply use a knife tool to make adjustments or add designs with a needle tool. With a thrown plate, you'll need to trim some of the weight off the bottom by putting it back on the wheel.
- For a thrown plate, turn the plate upside down. Place foam underneath the center of the plate on the wheel to support it, though the edges should still touch the wheel. Center the plate on the wheel using the rings on the wheel, then press 4-6 small pieces of fresher clay around the edges in small balls to hold it in place. Turn the wheel on slowly and use a metal trimming tool with a rounded loop. Press the edge of the loop into the bottom of the plate as it spins, and you'll trim off the excess clay. This is a way to make it thinner and lighter at the bottom.[16]
-
2Fire the plate in a kiln when it's completely dry. You'll need to leave it uncovered at least overnight for it to dry out. Once it's dry, place it in a kiln and heat it. Typically, kilns heat to 1,700 °F (930 °C) or even higher. Check your clay to see how hot you should heat it and set your kiln to heat that high.[17]
- When the piece is completely dry, it won't feel cool to the touch.
- If your kiln doesn't have an automatic controller, you will need to use cones to measure the temperature. You place the cones in front of the window on the kiln and monitor them throughout the firing. When your kiln reaches the correct temperature, the firing cone, which is usually in the middle, bends over.[18]
-
3Add glazing and fire the plate again. Use a food-safe glaze to paint a design on the plate or cover the whole plate. To make it easier to fire, leave the bottom unglazed so it can rest on a shelf without getting stuck to it with the glaze. Then fire the plate again to the temperature required by your glaze.[19]
- You don't need to add glaze. You can leave the plate as is if you prefer, though it will be porous.
- If you dip and glaze, it is better to wax the bottom so that glaze does not get onto the part that touches the kiln shelf.
- You need not wax it if you brush and glaze because you can control where exactly you are putting the glaze.
- If you use the brush, follow the manufacturer's directions for the product you are using. You can use a soft bristle brush. Wait in between coats. Let it reach room temperature before applying another coat.


Decorating a White Plate
-
1Find food-safe paint for your plates. These paints are easiest to find online. Some are marked as multi-surface while others are just for ceramics. Make sure they're not toxic before you buy them.[20]
- The best paints for plates are ones that you need to bake in the oven. That will help them set.
-
2Wipe down clean plates with rubbing alcohol. Start with clean plates. Pour some rubbing alcohol on a paper towel. Thoroughly wipe down the surface with the paper towel. That will help remove any oils and fingerprints that may affect how the paint adheres to the plate.[21]
- If your plates came directly from a store, you can just wipe them down with the alcohol. You don't need to clean them ahead of time.
-
3Paint or draw a design on your plate. Now it's up to your imagination! Use a paint marker to draw a simple geometric design like triangles or dots for something simple and fun. Try adding a cute seasonal message on the plate with a thin paintbrush for your favorite holiday, for instance. Alternatively, paint on flowers with a fan brush. It's really up to you![22]
- If you want, you can use a stencil to guide your design. For instance, use a stencil to spell out your initials or a holiday message. Hold the stencil in place with a bit of tape, then dab the paint on the stencil. You may need to do more than one coat.
- Alternatively, try color blocking. Use masking tape or washi tape to create a geometric design on the plate then paint solid colors between the lines. Make sure to remove the tape before the paint dries, or you may pull up the paint with the tape.
- Paint pens can make writing cursive and other lettering a bit easier.
-
4Let the paint dry overnight as needed. Some all-purpose paints note that you should leave the pieces to dry for 24 hours. That way, the paint really has time to set before you stick it in the oven.[23]
-
5Bake the plates according to the paint's directions. Typically, you'll bake them for 30 minutes to an hour. The temperature is usually somewhere between 325 and 375 °F (163 and 191 °C). Make sure to read the directions for your paint carefully![24]
- Make sure to let the pieces cool in the oven before pulling them out.


Things You'll Need
Creating a Ceramic Plate with the Slab Technique
- Sponge
- Clay with sand or grog in it to decrease warping
- Needle tool
- Rolling pin
- Cut-off wire
- Uncoated paper plates
- Strips of wood, optional
Throwing Plates on a Potter's Wheel
- Sponge
- Clay with sand or grog in it to decrease warping
- Needle tool
- Wire tool
- Water
- Potter's wheel
Finishing Your Plate
- Kiln
- Firing cones
- Trimming tools
- Glaze
Decorating a White Plate
- Food-safe ceramic markers or paint
- Paintbrush, optional
- Oven
- Ceramic plates
- Rubbing alcohol
- Paper towels


References
- ↑ https://ceramicartsnetwork.org/daily/pottery-making-techniques/handbuilding-techniques/great-idea-for-teachers-a-simple-lesson-plan-for-slab-built-plates-with-textured-and-stenciled-decoration/
- ↑ https://www.youtube.com/watch?v=8XH7Eak44Qo&feature=youtu.be&t=13
- ↑ https://ceramicartsnetwork.org/daily/pottery-making-techniques/handbuilding-techniques/great-idea-for-teachers-a-simple-lesson-plan-for-slab-built-plates-with-textured-and-stenciled-decoration/
- ↑ https://www.youtube.com/watch?v=8XH7Eak44Qo&feature=youtu.be&t=37
- ↑ https://ceramicartsnetwork.org/daily/pottery-making-techniques/handbuilding-techniques/great-idea-for-teachers-a-simple-lesson-plan-for-slab-built-plates-with-textured-and-stenciled-decoration/
- ↑ https://www.youtube.com/watch?v=8XH7Eak44Qo&feature=youtu.be&t=73
- ↑ https://ceramicartsnetwork.org/daily/pottery-making-techniques/handbuilding-techniques/great-idea-for-teachers-a-simple-lesson-plan-for-slab-built-plates-with-textured-and-stenciled-decoration/
- ↑ https://ceramicartsnetwork.org/daily/pottery-making-techniques/handbuilding-techniques/great-idea-for-teachers-a-simple-lesson-plan-for-slab-built-plates-with-textured-and-stenciled-decoration/
- ↑ http://www.lakesidepottery.com/HTML%20Text/Tips/Tips%20and%20Tricks%20on%20Plates%20and%20Platters.htm
- ↑ https://www.youtube.com/watch?v=QSRQUwCuj-w&feature=youtu.be&t=14
- ↑ https://www.youtube.com/watch?v=QSRQUwCuj-w&feature=youtu.be&t=36
- ↑ http://www.lakesidepottery.com/HTML%20Text/Tips/Tips%20and%20Tricks%20on%20Plates%20and%20Platters.htm
- ↑ https://www.youtube.com/watch?v=QSRQUwCuj-w&feature=youtu.be&t=157
- ↑ https://www.youtube.com/watch?v=QSRQUwCuj-w&feature=youtu.be&t=197
- ↑ https://www.youtube.com/watch?v=QSRQUwCuj-w&feature=youtu.be&t=270
- ↑ http://www.lakesidepottery.com/HTML%20Text/Tips/Tips%20and%20Tricks%20on%20Plates%20and%20Platters.htm
- ↑ https://ceramicartsnetwork.org/daily/firing-techniques/electric-kiln-firing/firing-clay-ten-basics-of-firing-electric-kilns/
- ↑ https://www.youtube.com/watch?v=m2zmY4SQkl8&feature=youtu.be&t=24
- ↑ https://ceramicartsnetwork.org/daily/firing-techniques/electric-kiln-firing/firing-clay-ten-basics-of-firing-electric-kilns/
- ↑ https://www.hgtv.com/design/make-and-celebrate/entertaining/how-to-make-hand-painted-plates
- ↑ https://30minutecrafts.com/2015/12/make-cookie-exchange-plates.html
- ↑ https://www.hgtv.com/design/make-and-celebrate/entertaining/how-to-make-hand-painted-plates
- ↑ https://www.hgtv.com/design/make-and-celebrate/entertaining/how-to-make-hand-painted-plates
- ↑ https://abeautifulmess.com/2015/11/hand-painted-dish-set.html
About This Article