This article was co-authored by Nicole Bolin. Nicole Bolin is a Crafting Specialist and the CEO of Stencil, a DIY Craft Studio in Phoenix, Arizona. Nicole specializes in interior design and various craft and DIY projects. Nicole holds a Certificate in Interior Design from the New York Institute of Art and Design. She opened Stencil in 2017 to teach others to create DIY projects that fit their home and lifestyle.
There are 9 references cited in this article, which can be found at the bottom of the page.
This article has been viewed 84,871 times.
Whether you want to make a deck of regular playing cards, create a card game that you invented, or duplicate some other kinds of cards, making your own deck of cards is a relatively easy and cheap project. Design and print out any kind of cards on cardstock, or repurpose some old cards to make all kinds of custom decks. With a few craft supplies and a spare afternoon, you'll have a new deck of playing cards in no time!
Steps
Designing Your Own Playing Cards
-
1Create your playing cards from scratch in a computer program. Use a program such as Adobe Photoshop or Illustrator to create your designs. Create regular playing cards by using shapes for the suits that are pre-drawn in the program, or draw your own designs for any other type of playing cards.[1]
- Using Adobe Photoshop or Illustrator is the easiest way to design and format your cards for printing all in one place. Gimp is a good free alternative to Adobe programs that has a lot of the same capabilities.
-
2Upload photos for your cards as an alternative to making your own designs. Upload any images you want to use to a design program. Consider using photography of your own, or download images off the web to customize your cards.[2]
- For example, you could use pictures of your friends and family for the face cards in different suits of a standard playing card deck to create a fun custom deck.
Advertisement -
3Design the backs of the cards if you don't want to leave them blank. Scan the backs of an existing deck of cards you own if you want to use a generic pattern. Upload photos to a photo editing program to format them for the backs, or draw your own back designs in a design program to use.[3]
- You can search online for a variety of actual card back designs, or any other images you want to use, and load these into whatever editing program you are using to create the backs of the cards.
-
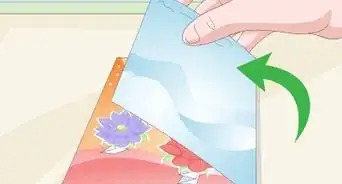
4Print photos and glue them to the backs of cards you own for an easy custom deck. Print out some photographs on photo paper at the same size as a deck of playing cards you want to customize. Use scrapbook adhesive to glue the photos to the back of the playing cards. Trim around the corners with scissors to round them.[4]
- This is a good idea for a custom gift that you can give to friends or family.
- You should only use a max of 5 photos for a regular deck of playing cards. This way, people can't memorize which card has which photo while you are playing!


Printing Custom Playing Cards
-
1Get a sturdy cardstock, like 110# index cardstock, to print on. This works best for printing black and white cards. Color printing will wear off faster after frequent use and shuffling.[5]
- You can get cardstock at an office supply or print shop.
- You can use this technique to create any kind of custom playing cards you want, from normal poker-style cards, to homemade card games.
-
2Format the cards on the computer to fit the size of the cardstock. Make the cards as big or small as you want. Use a computer program to create an image file the same dimensions as the cardstock and fit as many of the cards as you can on the sheet.[6]
- As a rule of thumb, you should be able to fit 9 cards on a piece of cardstock, but you can make the cards smaller or bigger if you like.
- Adobe Illustrator or Photoshop are examples of programs you can use to format the cards, or use Gimp as a free alternative. You could even use a business card template to format the playing cards in one of these programs.
-
3Print your cards on the cardstock with a laser printer. Print the card design you want at home from your computer to a laser printer if you have one. Take your design file on a USB drive to a print shop if you don't have a laser printer at home.[7]
- Many print shops also offer graphic design services, and should be able to format the cards to print for you if you don't have the software or know how to do it at home.
-
4Print a design on the backs of the cards if you want to. Place the printed cardstock back in the printer with the blank back sides facing up. Repeat the printing process with your back design files.[8]
- Make sure to orient the cardstock so that the back design prints the way you want it to. You can run a regular piece of printing paper through the printer first to test how it prints.


Cutting Out the Playing Cards
-
1Use a ruler and pencil to draw lines between the cards to cut along. Place the ruler horizontally between each row of cards and draw a line along it with a pencil. Do the same vertically between each column of cards.[9]
- Alternatively, you can put some light-colored lines in between the cards in the design file on your computer before you print them.
-
2Cut along the lines with a paper cutter to separate the cards. It's easiest to separate the cardstock into 4 quadrants by making 1 vertical cut and 1 horizontal cut first. Cut apart the individual cards in each quadrant first, and then trim off any excess cardstock from each card.[10]
- Make sure the height of the cards is as equal as possible, as this will help them shuffle better. The width is not as important.
- Use the guide on the paper cutter to help you make uniform cuts.
- If you don't have a paper cutter, you can use a ruler and a utility knife to cut along the lines.
- You can also use an exacto knife to cut paper.
-
3Round the corners with a corner rounding tool for a more professional look. Insert the corner of a card into the tool and press the button down to clip it. Repeat this for every corner. This will also help the cards shuffle better.[11]
- You can get a corner rounding tool from a scrapbooking store.

wikiHow Video: How to Make Playing Cards
Things You'll Need
- Cardstock
- Ruler
- Pencil
- Laser printer
- Card designs
- Paper cutter
- Corner rounding tool (optional)
- Old playing or trading cards
- Trading card sleeves
- Printer paper
- Full sheet label paper
- Photo paper
- Printer
- Scrapbook adhesive
- Scissors

-Step-17.webp)
References
- ↑ https://www.youtube.com/watch?v=l0MFE7z4zlY
- ↑ https://www.lybrary.com/how-to-make-your-own-playing-cards-a-11.html#design
- ↑ https://www.lybrary.com/how-to-make-your-own-playing-cards-a-11.html#design
- ↑ https://abeautifulmess.com/2013/06/diy-photo-playing-cards.html
- ↑ https://www.youtube.com/watch?v=l0t6PBypahI&t=135
- ↑ https://helpx.adobe.com/indesign/how-to/business-card-design.html
- ↑ https://www.youtube.com/watch?v=l0t6PBypahI&t=155
- ↑ https://www.youtube.com/watch?v=l0t6PBypahI&t=155
- ↑ https://www.youtube.com/watch?v=l0t6PBypahI&t=165
About This Article

Making your own playing cards is fun and easy. To get started, create the designs you want on the front of each card. You can either do this using digital art software, or draw the designs by hand and scan or photograph them. Another option is to use photos on your cards, or download pre-existing designs from the web. Don’t forget to choose an image for the backs of the cards, too. Once you’ve created or chosen your images, use a graphic design program to format the designs the way you want. For example, use your software to set the printing dimensions of each card and add details such as the numbers and suit symbols. When you’re completely satisfied with your designs, print them out on cardstock. Depending on how big you make the cards, you can generally fit about 9 card designs on a standard-size piece of printable cardstock. Next, turn the page over and print it out again with the card back designs on the other side. You may need to experiment with how you orient the page in your printer to make sure that the backs and fronts line up properly when you print them out. If you’re satisfied with how the printed cards turned out, use a ruler to draw cutting lines between the cards. Carefully cut out the cards using a paper cutter or a sharp utility knife. Put the finishing touch on your cards by rounding the corners with a special corner-rounding tool, which you can buy in a scrapbooking or arts and crafts store.