This article was co-authored by Tom Blake and by wikiHow staff writer, Sophia Latorre. Tom Blake manages the bartending blog, craftybartending.com. He has been a bartender since 2012 and has written a book named The Bartender's Field Manual.
There are 7 references cited in this article, which can be found at the bottom of the page.
This article has been viewed 41,073 times.
For a whiskey to be considered rye whiskey, the mash must contain at least 51% rye. Rye whiskey has a drier taste than other whiskeys, like bourbon, that are made primarily with corn. If you want to make rye whiskey yourself, it’s important to research the process thoroughly and follow all safety precautions carefully. Keep in mind that in many places it is illegal to make your own alcohol. Always comply with the rules and regulations concerning the distillation of whiskey for your area.
Ingredients
- 6 pounds (2.7 kg) of flaked rye
- 3.5 pounds (1.6 kg) of flaked corn
- 0.5 pounds (0.23 kg) of malted barley
- 1 teaspoon (4.9 ml) of gypsum
- 1 teaspoon (4.9 ml) of acid blend
- 5 gallons (19 l) of water
- 1 tablespoon (14.3 g) of distiller’s yeast
Yields 1 to 2 gallons (3.8 to 7.6 l) of whiskey
Steps
Making the Mash
-
1Fill an insulated container with 5 gallons (19 l) of 165 °F (74 °C) water. A 10 US gal (38 l) cooler works well for this as it has a tight-fitting lid and preserves the heat of the water. You can heat up the water in a large pot on the stove before adding it to the insulated container. Make sure the water reaches 165 °F (74 °C), as the heat is required to steep the grains.[1]
-
2Add rye, corn, malted barley, gypsum, and acid blend to a mesh bag. Use a nylon mesh bag that liquid can seep out of. Fill the bag with 6 pounds (2.7 kg) of flaked rye, 3.5 pounds (1.6 kg) of flaked corn, 0.5 pounds (0.23 kg) of malted barley, 1 teaspoon (4.9 ml) of gypsum, and 1 teaspoon (4.9 ml) of acid blend. Thoroughly mix the ingredients together with a long spoon or paddle.[2]
- All the ingredients can be found online as well as in distillery or brewery stores.
Advertisement -
3Put the mesh bag in the container and let it steep for 60 to 90 minutes. Tie the top of the mesh bag to prevent the ingredients from spilling out. Place the bag inside the water in the container and cover the container with a tight-fitting lid. Let it steep for 60 to 90 minutes. You can stir the mash occasionally, if desired. The liquid is now known as wort.[3]


Fermenting the Wort
-
1Put the wort in a fermenter and add 1 tablespoon (14.8 ml) (14.3 g) of yeast. You can do open or closed fermentation, depending on your preference and the equipment available. For every 5 gallons (19 l) of wort, use 1 tablespoon (14.8 ml) (14.3 g) of distiller’s yeast.[4]
-
2Let it ferment until it is no longer bubbling. The amount of wort and yeast, as well as the temperature of the fermenter, will determine how long the wort takes to ferment. It can take from a few days to over a week, though higher heat can shorten the fermentation time. Once the wort is no longer bubbling, it is done fermenting.
-
3Strain the liquid. To remove large, solid particles, the liquid can be strained through cheesecloth or even a clean pillowcase. Secure your cheesecloth to the side of a large, clean bucket with clips or a vice. Carefully pour the fermented wort through the cheesecloth. At this stage in the process, the liquid is now referred to as wash.
-
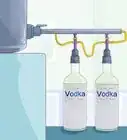
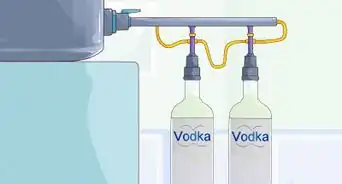
4Siphon the wash into a still. You can use a copper pot still or a continuous still. A continuous still is favored by modern distillers, while Scottish whiskey is usually made in a copper still. A continuous still, also called a column still, can be run continuously. A pot still, on the other hand, can only be used for small batches.[5]


Distilling the Wash
-
1Heat the liquid slowly to 120 to 140 °F (49 to 60 °C). Use a medium temperature to slowly heat the wash over the course of 30 to 60 minutes until it reaches the desired temperature. Keep a close eye on the temperature gauge on the side or front of the still.
-
2Turn on the condenser. Once the temperature reaches 120 to 140 °F (49 to 60 °C), turn on the condenser. The heat turns the alcohol into vapor, while leaving the water as a liquid. The alcohol vapor is condensed back into a liquid and collected in a water-cooled condenser.
-
3Throw out the heads. The “heads” refer to the first, toxic liquid that comes out of the still. The heads contain dangerous methanol that can seriously harm you if consumed. Be sure to dispose of the first 1⁄4 cup (59 ml) of liquid from the dispenser. Never drink the heads!
- Contact your local government to determine if they are any specific disposal requirements pertaining to distillation waste.
-
4Collect the hearts in small batches of 2 cups (470 ml) each. Continue collecting liquid from the condenser in small batches. The temperature of the still should be about 175 to 185 °F (79 to 85 °C) during collection of the “hearts” or the drinkable portion of liquid.
- You’ll collect between 1 to 2 gallons (3.8 to 7.6 l) of hearts, throwing out about 1⁄2 cup (120 ml) of undrinkable heads and tails.
-
5Throw out the tails. When the temperature reaches about 205 °F (96 °C), throw out the last of the liquid. Dispose of at least the last 1⁄4 cup (59 ml) of liquid, as these “tails” contain dangerous fusel oil. Never drink the tails!
- The tails don’t contain methanol, so they can disposed of down the drain.
- Let everything cool down, then thoroughly clean the still.


Aging and Diluting the Whiskey
-
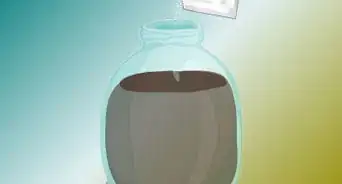
1Age rye whiskey in new, charred oak barrels for 1-3 years. Transfer the whiskey to new, charred oak barrels. Keep them indoors in a dry, cool environment. There is no specific time frame that you must age rye whiskey for, but it’s generally aged for 1 to 3 years. To be considered straight rye, the whiskey needs to be aged for at least 2 years.[6]
- Oak barrels can be purchased from distillery equipment shops or online.
-
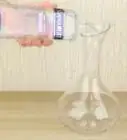
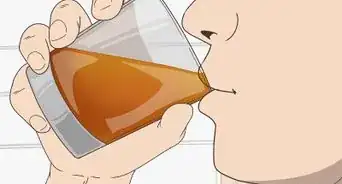
2Test the ABV and dilute the whiskey if necessary. Once the aging process is complete, use a hydrometer to test the alcohol by volume (ABV) content of the whiskey. Because the ABV will be quite high, you can dilute the whiskey with purified water prior to bottling it. To be called a rye whiskey, though, the liquor must be a minimum of 80 proof, so don’t dilute it past this point.[7]
-
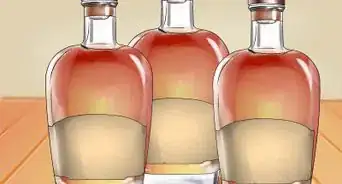
3Bottle the whiskey. Transfer the whiskey from the barrels to glass bottles to preserve the flavor. Seal the bottles and create labels for them with the date and contents. Now you can enjoy your own, homemade rye whiskey! Please drink responsibly.[8]
-
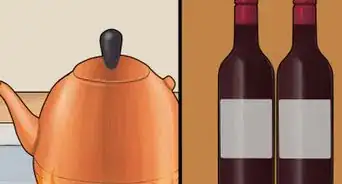
4Store bottled whiskey in a dark, temperature-controlled environment. Sealed bottles of whiskey can last indefinitely if stored correctly. Choose a dark location, well away from direct sunlight. A cabinet or closet inside a temperature-controlled home should work well. However, a room like the kitchen that has frequent fluctuations due to cooking is not ideal.[9]


Community Q&A
-
QuestionHow do I get all the wort out of the mash? It seems like a lot of liquid remains in bagged mash and is wasted.
 Community AnswerSqueeze the bag as hard as you can go get all the liquid out.
Things You’ll Need
- 10 US gal (38 l) insulated container with a tight-fitting lid (like a cooler)
- Large pot for boiling water
- Nylon mesh bag
- Spoon or paddle for stirring
- Fermenter
- Still
- Charred oak barrel(s)
- Hydrometer
- Purified water (optional)
- Glass bottles
References
- ↑ https://www.youtube.com/watch?v=aifziRfZAjE&feature=youtu.be&t=77
- ↑ https://www.youtube.com/watch?v=aifziRfZAjE&feature=youtu.be&t=524
- ↑ https://www.youtube.com/watch?v=aifziRfZAjE&feature=youtu.be&t=901
- ↑ https://www.clawhammersupply.com/blogs/moonshine-still-blog/11824025-bourbon-whiskey-vodka-and-moonshine-how-much-yeast
- ↑ http://www.madehow.com/Volume-2/Whiskey.html
- ↑ https://www.liquor.com/spirit/rye-whiskey/#gs.rXiFRX4
- ↑ https://www.liquor.com/spirit/rye-whiskey/#gs.rXiFRX4
- ↑ http://www.madehow.com/Volume-2/Whiskey.html
- ↑ http://scotchnoob.com/2012/04/16/how-to-store-whisky/
About This Article