This article was co-authored by Seleh Rahman and by wikiHow staff writer, Jessica Gibson. Seleh Rahman is a Tailor, Furrier, and the Owner of Seleh de Federal Hill in Baltimore, Maryland. With over 45 years of experience, Seleh specializes in fur, alterations, and fashion illustration. Seleh studied Fashion Design and Tailoring at Bay College of Maryland. He holds certifications in fur, design, and tailoring.
There are 18 references cited in this article, which can be found at the bottom of the page.
This article has been viewed 361,008 times.
Shopping for jeans can be a frustrating experience. You have to find pants in your price range and size, not to mention in a style you like. Save yourself the hassle and sew your own. If you're an experienced sewer and have a sturdy sewing machine with a heavy-duty needle, you can craft a custom pair of jeans in a day. You might find that you never buy another pair of jeans again!
Steps
Cutting the Denim Pieces
-
1Buy a jeans pattern in the style you want. The great thing about sewing your own jeans is that you can completely customize the style and fit. Choose a skinny, curvy, or relaxed fit pattern, for instance. Download an online pattern or buy a paper pattern from a craft supply store.[1]
- If you're unsure what style to choose, read reviews or ask a salesperson to recommend a pattern.
-
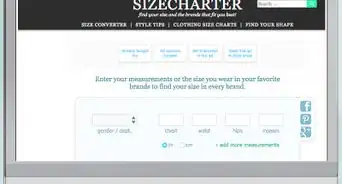
2Choose your size and cut out the corresponding paper pattern pieces. Although you might know the pant size that you usually buy, check the pattern company's size chart. Each company's sizing can be different, so measure around your waist to find the size that matches you best. Then, find the outline on your pattern that's for your size. You can usually customize the size of the pattern to make the jeans as long as you need.[2]
- Your pattern will probably show overlapping lines with sizes on each line. To make it easier to cut out, highlight the line for your size and then cut it out.
- Disregard the other lines since they're for different sizes.
Advertisement -
3Wash and dry the denim to pre-shrink it. You don't want to make perfect-fitting jeans only to toss them in the wash and shrink them. This is why it's important to put your denim into the washing machine and wash it on the hottest-recommended setting before you cut out the pieces. Put the denim into the dryer and tumble the fabric until it's completely dry.[3]
- If your denim has some elastic, it may not shrink as much as 100% cotton denim.
-
4Fold the denim in half and arrange the pattern pieces on it. Fold the denim in half lengthwise and arrange the pieces on it so they all fit. Your pattern should have a vertical line on each piece that you line up with the grain of the denim.[4]
- Folding the material means you only have to cut around each pattern piece to get 2 pieces. Since jeans are symmetrical, you'll need 2 of each pattern piece to assemble the pants.
- If the denim is wrinkled, iron it flat so you can pin the pattern to smooth denim.
-
5Pin the pattern pieces to the fabric. Insert sewing pins through the paper and into the fabric to keep the pattern in place. Feel free to use fabric weights instead of sewing pins if you don't want to push pins through thick denim.[5]
- Most jeans patterns are made up of around 10 pieces. You may be directed to only cut 1 piece for the waistband, so you'll probably have about 19 denim pieces once you cut them out.
-
6Cut out each denim pattern piece. Use sharp sewing scissors to carefully cut out the denim using the patterns as guides. If the denim material looks the same on both sides, take a fabric pencil and mark the wrong sides with a "W."[6]
- If you have a large cutting mat, spread the denim on it and run a rotary cutter around the paper patterns to cut the denim. Use caution when you use the sharp rotary cutter.

Making the Fly Zipper and Pockets
-
1Sew the fly to 1 side of a front jean piece. Pin the fly to the inner edge of 1 front jean piece so it's on the side where the zipper will go. Position the pieces so the right sides touch. Make straight stitches down the long side to join them. Then, unfold the fly so it lays flat.[7]
- Use thread that matches the color of the denim since you don't want this thread to stand out.
- If you have a serger, serge around the other edges of the fly so they don't fray. If you don't have a serger, sew a zigzag stitch around them.
-
2Clip a zipper to the fly and sew it in place. Lay a jeans zipper on the fly so it's lined up with the edge and clip it in place. Attach a zipper foot to your sewing machine and straight stitch along the edge to secure the zipper to the fly.[8]
- Ensure that you don't sew into the teeth of the zipper or you could damage your machine.
-
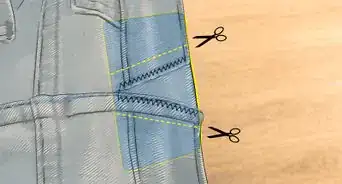
3Attach the front pockets to the bags. If your pattern has pocket bags, cut out the material and stack the pieces. Line up 1 of the front pockets on the corner of the bag and pin it in place. Then, sew around all of the edges except the top edge of the pocket. Repeat this for the other front pocket.[9]
- If your jeans pattern doesn't have pocket bags, skip this step and just sew the front pockets together with a straight stitch.
-
4Stitch the front pocket bags to the front of your jeans. Spread 1 of the front jean pieces flat so the right side faces up and arrange 1 of the front pocket pieces on top so the right side faces down. Line up the curve of the pocket and sew along the curve. Then, flip the pocket bag behind the jeans and iron it flat.[10]
- Repeat this for the other front pocket.
-
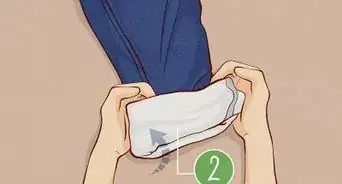
5Sew the folded sides of the back pockets and stitch them to the jeans. Take both of the back pocket pieces and fold the top edge down 2 times to hide the raw edge. Straight stitch across this edge before you fold the other sides in by 1⁄4 inch (0.64 cm). Iron the pockets flat and position them on the back of the jeans so the right sides face out. Then, straight stitch around the sides and bottom of each pocket.[11]
- Ensure that the pockets are centered on the back pieces of your jeans.
- Don't accidentally sew the top edge of the pockets to the pants or you won't be able to use them!
Sewing the Main Pieces
-
1Lay the back pieces together and sew along the crotch seam. Stack the 2 back pieces so the right sides touch and line up the curve of the crotch. Stick a few sewing pins along this edge so the pieces don't shift as you're sewing. Then, sew straight stitches along this entire curved edge and leave a 3⁄4 inch (1.9 cm) seam allowance.[12]
- To reduce some of the bulk in the crotch area, trim 1 side of the seam allowance down to 1⁄4 inch (0.64 cm). Fold the other side over and straight stitch across the seam.
-
2Stack the top and bottom pieces and pin them in place. Lay the front piece of the jeans with the right side facing up on your work surface and put the back piece on top so the right side faces down. Line up the center crotch seam and pin from there down both inner sides of the legs.[13]
-
3Sew the inner seam with a 3⁄4 inch (1.9 cm) seam allowance. Start sewing at the bottom of 1 leg along the inner seam and leave a 3⁄4 inch (1.9 cm) seam allowance. Keep sewing up the leg, around the bottom of the crotch, and down the other inner leg seam till you reach the bottom.[14]
- If you'd like to have a more polished look, open the pant legs so they're flat and fold the seam over to 1 side. Then, stitch along the very edge to make a flat felled seam.
-
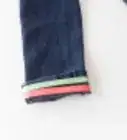
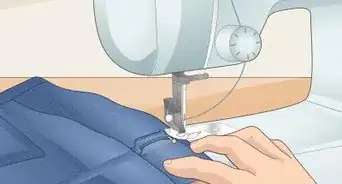
4Fold the bottom of the legs under and hem around each leg. Tuck the bottom of pant leg in by about 1⁄2 inch (1.3 cm). Then, fold it again by 1⁄2 inch (1.3 cm) to hide the raw seam. Use sewing clips around the leg to keep the folds secure. Then, use a straight stitch to sew around the bottom of the leg. Leave a 1⁄2 inch (1.3 cm) seam allowance and do the same for the other pant leg.[15]
- Although you could use sewing pins to hold the hem in place, you don't want to add needle marks to the jeans.
Finishing the Jeans
-
1Sew the waistband pieces together and attach it to the top of the jeans. Take the 2 fabric pieces for the waistband and stack them so the right sides touch. Make straight stitches just along the top edge of the band and clip this side to the inside of the jeans so the ends line up with the front. Sew around the waistband and leave a 1⁄2 inch (1.3 cm) seam allowance.
-
2Fold the waistband over and sew it in place to finish. Now that the waistband is attached to the jeans, fold the fabric over so the right side faces out. Tuck all of the raw edges under and clip the waistband in place at the front where it meets the zipper. Then, straight stitch across the bottom and top of the entire waistband.[16]
- If you have time, iron the waistband after you fold it down, which can keep the fabric in place before you finish sewing.
-
3Cut 5 or 7 belt loops. Cut out the denim for the belt loops and fold it over 2 times to make a long, narrow strip. Make straight stitches along both long sides and then cut the strip into 5 or 7 equal pieces, depending on how many loops you want to add.
- Women's jeans usually have about 5 loops while men's jeans generally have 7.
-
4Sew each belt loop to the waistband. To sew a loop to the jeans, tuck a loop under by 1⁄2 inch (1.3 cm) and line up the edge with the top of the waistband. Zigzag stitch across it and repeat this for the other end, which is at the bottom of the waistband.[17]
- In general, sew a loop on each side seam, put 2 on the front, and place 1 at the center back. If you want to use 7, put 2 more loops on the back of the jeans.
- If you'd like to secure the loops even more, straight stitch across the loop ends after you've zigzagged them to the waistband.
-
5Sew a buttonhole on the front of the jeans. Attach the button foot to your sewing machine and run your machine so it tightly stitches a long rectangle with space in the center. Then, scissors or a box cutter and very carefully slice the denim in the center to create the hole.[18]
- The denim does fray a little, so put a few drops of liquid sealant, which prevents further fraying.
-
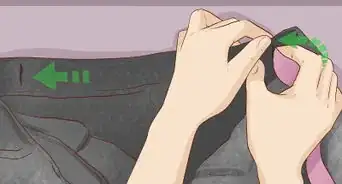
6Push a button onto the opposite edge of the jeans. To attach a metal button, poke a hole through the fabric on the opposite edge of the jeans and push the metal button through. Place the bottom tack under the button and tap the top with a mallet to snap the button in place.[19]
- You can use a flat tack button if you'd like the button to be completely smooth or a donut button, which has an indented circle in the center.
Community Q&A
-
QuestionWhy do people wear clothes?
 Community AnswerBecause public nudity is illegal in most places, and because people are generally shy about exposing their bodies to others.
Warnings
- Jeans are a challenging project, even for an experienced sewer. It's important to learn basic sewing skills before you attempt a project that includes a lot of moderate to advanced sewing techniques.[20]⧼thumbs_response⧽
Things You'll Need
- Denim
- Scissors
- Jeans pattern
- Sewing machine
- Polyester thread
- Zipper or buttons
- Sewing clips
- Heavy-Duty or denim needle
- Button
- Awl
- Mallet
- Cutting mat and rotary cutter, optional


References
- ↑ https://youtu.be/Xs_HGm2fXQI?t=85
- ↑ https://youtu.be/F025v6FvGi4?t=423
- ↑ http://www.sewingsupport.com/sewing-how-to/sewingsupport-articles/how-to-preshrink-fabric.html
- ↑ https://youtu.be/gNSnWp3cUD8?t=106
- ↑ https://youtu.be/gNSnWp3cUD8?t=106
- ↑ https://youtu.be/Xs_HGm2fXQI?t=110
- ↑ https://youtu.be/WV2yQ57pTGE?t=299
- ↑ https://youtu.be/HWYuQhsuwdA?t=1136
- ↑ https://youtu.be/HWYuQhsuwdA?t=521
- ↑ https://youtu.be/HWYuQhsuwdA?t=568
- ↑ https://youtu.be/HWYuQhsuwdA?t=391
- ↑ https://youtu.be/HWYuQhsuwdA?t=814
- ↑ https://youtu.be/HWYuQhsuwdA?t=1311
- ↑ https://youtu.be/HWYuQhsuwdA?t=1311
- ↑ https://youtu.be/WV2yQ57pTGE?t=453
- ↑ https://youtu.be/WV2yQ57pTGE?t=479
- ↑ https://youtu.be/WV2yQ57pTGE?t=522
- ↑ https://youtu.be/om_r2EhLApA?t=155
- ↑ https://youtu.be/WV2yQ57pTGE?t=565
- ↑ https://www.theguardian.com/fashion/did-you-make-that/2013/jul/02/how-to-make-your-own-jeans
About This Article