This article was co-authored by wikiHow Staff. Our trained team of editors and researchers validate articles for accuracy and comprehensiveness. wikiHow's Content Management Team carefully monitors the work from our editorial staff to ensure that each article is backed by trusted research and meets our high quality standards.
This article has been viewed 57,301 times.
Learn more...
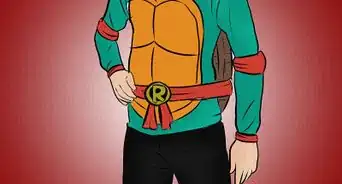
Batman, the iconic DC Comics superhero, is outfitted with high-tech, crime-fighting gadgets. Many of these useful tools, which include grappling hooks, sonic grenades, and a mini-computer, are stored in the canisters and pockets of his utility belt. No Batman costume is complete without a replica utility belt. Instead of purchasing a utility belt, create your own utility belt relatively inexpensively— high-tech gadgets and weapons not included.
Steps
Making the Batman Buckle
-
1Get the materials needed. To make the buckle, you'll need 3mm foam, scissors, a X-Acto knife, and super glue.
- Use 3mm foam. Use yellow foam for an all yellow utility belt, and black foam for an all black belt. Alternatively, you can use both black and yellow foam, using yellow for the base of the buckle and black for the Batman symbol.
-
2Draw or trace a pattern onto the foam. For the design of the Batman buckle, you can make your own, using a picture of Batman's utility belt as a reference.. Use a sharpie or a pen to draw the patterns in the foam.
- For a basic Batman utility belt buckle, you'll need three pieces: an oval, a ring that goes around the edge of the oval, and a Batman symbol. The oval should be roughly 4" across and 3" tall. The ring should be the same dimensions of the oval but with the middle cut out. The Batman symbol should be no bigger than the inner dimensions of the ring.
Advertisement -
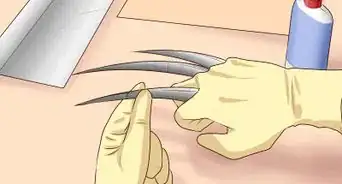
3Cut out the patterns. After you've drawn the three pieces on the foam, the oval, the ring, and the Batman symbol, and whatever other details you chose, cut them out. You can use scissors for the bigger pieces, like the base oval. For pieces with smaller details, like the Batman symbol, use an X-Acto knife.
-
4Glue the pieces together. Glue the ring onto the edges of the oval to create a border. Glue the Batman symbol onto the center of the oval. Allow the glue to dry.[1]


Making the Pouches
-
1Get the materials needed. To make the pouches, you'll need 5mm foam, scissors, a X-Acto knife, cardboard or cardstock, a ruler, velcro, and super glue.
- Use yellow foam if you want a yellow Batman utility belt, and black foam for an all black belt.
-
2Create a pattern. A basic pouch is made out of three foam pieces. The first piece is a long rectangle that is folded to form the front, back, and top flap. The other two pieces are shorter and narrower rectangles that function as the sides.
- To create the first piece, make a pattern piece out of cardboard or cardstock that is 10.5 inches long and 4 inches wide.
- To create the two side pieces, make 2 pattern pieces out of cardboard or cardstock that are 3 ⅜ inches long and ⅞ inches wide.
- Cut out the pattern pieces.
- The pouches on your utility belt may be any size you wish. Allow the items you intend to carry determine the size of the pouches—the pouch must be large enough to hold the item. To create a custom-sized pouch, use the length, width, and depth measurements of the items you plan to carry in the pouches of your utility belt.
-
3Trace and cut out the pieces. Trace each pattern piece onto the foam 4 to 6 times. Use scissors to cut out all the pieces.
- If you have more room on your belt, you can always make more pouches.
- You may need to round the edges of the side pieces with scissors so that they fit.
-
4Glue the pieces together to form pouches. Prior to construction the pouches, you must determine the flap length. And add one inch to this measurement to account for the width of the pouch.
- Measure and mark the flap. From the top of the rectangle, use a ruler to measure and mark the length of your flap.
- Place side pieces. Place a thin layer of glue along one long edge of a side piece—this edge will rest on the top of the large rectangle. Align the top of the side with the mark used to indicate the flap length and align the edge with glue flush with large rectangle’s left edge. Repeat this process with the other side piece, attaching it to the right edge of the large rectangle. Allow the glue to dry.
- Place a thin layer of glue along each of the side piece’s bottom and side edge. Do not put glue on the top edge.
- Fold the large rectangle up and over the base and side edges of the two side pieces. Hold the large rectangle in place as the glue sets.
- Repeat this process until you have constructed each pouch.
-
5Glue velcro to the flap. To prevent your pouches from opening, add a piece of velcro to the flap of each pouch.
- Cut one small square of velcro for each pouch. Do not pull apart the velcro.
- Glue one side of the velcro onto the inside of the front flap.
- Place a small amount of glue onto the other side of the velcro.
- Carefully fold the flap onto the front of the pouch and hold it firmly in place.
- Once the glue has dried, rip apart the velcro.[2]


Constructing the Utility Belt
-
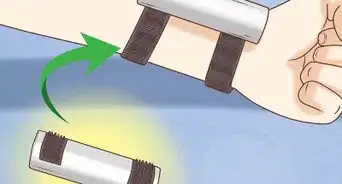
1Use found objects for canisters. If you want to add canisters, you can use a number of different objects. You can use film roll canisters, or pill bottles, or some other cylindrical object that would fit on a belt.[3]
-
2Get a belt. You'll want a thick leather belt to attach everything to. If you think you'll want to paint the whole thing yellow, it doesn't matter what color the belt is. If you want your Batman utility belt to be all black or have yellow pouches on a black belt, look for a black leather belt.[4]
-
3Glue the pouches, buckle, and optional canisters to the belt. You'll want to use super glue of some sort to glue everything to the belt. Krazy glue will work. Don't paint anything until it's all glued on, as glue doesn't stick to painted surfaces as well.[5]
-
4Paint the belt. Use acrylic paint to paint what you want to be a different color. This will usually include painting the canisters yellow and optionally painting the belt yellow. Use a small brush to get the edges where the belt meets the pouches so that there's no brown or black leather showing, if you want the belt yellow.[6]
-
5Finished.


Community Q&A
-
QuestionWhy can't I use tape instead?
 AdelleshelpfultipsCommunity AnswerThe tape will tear and fall apart. Tape usually tears and gets ruined very quickly.
 -
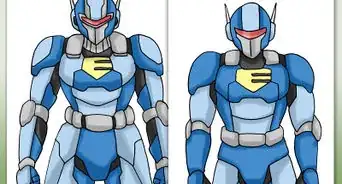
QuestionI am a boy, can I use blue and green foam to make my belt?
 Community AnswerYou can if you want to, it just won't really be recognizable as a "Batman belt" so most people, because those aren't Batman's colors.
 -
QuestionHow do I get the items to put into the belt?Community AnswerYou can just find items around your house or purchase them from a store. It's up to you what you put in your utility belt! If you want Batman-themed items, I recommend ordering them online.
Warnings
- Be careful when using utility knives and scissors.⧼thumbs_response⧽
Things You'll Need
- 3mm foam, yellow and/or black
- 5mm foam, black or yellow
- Paint and paint brushes
- Super glue
- Velcro
- Scissors
- Utility knife
- Canister-like objects
- Cardstock or cardboard
- Ruler


References
- ↑ http://www.thefoamcave.com/tutorials/how-to-make-a-utility-belt
- ↑ http://www.thefoamcave.com/tutorials/how-to-make-a-utility-belt
- ↑ http://www.thefoamcave.com/tutorials/how-to-make-a-utility-belt
- ↑ https://www.youtube.com/watch?v=3eAXER9Nc5s
- ↑ https://www.youtube.com/watch?v=3eAXER9Nc5s
- ↑ http://www.thefoamcave.com/tutorials/how-to-make-a-utility-belt
About This Article