This article was co-authored by wikiHow Staff. Our trained team of editors and researchers validate articles for accuracy and comprehensiveness. wikiHow's Content Management Team carefully monitors the work from our editorial staff to ensure that each article is backed by trusted research and meets our high quality standards.
The wikiHow Video Team also followed the article's instructions and verified that they work.
This article has been viewed 189,411 times.
Learn more...
Blackberry pie is a popular, sweet dessert for every season. Most people pick their blackberries in the spring or summer to make their pies fresh, or you can save the berries by freezing them to make a pie later in the year. No matter what kind of berries you're using, baking a blackberry pie is fun and easy for bakers of all ages!
Ingredients
- 4 cups (440 g) of fresh or frozen blackberries
- 3/4 cup (172.5 g) of sugar
- 1/2 cup (64 g) of flour
- 2 tablespoons (30 mL) of milk
- 2 homemade or refrigerated pie crusts
Steps
Filling the Pie
-
1Preheat the oven to 425 °F (218 °C). Make sure the oven is set to the right temperature, and as it's heating up, get a pie pan or plate. It's important to bake the pie at higher heat first to ensure that the crust becomes crispy and flaky and the filling is cooked all the way through. This should take about 10-15 minutes, depending on your oven.[1]
- While the oven is preheating, you can start on the next steps of the recipe.
-
2Line a greased pan with 1 of the pie crusts. Spray the pan with baking oil or apply a thin layer of fat, like butter or margarine, by hand. Roll out your dough to make a circle about 1⁄8 inch (0.32 cm) thick, and flip the pie pan upside down on top of the dough to ensure that it extends around 1–3 inches (2.5–7.6 cm) from the outer rim. Remove the pan and lift the dough with a rolling pin. Gently place the crust in the dish, pressing it down carefully until it is touching the bottom and sides of the pan.[2]
- You can use a store-bought crust or make your own homemade crust from scratch.
Advertisement -
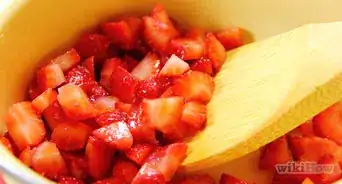
3Mix 3.5 cups (385 g) of blackberries with ½ cup (115 g) of sugar and the flour. In a large mixing bowl, combine most of the blackberries and sugar with all of the flour. Use a spoon or spatula to stir the mixture until it's an even consistency with no clumps of flour or sugar. If you do have clumps, use the spoon or spatula to break them up and continue stirring.[3]
- Keep in mind that you can use fresh or frozen blueberries. If you're using frozen blueberries, you may have to stir the mixture a bit longer to break up clumps.
If you're using frozen blackberries, be sure to defrost them and drain any excess liquid before you begin making your filling.
-
4Spoon the mixture into the pie shell and top with unsweetened berries. Carefully distribute the sweetened berries into the pie shell and make sure this bottom layer is even across the pan. Then, add the remaining ½ cup (55 g) of berries on top of the sweet filling. This will help to ensure that the pie isn't too sweet.[4]
- If you like your pie on the sweeter side, you can mix all of the berries in with the sugar and flour for a delicious, sweet filling.
Adding the Top Crust
-
1Roll out the crust on a floured surface so that it doesn't stick. Dust a countertop or cutting board with a light layer of flour and lay the crust on top of the flour. If it hasn't been rolled out already, use a rolling pin to flatten it into a circle about 1⁄8 inch (0.32 cm) thick. For store-bought crusts, you may still have to roll it out to make it a bit thinner.[5]
- Make sure the circle is large enough to cover the pie. Most pie pans have a diameter of 8–9 inches (20–23 cm), so your dough should also be around that same size.
-
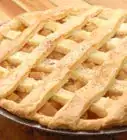
2Cut the crust into strips or shapes using a sharp knife if you want a fun design. Carefully cut the crust into a perfect circle, and then use a knife to make strips if you want a lattice-style crust. For a more unique design, try using a cookie cutter or your knife to cut out shapes, like stars, autumn leaves, or even hearts.[6]
- If you're having trouble deciding what kind of design to use for your crust, you can look up inspiration pictures online.
- If you want a simple pie without a design on the crust, you can skip this step and leave the crust intact.
Tip: You can make your pie crust themed for the season by using small cookie cutters to make fun shapes. Try leaves for fall, hearts for Valentine's day, or flowers for spring!
-
3Arrange the crust in your desired design on the top of the pie filling. If you're doing a traditional pie, simply transfer the crust onto the top of the pie and use a knife to cut 3-4 vents into the top for steam to escape. For a lattice-style design, weave the strips that you cut over and under each other, leaving squares of exposed blackberries in between the strips.[7]
- For cut out shapes, you can arrange them in a pattern around the edge of the pie, or position them all over the top of the pie. Feel free to get creative with your design.
-
4Crimp the crust around the edge of the pie so that the crusts bake together. Use a fork to press down on the dough around the edge of the pan where the crusts meet. This will make it so that your crust sticks together as it bakes and will be less likely to fall apart when you cut it later.[8]
- If you don't want the lines from the fork, you can press down on the crusts with your fingers to crimp the crusts together.
Baking the Pie
-
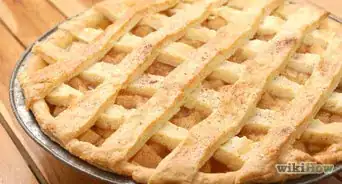
1Brush the crust with 2 US tbsp (30 mL) of milk and sprinkle sugar on top. Use a basting brush to evenly cover the top layer of crust with the milk. Then, sprinkle ¼ cup (60.6 g) of sugar across the top of the pie. This will help the top crust bake into an even, brown color and add some sweetness to the crust.[9]
- Some chefs choose to use an egg wash to brush their crusts instead. However, milk works best for this pie because it helps the top of the crust to become flaky and sweet.
-
2Place the pie in the preheated oven to bake for 15 minutes. Position the pie on the center rack of the oven, and leave it uncovered to bake at 425 °F (218 °C). After 15 minutes, the top of the crust should be a very light brown color, which means that the pie is baking thoroughly.[10]
- Baking at high heat first helps to brown the crust and cook the filling without over baking.
-
3Reduce the temperature to 375 °F (191 °C) and bake for 20-25 minutes. Without removing the pie from the oven, lower the temperature of the oven. As the temperature falls, let the pie bake for the rest of the time or until the filling begins to bubble around the edges of the crust.[11]
- This will help the pie bake all the way through the filling but keeps the crust light and flaky. When the pie is done, the crust will be a light, golden-brown color.
Tip: If you notice the edges of the crust are becoming a dark brown color, lay a piece of foil over the pie to keep it moist.
-
4Remove the pie from the oven and let it cool on a wire rack before serving. Carefully take the pie out of the oven and set it on a wire rack to cool, uncovered. Ideally, you should let the pie cool for 1-2 hours so the filling can set, which will prevent it from becoming running when you cut into it.[12]
- You can store leftover pie by covering the plate with cling wrap and placing it in the refrigerator, where it will stay fresh for about 5 days.


Community Q&A
-
QuestionShould I boil the blackberries before baking?
 Pat Southwood-TheronCommunity AnswerNot unless the recipe you're using requires you to do so.
 -
QuestionWhat's the best way to clean blackberries?
 Community AnswerRinsing them in cold water is the best way to clean blackberries prior to eating them. I recommend using a colander.
 -
QuestionCan I freeze my blackberry pie with the blackberries that were frozen?
 Community AnswerYes. Spread the blackberries out on a cookie sheet in a single layer. Then, stick the tray in the freezer. This is known as flash freezing, and will ensure that the berries freeze individually, rather than in big, unmanageable clumps. To avoid freezer burn, try to use your blackberries within six months.
Things You'll Need
- Pie pan or dish
- Oven
- Spoon or spatula
- Mixing bowl


References
- ↑ https://www.allrecipes.com/recipe/12284/blackberry-pie-i/
- ↑ https://www.foodnetwork.com/videos/lining-a-pie-pan-92138
- ↑ https://www.allrecipes.com/recipe/12284/blackberry-pie-i/
- ↑ https://www.allrecipes.com/recipe/12284/blackberry-pie-i/
- ↑ https://kristineskitchenblog.com/blackberry-pie/
- ↑ https://kristineskitchenblog.com/blackberry-pie/
- ↑ https://kristineskitchenblog.com/blackberry-pie/
- ↑ https://www.allrecipes.com/recipe/12284/blackberry-pie-i/
- ↑ https://www.allrecipes.com/recipe/12284/blackberry-pie-i/
About This Article

To make a blackberry pie, start by mixing blackberries, sugar, and flour and then spooning the mixture into a greased pan lined with a pie crust. Then, top the filling with an even layer of unsweetened blackberries. Next, roll out some more pie crust and cut it into strips or shapes before arranging it on top of the pie filling, crimping the edges so the upper and lower pie crusts bake together. Finally, bake the pie for 35 minutes at 425 degrees Fahrenheit, lowering the temperature 375 degrees after 15 minutes. To learn how to make different crust designs for blackberry pie, scroll down!