This article was co-authored by wikiHow Staff. Our trained team of editors and researchers validate articles for accuracy and comprehensiveness. wikiHow's Content Management Team carefully monitors the work from our editorial staff to ensure that each article is backed by trusted research and meets our high quality standards.
There are 9 references cited in this article, which can be found at the bottom of the page.
The wikiHow Video Team also followed the article's instructions and verified that they work.
This article has been viewed 34,398 times.
Learn more...
A butterfly is a cute, pretty costume for people of all ages. Choose any fabric to make butterfly wings, decorate them how you want them to look, and then attach them to a garment, such as a dress or shirt. Enhance your costume with a quick and easy pair of antennae, accessories, make-up and you’ll be ready to go! You can create a butterfly costume for a child or an adult.
Steps
Creating Butterfly Wings
-
1Draw or print a butterfly wing template. You can draw a template onto a large piece of butcher paper or newspaper if you want to make your own. Use a picture of a butterfly to help you choose a wing design and copy it as best you can. Or find a free butterfly wing pattern online and print it out. Cut out your paper template using a sharp pair of scissors.
- If you are making your own template, measure from fingertip to fingertip and divide this number in half to determine how wide to make the wing template. Then, measure from your shoulder to the middle of your thigh to determine how long to make the template.
- You only need to draw or print 1 wing to use as your template.[1]
Tip: If you are making this costume with a small child, make sure someone responsible and older is cutting.
-
2Pin the wing template onto a 2 yd (1.8 m) long piece of fabric. Muslin, cotton, felt are all good choices for making butterfly wings. Fold your fabric so that it is in 2 layers and smooth out any lumps or bumps. Place the template onto the fabric so that the inner or flat edge of the wing template is lined up with the fold. Place a pin every 2 to 3 in (5.1 to 7.6 cm) along the edges.
- Be sure that the fabric is no too heavy or bulky if you are wearing the costume for extended periods of time, like trick-or-treating or at a party.[2]
- Insert the pins so that they are perpendicular to the edges of the template.
Tip: You can use any type of fabric you like to create your wings. For a quick, easy, and cheap pair of butterfly wings, trace the paper template onto a plastic garbage bag and then use orange and white plastic pieces to decorate the wings.
Advertisement - Be sure that the fabric is no too heavy or bulky if you are wearing the costume for extended periods of time, like trick-or-treating or at a party.[2]
-
3Cut around the non-folded edges of the wing template. Do not cut along the folded edge! Only cut along the curves and other parts of the wings. Use a sharp pair of fabric scissors to make long, even cuts in the fabric. Be careful not to create any jagged edges as you cut.[3]
- Remove the pins and the paper template after you finish cutting and open up the wings. Place them with the right (outer or print) side of the fabric facing up. If the fabric is the same on both sides, then this won’t matter.
-
4Use markers or paint if you want to color the wings yourself. If you are using a light-colored muslin or cotton fabric, then you can color it in with fabric markers or acrylic paint. Use the shapes that are printed on your template to help you determine where to draw shapes and fill them in with color. [4]
- Try using black, orange, and white for a monarch butterfly look.
- Go with different shades of 1 color, such as dark blue, royal blue, and light blue for a monochromatic look.
- Choose several bright or pastel colors for a rainbow effect.
Tip: Decorating costumes can be especially fun for small kids!
-
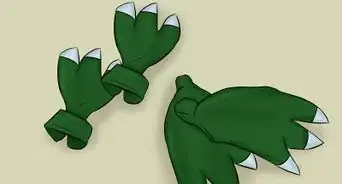
5Cut out shapes of foam or different colored fabrics and glue them on if you want a 3D effect. If the template you used includes various shapes, then you can use these to cut out fabric pieces that you can glue onto your wings. If the wing template does not include shapes, you can draw your own using an image of butterfly wings as your guide. Cut out teardrops and dots and attach them to the wing with fabric glue. Position the teardrops in the middle of the wings with the pointed ends facing in and place the dots along the outer edges.
- To attach the shapes you can use hot glue, fabric glue, or needle and thread. Make sure that whatever you do use to attach the embellishments is durable.[5]
- Butterflies usually have intricate patterns on their wings, but don’t worry if you can’t replicate it exactly. Gluing a variety of shapes to the wing will create the desired effect.
- To attach the shapes you can use hot glue, fabric glue, or needle and thread. Make sure that whatever you do use to attach the embellishments is durable.[5]
-
6Add accents with puffy paint, glitter, or other items. After you have colored in the wings with your desired colors, add more detail by enhancing the design with colorful shapes, glitter, sequins, pom poms, or beads. Use fabric glue to attach items to the wings where you want them to go.[6]
- Let the glue dry for 8 hours or overnight before you move or wear the wings.
Tip: You may decorate 1 or both sides of the wings depending on how you want the costume to look. Decorating both sides will ensure that the colors will be visible from the front and the back. However, only decorating 1 side might make your costume a little more mysterious. Keep in mind that if you decorate both sides, your body will cover up a portion of the front, so don't decorate there.
-
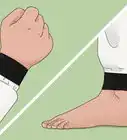
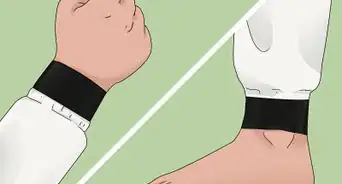
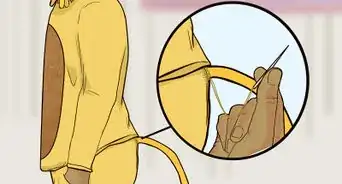
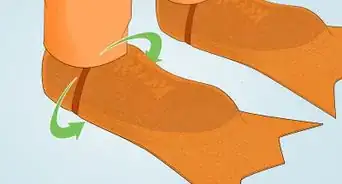
7Tie elastic bands to the wings to keep them on your wrists. Cut a small slit in the wing and insert a 6 in (15 cm) long scrap of fabric through it. Loop an elastic band on the fabric and tie a double knot to secure the elastic band to the wing. Then, trim off the excess fabric leaving only about 0.5 inches (1.3 cm). Repeat for the other side.[7]
- Slip the elastic bands over your wrists when you wear the wings. This will allow you to flap and flutter the wings while you wear them.

Putting the Costume Together
-
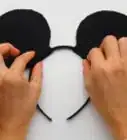
1Use double-sided tape, glue, or needle and thread to attach the wings to a shirt or dress. After you have finished decorating your wings and the paint or glue has dried, adhere the wings to a shirt or dress with your method of choice.[8] You may also want to tack the wings down at the top of the garment with needle and thread, or secure it with a couple of safety pins to ensure that the wings will stay put.[9]
- Make sure to select a dress or shirt and pants that will complement the colors in your wings. For example, if your wings are orange, black, and white, then go with a black dress or a black t-shirt with black pants.
- If you opt for all black clothes consider adding subtle embellishments that complement the wings.
-
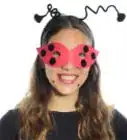
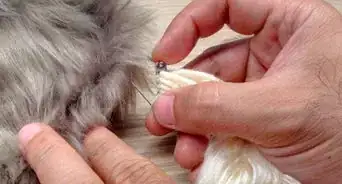
2Make a simple antennae headband to wear. Glue 1 pom-pom to the end of a pipe cleaner. Then repeat with another pom-pom and pipe cleaner. Let the glue dry overnight. Wrap the free end of the pipe cleaner around the center of a headband. Repeat this with the second pipe cleaner and pom-pom. Adjust the antennae to your liking, such as by separating the pom-poms or bending the pipe cleaners slightly.[10]
- Wear the antennae headband with your butterfly wings to complete the costume.
-
3Style your hair to complement the butterfly wings. You might also style your hair in a way that will complement the costume. You could wear your hair back in a bun for a sleek look, or wear your hair loose for something more casual.
- If you decide to add hair clips or other accessories, choose ones that match your costume, such as yellow clips with yellow butterfly wings.
- You can also consider temporary hair dye for bolder hair.
-
4Do butterfly inspired makeup or face paint. Choose eye shadow and lipstick colors that match your wings, or draw a butterfly on your cheek using face paint. For example, if you are wearing royal blue, black, and white butterfly wings, then opt for a blue lipstick with blue or white eyeshadow and black eyeliner.
- Instead of a butterfly, you can also repeat motifs from your wings as face paint. For example, if you have teardrops on your wings you can draw teardrops in corresponding colors on you face.[11]
- Keep in mind that wearing makeup is optional.
Tip: You could also look for a butterfly temporary tattoo or nail art for even more butterfly details!
- Instead of a butterfly, you can also repeat motifs from your wings as face paint. For example, if you have teardrops on your wings you can draw teardrops in corresponding colors on you face.[11]

Community Q&A
-
QuestionHow do you make butterfly wings?
 Drew Hawkins1Community AnswerStart by drawing or printing the outline of the wings and pinning them onto a long piece of fabric. Cut out the fabric around the wings and then color the wings with markers or paint. Attach the wings to some foam to keep them rigid and you're done!
 -
QuestionHow do I attach wings to a costume?Drew Hawkins1Community AnswerYou could use some double-sided tape to attach the wings to a shirt or dress to make an easy costume!
Things You’ll Need
- Wing template or butcher paper/newspaper to create your own
- Marker or pen
- Pins
- Scissors
- Felt, cotton, or muslin fabric
- Glue stick or fabric glue
- Double-sided tape
- Needle and thread
- 2 elastic bands or strips of elastic
- Dress or shirt and pants
- Headband
- 2 pipe cleaners
- 2 pom poms
- Hair accessories (optional)
- Hair dye (optional)
- Makeup (optional)
- Face paint (optional)

References
- ↑ https://www.youtube.com/watch?v=tXMXR_32eiQ&feature=youtu.be&t=34
- ↑ https://www.youtube.com/watch?v=tXMXR_32eiQ&feature=youtu.be&t=56
- ↑ https://brendid.com/how-to-make-an-easy-butterfly-costume/
- ↑ https://www.skiptomylou.org/easy-butterfly-costume/
- ↑ https://brendid.com/how-to-make-an-easy-butterfly-costume/
- ↑ https://brendid.com/how-to-make-an-easy-butterfly-costume/
- ↑ https://www.youtube.com/watch?v=tXMXR_32eiQ&feature=youtu.be&t=155
- ↑ https://www.youtube.com/watch?v=tXMXR_32eiQ&feature=youtu.be&t=137
- ↑ https://www.youtube.com/watch?v=tXMXR_32eiQ&feature=youtu.be&t=148
About This Article