This article was co-authored by wikiHow staff writer, Hunter Rising. Hunter Rising is a wikiHow Staff Writer based in Los Angeles. He has more than three years of experience writing for and working with wikiHow. Hunter holds a BFA in Entertainment Design from the University of Wisconsin - Stout and a Minor in English Writing.
There are 9 references cited in this article, which can be found at the bottom of the page.
wikiHow marks an article as reader-approved once it receives enough positive feedback. In this case, 95% of readers who voted found the article helpful, earning it our reader-approved status.
This article has been viewed 269,427 times.
Learn more...
Guinea pigs are grazing animals and need space to roam around and play. Although you can get large cages for your guinea pig from a pet store, a more cost-effective option is to build your own with cube storage grids and coroplast, also known as a C and C cage. C and C cages can be arranged in any shape and are easy to build in an afternoon. Once your cage is complete, you’ll have a new home your guinea pigs will love!
Steps
Constructing the Cage
-
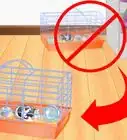
1Purchase a set of cube storage grids. Storage grid cubes are easy-to-build metal storage options typically used for cheap shelving options. Look for cube grids that have openings between 1 1⁄2–2 1⁄2 in (3.8–6.4 cm). Make sure you have at least 12 grid pieces for your cage.[1]
- Storage grids can be purchased from your local superstore or online.
- Guinea pigs may get stuck in openings that are 1 1⁄2 in (3.8 cm) or smaller and cause suffocation.
-
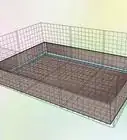
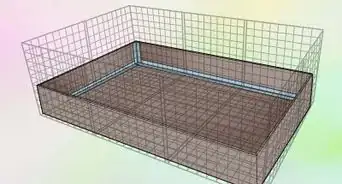
2Lay the grid on the floor to make a rectangle that’s at least 7 1⁄2 sq ft (0.70 m2). Spread the grid pieces on a table or on the floor of the room where you plan on keeping your guinea pigs. Make sure the edges line up so that the cage doesn’t overlap. Measure the square footage of the base to confirm that it’s at least 7 1⁄2 sq ft (0.70 m2). This will form the base of your cage.[2]
- If you’re housing more than 2 guinea pigs, add 3 square feet (0.28 m2) for each additional animal.
- Most grid pieces are 12 in × 12 in (30 cm × 30 cm), so you only need 8 pieces to make your floor.
- You can leave the cage on the ground or put it on a table.
Tip: Change the shape of the cage if a rectangle won’t fit in your room. For example, you can make an L-shaped cage as long as it still is at least 7 1⁄2 sq ft (0.70 m2).
Advertisement -
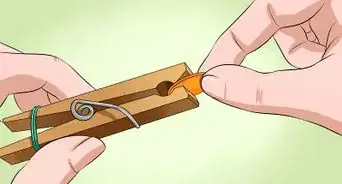
3Secure the grid pieces together with 2-3 zip ties per side. Hold the edges of the base together so they’re touching. Combine the pieces by wrapping 1 zip tie around them in each corner. If the connection feels loose between the grid pieces, add another zip tie in the middle. Continue wrapping zip ties around each grid piece until your floor is finished.[3]
- Zip ties can be purchased from your local hardware store.
-
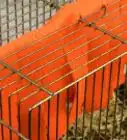
4Attach upright grid pieces along the sides of the base to make the walls. Hold a grid piece so it’s standing up against the outer edge of your floor. Use 2-3 more zip ties per grid piece to attach your walls to the floor. Tie the wall pieces together with more zip ties.[4]
- Work with a partner to make the building process easier.
-
5Cut the tails of the zip ties so your guinea pigs don’t chew on them. When you pull the zip ties tight, there will be excess tails that stick out in the middle of your cage. Use a pair of scissors to cut any of the excess zip ties off. Go around your entire cage and remove them so your guinea pigs can’t chew on them.[5]
- Cut off the zip tie tails as you put them on so you don’t have to do so many later.


Cutting and Scoring the Coroplast
-
1Measure the base of your cage from the inside. Use a tape measure to find the dimensions inside of your cage. Write down the length of at least 2 sides if your cage is a rectangular shape. If you have an oddly-shaped cage, then measure each side of the base.[6]
- Even if you used grid pieces that are 12 in (30 cm) long, measure the inside base since it may be slightly different in size.
-
2Mark the measurements onto coroplast, adding 6 in (15 cm) to each side. Coroplast is a waterproof material typically used to make lawn signs. Transfer your measurements onto a large piece of coroplast by drawing it on with a marker. Leave enough room for an additional 6 in (15 cm) on each side so you can fold them up into walls later on.[7]
- Coroplast can be purchased online or in stores that sell signs.
- If you can’t get a sheet of coroplast big enough for your cage, use multiple pieces and tape them together later on.
-
3Cut out a 6 in × 6 in (15 cm × 15 cm) square from each corner. Measure 6 in (15 cm) from the corner on each side of the coroplast, and draw a square on your coroplast. Use a utility knife to cut through the coroplast along the outline of the square. Remove the square completely so you’re able to fold the walls. Repeat the cuts for the remaining corners.[8]
-
4Use a straightedge and utility knife to score the bottom of the coroplast walls. Hold the straightedge along the bottom of your walls. Cut into the coroplast halfway to score the material. Score along each of your measurement lines so it’s easier to fold your coroplast into walls.[9]
- It doesn’t matter which side of the coroplast you score.
- Make sure not to cut through the coroplast entirely or else it could break the walls.
Tip: If you don't have a straight edge that's long enough for the entire length of your cut, stop your cut halfway through and move the straightedge to the second half to continue scoring the coroplast.


Finishing the Cage
-
1Fold the walls up along the scores. Flip your piece of coroplast over so your scores are face down. Slowly bend the walls up along the scores until the walls form a 90-degree angle to the base. Make sure the corners sit flush with one another.[10]
- If the corners of your walls don’t line up, either trim them if they’re too long or tape additional coroplast if you need to fill the gap.
-
2Duct tape the corners of the coroplast together. Cut 6 in (15 cm) strips of duct tape with a pair of scissors. Use 1 strip in each corner of your coroplast base to hold the walls together. Place the tape on the outside of the coroplast so your guinea pigs can’t chew on it.[11]
- Have a partner hold the walls up while you tape the corners so they’re less likely to fall apart.
-
3Set the coroplast into the grid cage. Put the coroplast on the bottom of the cage so they cover the grid. Push the coroplast base down into the cafe until it’s flush with the grid pieces underneath it.[12]
-
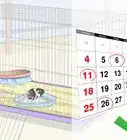
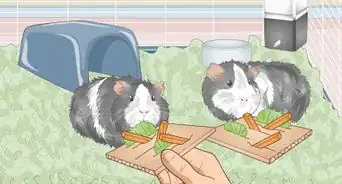
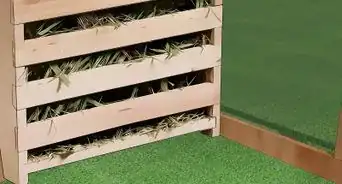
4Provide bedding and hiding places for your guinea pig. Cover the bottom of your new cage with aspen, kiln-dried pine, or wood pellet bedding so your guinea pigs can be comfortable in their new home. Since guinea pigs need places to sleep away from light, provide igloo covers or plastic tunnels so they can hide.[13]
- Line sleeping or hiding areas with fleece so your guinea pigs are even more comfortable.
- Provide more than 1 hiding area if you’re housing multiple guinea pigs.
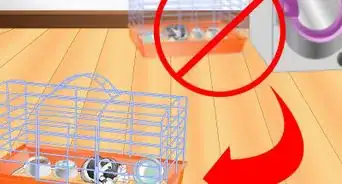
- Avoid using aspen shavings since the aromatic oils can cause severe respiratory problems.
-
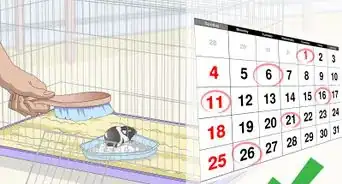
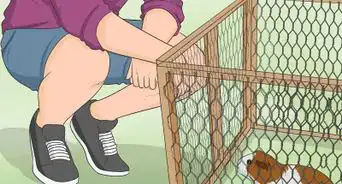
5Introduce your guinea pig to its new cage. Transfer your guinea pig from its old cage to the new C and C cage you built. When you first put the guinea pig in the cage, let them explore and grow accustomed to their new surroundings for a day before interacting with them again.[14]


Community Q&A
Did you know you can get answers researched by wikiHow Staff?
Unlock staff-researched answers by supporting wikiHow
-
QuestionWhat are C and C cages made of?
 wikiHow Staff EditorThis answer was written by one of our trained team of researchers who validated it for accuracy and comprehensiveness.
Staff AnswerwikiHow Staff EditorStaff AnswerThese cages are made out of metal storage cube components and corrugated plastic sheets (coroplast).
Support wikiHow by unlocking this staff-researched answer.
-
QuestionCan I put a blanket in my guinea pig cage?wikiHow Staff EditorThis answer was written by one of our trained team of researchers who validated it for accuracy and comprehensiveness.
Staff AnswerwikiHow Staff EditorStaff AnswerYes, but make sure the blanket is in good shape. Blankets with holes or loose threads can snag or trap your guinea pig’s paws.Support wikiHow by unlocking this staff-researched answer.
-
QuestionAre C and C cages good for guinea pigs?wikiHow Staff EditorThis answer was written by one of our trained team of researchers who validated it for accuracy and comprehensiveness.
Staff AnswerwikiHow Staff EditorStaff AnswerYes, these cages are great because they’re roomy, well-ventilated, and easy to customize to suit your guinea pigs’ needs.Support wikiHow by unlocking this staff-researched answer.
Warnings
- Make sure the openings of your grid aren’t smaller than 1 1⁄2 in (3.8 cm) since guinea pigs can get stuck and suffocate.⧼thumbs_response⧽
Things You’ll Need
- Cube storage grids
- Zip ties
- Scissors
- Tape measure
- Marker
- Coroplast
- Utility knife
- Duct tape
References
- ↑ https://youtu.be/UngHBbC7T3g?t=15
- ↑ https://www.petful.com/other-pets/guinea-pig-care-guide/
- ↑ https://youtu.be/EOc_s9XWVRo?t=30
- ↑ https://youtu.be/UngHBbC7T3g?t=78
- ↑ https://youtu.be/UngHBbC7T3g?t=114
- ↑ https://youtu.be/EOc_s9XWVRo?t=309
- ↑ https://youtu.be/f04DTmuJDuE?t=160
- ↑ https://youtu.be/f04DTmuJDuE?t=160
- ↑ https://youtu.be/f04DTmuJDuE?t=179
About This Article

To make a C and C cage for a guinea pig, start by arranging some storage grids in a rectangle on the floor that's at least 7.5 square feet. Then, secure the grids together with zip ties, and attach upright storage grids around the edges to make the walls of the cage. Next, measure the base of the cage, and mark the measurements onto some coroplast, adding 6 inches to each side. Finally, fold up the edges of the coroplast to make walls, tape the corners together, and place it inside the storage grid cage. To learn how to fill and decorate your C and C cage, scroll down!