This article was co-authored by wikiHow Staff. Our trained team of editors and researchers validate articles for accuracy and comprehensiveness. wikiHow's Content Management Team carefully monitors the work from our editorial staff to ensure that each article is backed by trusted research and meets our high quality standards.
There are 10 references cited in this article, which can be found at the bottom of the page.
This article has been viewed 45,828 times.
Learn more...
Give your guinea pig a chance to explore and graze by making an outdoor run! This run is 8 sq ft (0.74 m2) and your guinea pig will love playing and exercising in the new space. To get started, purchase all of your supplies and create rectangular frames out of furring strips. Cover the rectangular frames with chicken wire, and use hinges and locks to construct the run. Place a few accessories like guinea pig houses, a water bottle, and toys into the run, and then it's ready to enjoy!
Steps
Getting Supplies and Building the Frames
-
1Buy all of the supplies for the guinea pig run. You'll need furring strips, chicken wire, hinges, hook-and-eye locks, and screws. Visit your local home improvement store to find all of these supplies. You may even have some of these supplies around your home![1]
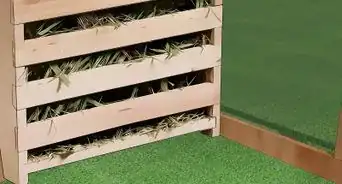
- Get ten 2 in (5.1 cm) x 2 in (5.1 cm) x 8 ft (2.4 m) furring strips. Furring strips are usually used in construction to level surfaces, however, they are also great for small, DIY projects.
- Find 16 ft (4.9 m) of chicken wire to enclose the framing.
- Get 4 hinges to join the framing pieces.
- Pick 2 hook-and-eye locks for the entrances to the run.
- Choose twenty-four #8 3 in (7.6 cm) screws to construct the frame.
-
2Get all of the necessary tools for making the guinea pig run. Pick up a measuring tape, power saw, drill, drill bit, staple gun, staples, and wire cutters. You can find all of these supplies at a home improvement store or possibly around your home.[2]
- The power saw, drill, and drill bit are necessary for constructing the wooden frames of the run.
- The staple gun and staples are for attaching the chicken wire to the frames.
- Many different power saw options are suitable for this project. Consider a circular saw, a table saw, or a reciprocating saw.
- Alternatively, you can use a hand saw instead of a power saw. The process may take longer.
Advertisement -
3Cut the furring strips to size with a power saw. Use the tape measure to measure out eight 48 in (120 cm) long pieces and twelve 24 in (61 cm) long pieces. Mark these measurements with a pencil. Switch on the power saw, hold the furring strip steady, and slowly guide the saw through the marking. Always follow all of the manufacturer’s safety directions.[3]
- If you don't want to cut the furring strips yourself, some home improvement stores offer cut-to-size services.
-
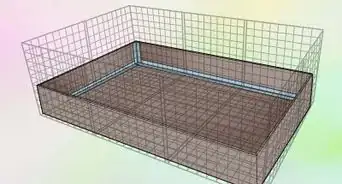
4Drill together four 48 in × 24 in (122 cm × 61 cm) wooden rectangles. Attach the drill bit to the drill and tighten the chuck to secure the drill bit in place. Connect two 48 in (120 cm) pieces and two 24 in (61 cm) pieces together in a rectangle shape with a screw at each join. Repeat this process to make 4 rectangles overall.[4]
- You may need to use a clamp or get a friend to hold the furring strip pieces steady while you work.
-
5Attach one 24 in (61 cm) furring strip across the center of each rectangle. Use a measuring tape and mark a point at 24 in (61 cm) along each 48 in (120 cm) long side of the rectangles. Drill one 24 in (61 cm) furring strip across each rectangle, connecting the long sides.[5]
- This gives each frame added support.


Adding Chicken Wire and Connecting the Frames
-
1Stretch the chicken wire across each frame lengthwise. Get a friend to hold the end of the chicken wire at a short end of a frame. Start unrolling the chicken wire and stretch it out to the other short end. Make sure that the chicken wire is taut across the frame.[6]
- It’s important to stretch the chicken wire across the frame before you cut it as otherwise, it may be too loose.
-
2Cut the 4 pieces of chicken wire with wire cutters. Measure out 48 in (120 cm) of the stretched chicken wire. Use wire cutters to cut a rectangular piece of chicken wire that fits the frame. Repeat this process to get 4 pieces of chicken wire, so that you have 1 for each frame.[7]
-
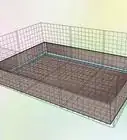
3Use a staple gun to attach the chicken wire to the frames. Hold a rectangular piece of chicken wire up to a frame. Make sure that the edges line up and use the staple gun to secure the chicken wire to the furring strips. Place a staple approximately every 5 in (13 cm) along the furring strips so that the chicken wire is well attached.[8]
-
4Use 2 hinges to connect 2 frames. Get a friend to hold 2 completed frames together at a right angle, creating a corner. Attach each hinge approximately 2 in (5.1 cm) in from the top and bottom of the frames. Simply use the drill to attach 1 side of the hinge to 1 frame at a time.[9]
-
5Connect the other 2 frames with 2 hinges. Repeat the process of installing the hinges to join 2 frames together to make a pair. As a result, you will have 2 pairs of frames.[10]
-
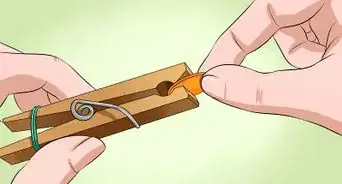
6Install 2 hook-and-eye locks to connect the 2 pairs of frames. Each pair of frames needs a hook on one end and an eye on the other. Measure 1 in (2.5 cm) down from the top of one edge and screw in the hook. Then hold the hook horizontally across to the other frame and screw in the eye where it meets the hook. Repeat this for the other pair of frames and connect the 2 pairs with the locks to make a rectangle.
- This means that you can open the run from 2 places.


Setting up and Using the Run
-
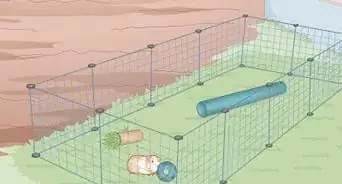
1Place the guinea pig run on the grass in a shady spot. Find a shady spot in your backyard and feel the ground to make sure that it’s flat and stable. Get a friend to help you carry the guinea pig run to this area.
- If you don’t a suitable shady spot for the run, simply attach an old sheet over half of the run using clothes pegs. This gives the guinea pig a sheltered spot from the sun.
-
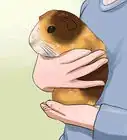
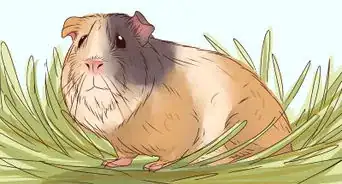
2Include 1 guinea pig house in the run for each guinea pig. Guinea pigs need their own place to hide to feel safe and secure. If you already have guinea pig houses inside an indoor cage, simply move these into the outside run.[11]
- You can find a variety of guinea pig houses and hides in pet supply stores. These are made with a variety of different materials including fabric, wood, and plastic.
-
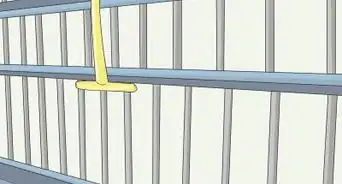
3Attach a water bottle to the side of the run. Hold the water bottle against the chicken wire on the outside of the run. Position the nozzle through the chicken wire around 4 in (10 cm) off the ground so that the guinea pig can reach it. Use the water bottle hook to secure it to the chicken wire.[12]
- Always make sure that your guinea pig has fresh water available.
-
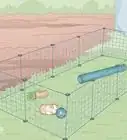
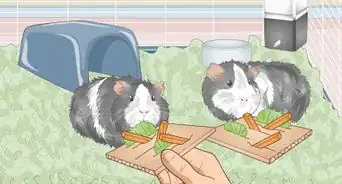
4Place 2-3 guinea pig toys inside the run. Give your guinea pig a few toys to help it have fun while enjoying the outdoors! Pick small, plastic guinea pig balls, tunnels, or wooden chew toys and put these inside the run.[13]
-
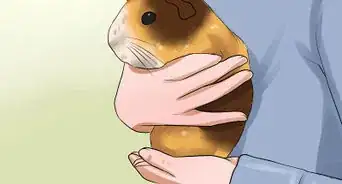
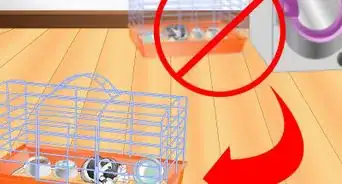
5Supervise your guinea pig while it’s in the run. Place your guinea pig into its new run and watch it play and explore! Always stay with your guinea pig while it’s in the run and never leave it unattended. This is because your guinea pig could get hurt or injured by a predator.[14]
- If you can’t supervise your guinea pig, place it back into its cage in the meantime.


Community Q&A
-
QuestionMy guinea pig jumped from a height of a meter or so. Will she be okay?
 Community AnswerYou really need to take your guinea pig to the vet. She may have injured her spine or another necessary body part.
 -
QuestionWhat paint is pet safe?
 Ella GoughCommunity AnswerPaint is not recommended. Instead, you should stain the wood with a pet-safe stain. See these websites for more info and products: www.therabbithouse.com/outdoor/petsafewoodstain.asp https://www.guineapigcages.com/forum/threads/105543-Pet-Safe-Paint-Wood https://www.theguineapigforum.co.uk › Guinea Pig Care › Housing and Enrichment
 -
QuestionWill food coloring harm guinea pigs?
 Amy HarrisonTop AnswererFood-grade dyes or vegetable dyes are less likely to harm your guinea pig, but while it does no harm, that doesn't necessarily make them a good thing. Food dyes aren't beneficial to guinea pigs in any way.
Warnings
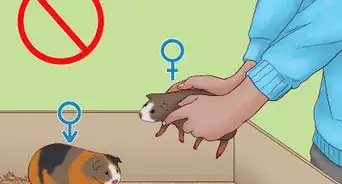
- Don’t let your guinea pig run freely around your backyard. This is potentially dangerous because it could eat a harmful plant, get attacked by a predator, or escape.[15]⧼thumbs_response⧽
Things You’ll Need
- Furring strips
- Chicken wire
- Hinges
- Hook-and-eye locks
- Screws
- Measuring tape
- Power saw
- Drill
- Drill bit
- Staple gun
- Staples
- Wire cutters
- Old sheet
- Clothes pegs
- Guinea pig houses
- Rodent water bottle
- Guinea pig toys

References
- ↑ https://youtu.be/WIKDSg1AJ0Q?t=7
- ↑ https://youtu.be/WIKDSg1AJ0Q?t=32
- ↑ https://youtu.be/WIKDSg1AJ0Q?t=7
- ↑ https://youtu.be/WIKDSg1AJ0Q?t=45
- ↑ https://youtu.be/WIKDSg1AJ0Q?t=51
- ↑ https://youtu.be/WIKDSg1AJ0Q?t=66
- ↑ https://youtu.be/WIKDSg1AJ0Q?t=66
- ↑ https://youtu.be/WIKDSg1AJ0Q?t=66
- ↑ https://youtu.be/WIKDSg1AJ0Q?t=76
About This Article