This article was co-authored by Claire Donovan-Blackwood. Claire Donovan-Blackwood is an Arts & Crafts Specialist and CEO of Heart Handmade UK, a site dedicated to helping people live a happy, creative life. With over 13 years of experience, Claire uses art as a form of therapy and focuses on mindfulness in the making of art. She makes crafting easy and accessible for those she works with. Claire received her B.A. in Photography & Visual Imagery from The University of Huddersfield.
wikiHow marks an article as reader-approved once it receives enough positive feedback. This article received 13 testimonials and 99% of readers who voted found it helpful, earning it our reader-approved status.
This article has been viewed 492,734 times.
Making candles at home allows you to choose the scent and appearance of your candles. Craft stores sell scents specifically for candle-making, but you can also scent your candles with essential oils. The trick to using essential oils is adding the oils when the wax is hot, but not so hot that the oils evaporate. Because soy wax has a lower melting point than other types of wax and melts easily in the microwave, it is an ideal wax to use to make a candle with essential oils.
Steps
Melting and Coloring the Wax
-
1Cover your work surface with newspaper. Wax splatters are difficult to clean, and even if you manage to scrape them off, there may still be some residue. Make cleaning easier later on by covering your counter with some newspaper.[1]
- You can also use other protective coverings, such as plastic bags, paper bags, or plastic tablecloths.
-
2Choose a glass or metal container for your candle. Tin cans, old tea tins, and mason jars are all great choices here. Make sure that whatever container you choose can withstand heat. Even though the flame won't be directly touching the material, it will still get hot.
- Wash the container with warm, soapy water, even if it looks clean.
- Old candle jars are another great option. Be sure to remove all of the old wax first, however.
- If you are using a mason jar, choose one that has a wide mouth; it will be easier to work with than the kind with the standard, narrow mouth.
Advertisement -
3Measure your wax flakes with your container, then double it. Place a bowl on a kitchen scale, then use your chosen container to measure out 2 portions of wax flakes. Wax will shrink as it melts, so you will need to use twice the amount that your container holds.
- Cans and jars come in all shapes and sizes, so there is no set weight that you should use.
- Soy wax flakes are the most popular and easiest to work with, but you can use others too, such as beeswax.
-
4Weigh your wax using a kitchen scale. This will help you figure out how much essential oil to use. Keep in mind that different types of waxes may require different ratios of wax to essential oil, so double-check the instructions that came with your wax.
-
5Melt the wax and heat it to about 180 °F (82 °C). Use a candle-making or candy-making thermometer to gauge the temperature. Double-check the instructions that came with your wax to find out exactly what temperature it should be heated to, as different kinds of wax have different melting points.
- Microwave: put the wax into a glass measuring cup, then heat it at 30-second intervals, stirring between each interval, until melts.[2]
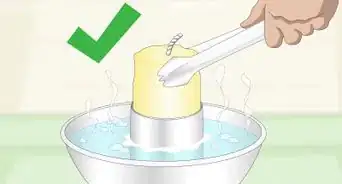
- Stove: Fill a pot with a 2 inches (5.1 cm) of water, then set a metal pitcher into it. Add the wax to the pitcher, and bring the water to a boil.[3] Stir the wax often as it melts.
-
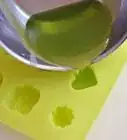
6Add color to the wax, if desired. There are 2 ways that you can do this. The professional way would be to add some pieces of candle-making dye. It comes in little bricks, which you can get at a craft store or online. Continue heating the wax until the dye melts and blends in completely.
- Alternatively, you can add in some crayon shavings instead.[4]


Adding the Wick
-
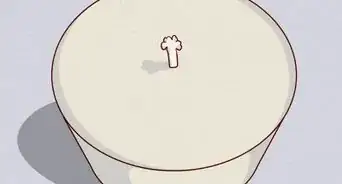
1Place a drop of hot wax into the bottom of your container. Take some of the wax you just melted, and place a drop into the bottom of your container. Alternatively, you can use a drop of hot glue or super glue instead.
- Be prepared to work quickly, as the hot wax or hot glue will set up fast.
- If you don't have spare candles or a hot glue gun on hand, place a piece of double-sided tape against the bottom of your tabbed wick.
-
2Press a tabbed wick into the wax. You can buy tabbed candle wicks in the candle aisle of a craft store and online. They look like long candle wicks with small, metal disks on the bottom. Tuck the wick into the container, then use your finger or a stick to press the tab against the hot wax or hot glue.[5]
- Don't worry if the wick is too long for the container. You will cut it at the very end. If you cut it now, it won't stick up straight in the wax.
-
3Wrap the wick around a stick, then set the stick on top of the container.[6] Take a stick of some sort; it can be a pen, chopstick, pencil, or even a paintbrush. Wrap the end of the wick around your stick until the stick hits the rim of the container. This will help hold the wick upright.[7]
- If the wick starts to unravel, secure it to the stick with a clothespin or a binder clip.
- Wrap the wick tightly enough so that it stands up as straight as possible inside the container.
-
4Wait about 5 minutes for the wick to set. Hot glue will need about 2 to 3 minutes to harden. If you used super glue or double-sided tape, then you don't need to wait at all.
- If you don’t wait for the wax or hot glue to set, the wick may move as you are pouring the wax.


Scenting and Pouring the Wax
-
1Let the wax cool to about 140 °F (60 °C). Use a candy-making or candle-making thermometer to gauge the temperature as the wax cools. The wax may already have cooled down to this temperature while you prepared the jar. If it didn't, then just wait a few more minutes.
- This is very important; if you add the oils to the wax too soon, the heat will cause them to burn off resulting in a less-fragrant candle.
-
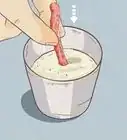
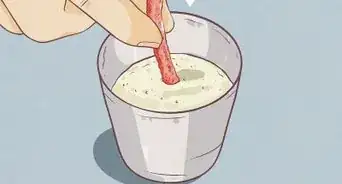
2Stir in your desired essential oils.[8] You can use just 1 type of essential oil, or you can mix-and-match difference oils to create a more unique fragrance. How much you add is up to you, but plan on using about 1/2 ounce (15 mL) of essential oil per 1 pound (454 g) of candle wax flakes.[9]
- You can use more or less oil. Keep in mind that the scent will weaken a little once the candle hardens.[10]
-
3Pour the wax slowly into the container. Don’t pour quickly, or you’ll get bubbles and wax splatters. Leave about 1 inch (2.5 cm) of the container unfilled. If you fill it all the way to the top, the wax may drip down the sides of the container when you light the candle.
- Be sure to save the excess wax. You can use it to fill in any dips or wells in the finished candle.
-
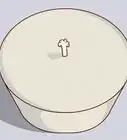
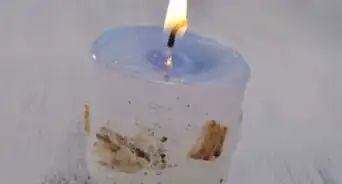
4Let the candle harden on the counter or in the fridge. As it hardens, the wax will turn from clear to opaque once again. Depending on the type of wax you used, this will be either white, ivory, or yellow.[11]
- It will take at least 4 hours on the counter, but it may take as long as 6 or 8. It shouldn't take longer than 1 hour in the fridge, however.
-
5Reheat the excess wax and use it to fill any wells, if needed. If your candle dried with a well in the middle, melt the leftover wax, then pour it into the well to fill it. Let the wax cool before moving on.
- Let any leftover wax harden and cool, then discard it into the trash. Never pour hot wax down the drain.[12]
-
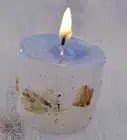
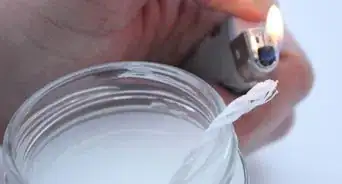
6Trim the wick down to about 1⁄4 inch (0.64 cm). Unravel the wick first, then cut it with a pair of scissors down to about 1⁄4 inch (0.64 cm). This will help prevent the flame from becoming too big and creating too much smoke.[13]
- You will need to trim the wick down each time before you use the candle.


Community Q&A
-
QuestionCan I mix essential oil and fragrance oil while making soy candles?
 Community AnswerYes. You should be able to use the same process as above to add the essential oils.
 -
QuestionWhat is the difference between wax flakes and wax blocks?Community AnswerThere really isn't much difference, you'd just have to shave down the blocks to make them into flakes so you could measure properly.
-
QuestionAre essential oils for candle making any different from ordinary essential oils?
 Community AnswerNo - pure 100% essential oil is the best to use, and an essential oil is an essential oil. The only difference is in the quality of oil; always read the labels for the purity of the product.
Things You'll Need
- Heat-safe tin or jar
- Soy wax flakes
- Glass measuring cup
- Wooden spoon
- Essential oil
- Tabbed candle wick
- Stick
- Scissors
- Candy-making or candle-making thermometer

References
- ↑ https://www.thehealthymaven.com/2015/11/homemade-aromatherapy-candles.html
- ↑ https://www.runtoradiance.com/easy-diy-essential-oil-candles/
- ↑ Claire Donovan-Blackwood. Arts & Crafts Specialist. Expert Interview. 3 May 2019.
- ↑ https://www.apartmenttherapy.com/how-to-make-candles-apartment-therapy-tutorials-217768
- ↑ https://www.thehealthymaven.com/2015/11/homemade-aromatherapy-candles.html
- ↑ Claire Donovan-Blackwood. Arts & Crafts Specialist. Expert Interview. 3 May 2019.
- ↑ https://www.thehealthymaven.com/2015/11/homemade-aromatherapy-candles.html
- ↑ Claire Donovan-Blackwood. Arts & Crafts Specialist. Expert Interview. 3 May 2019.
- ↑ http://candlemaking.craftgossip.com/fragrance-oil-vs-essential-oil-in-candle-making/2011/06/07/
- ↑ https://sugarandcharm.com/2016/03/diy-essential-oil-candles.html?section-10
- ↑ https://www.runtoradiance.com/easy-diy-essential-oil-candles/
- ↑ https://www.thehealthymaven.com/2015/11/homemade-aromatherapy-candles.html
- ↑ https://www.runtoradiance.com/easy-diy-essential-oil-candles/
- ↑ http://candlemaking.craftgossip.com/fragrance-oil-vs-essential-oil-in-candle-making/2011/06/07/
- ↑ http://candlemaking.craftgossip.com/fragrance-oil-vs-essential-oil-in-candle-making/2011/06/07/
- ↑ https://www.runtoradiance.com/easy-diy-essential-oil-candles/
- ↑ http://candlemaking.craftgossip.com/fragrance-oil-vs-essential-oil-in-candle-making/2011/06/07/
About This Article

To make a candle with essential oils, start by melting some wax in the microwave or on the stove. Secure your wick by pouring a drop of the melted wax into a glass or metal container and quickly pressing the tabbed wick into it. Pull the end of the wick up to the top of the container and wrap it around a pen or pencil so it stays upright. When the wick is ready to go, let your wax cool slightly, then mix in your essential oils. To finish, simply pour the wax into the container and let it harden around the wick for several hours. To learn how to make your essential oil candles different colors, scroll down!