This article was co-authored by wikiHow staff writer, Darlene Antonelli, MA. Darlene Antonelli is a Technology Writer and Editor for wikiHow. Darlene has experience teaching college courses, writing technology-related articles, and working hands-on in the technology field. She earned an MA in Writing from Rowan University in 2012 and wrote her thesis on online communities and the personalities curated in such communities.
This article has been viewed 4,901 times.
Learn more...
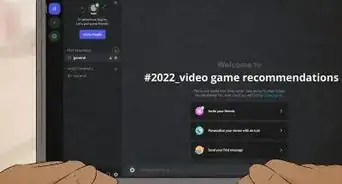
We all want to keep in touch with our friends or be a part of a community. By making a free server on Discord, we can do that. This wikiHow article will teach you how to make a Discord server on the mobile app.
Steps
Creating a Server
-
1Open Discord. This app icon looks like a controller on a light blue background.
-
2Swipe from left to right on your screen. You should see a panel appear on the left.
- Alternatively, you can tap the three-line menu (hamburger) menu.
Advertisement -
3Tap +. You'll see this plus sign below any servers you are currently a part of.
-
4Tap Create My Own. This will allow you to create a server from scratch; selecting a template will create a server with roles and categories common to that server type. For example, the "gaming" template comes with 2 text channels (general and clips-and-highlights) and 2 voice channels (lobby and gaming).
-
5Select an option. You can specify who your server is intended for (For a fan club or community or for me and my family) or you can tap skip this question to continue.
-
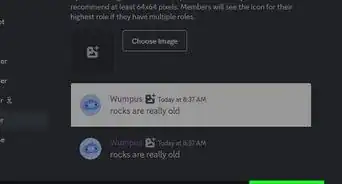
6Name your server. This will appear in the panel on the left for everyone in the discord, so make sure it is recognizable.
- You can also tap the + next to the image icon and upload an image.
- When you're done, tap Create Server.
-
7Tap Skip. It's in the upper right corner of your screen.
- You can enter a topic that you'll talk about on your server and tap Take me to my server! if you want to. This will add a text channel to your server, making a total of 2 text channels (general and the one that you just created).
-
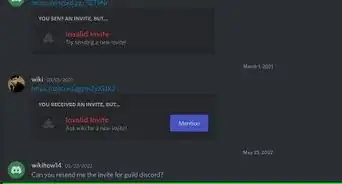
8Tap Invite next to the people you want to invite to your server. If you want to skip this step, you can tap the x in the top left corner.
- Another option is to tap Share link at the bottom of your screen so you can share the link with whoever isn't in your Discord contacts list. The link will normally expire in 7 days, so you can tap the toggle next to "Set this link to never expire" (Android) or tap "Edit invite option" and select Never (it's under Expire after) (iOS).
- After you choose to invite people or not, you will be redirected to your server. If not, you'll be able to find it in the server list in the panel on the left side of the screen (swipe from left to right to open it).
- To delete a server, go to Settings > ⋮ > Delete Server.


Creating Channels
-
1Open Discord. This app icon looks like a controller on a light blue background.
- Select your server from the server list if you're not in it currently.
-
2Swipe left to right to see your server's channels and categories. Categories are things like text channels and voice channels; they organize what type of channels are included together.
- For example, a gaming server might have categories like "RL(real-life)-Food" or "In-game food" and "RL-Selfies" or "In-game-Selfies."
-
3Tap +. You'll see this plus sign next to "Text Channels" and "Voice Channels," but it doesn't matter which you tap.
-
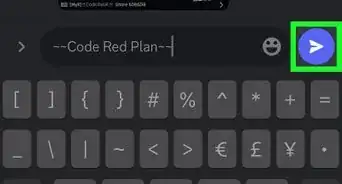
4Name your channel, signify if it's a text or voice channel, then tap . After you name your channel, tap the circle next to a category to select which channel type you're making. If you want to make a new text channel, tap the circle next to "Text Channel;" likewise, if you want to make a new voice channel, tap the circle next to "Voice Channel."
- If you want to make the channel private, tap the toggle next to "Private Channel" to enable the setting.
- When you tap the checkmark icon in the upper left corner of your screen, the channel will be created in your server.[1]
- You can do this to create as many voice and text channels as well as categories that you want in your server.
- To delete a channel, press and hold the channel name until a menu appears, then tap Edit Channel > ⋮ > Delete Channel.


Inviting People and Managing Permissions/Roles
-
1Open Discord. This app icon looks like a controller on a light blue background.
- Select your server from the server list if you're not in it currently.
-
2Swipe left to right to see your server's information. You'll see a list of all the channels and categories in your server.
-
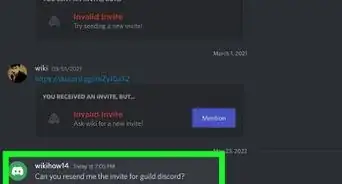
3Tap Invite Members. It's at the top of the menu under your server's name. Another option is to tap the three-dot menu next to the server's name and tap Invite.
-
4Tap Invite next to the people you want to invite to your server. If you want to skip this step, you can tap the x in the top left corner.
- Another option is to tap Share link at the bottom of your screen so you can share the link with whoever isn't in your Discord contacts list. The link will normally expire in 7 days, so you can tap the toggle next to "Set this link to never expire" (Android) or tap "Edit invite option" and select Never (it's under Expire after) (iOS).
- After you choose to invite people or not, you will be redirected to your server. If not, you'll be able to find it in the server list in the panel on the left side of the screen (swipe from left to right to open it).
-
5Swipe left to right again and tap ⋮. The three-dot menu icon is to the right of your server's name and will pull up a menu from the bottom of your screen.
-
6Tap Settings. It's next to a gear icon.
-
7Tap Roles. You'll find this under the "User Management" header near the bottom of the menu.
-
8Tap +. This circle with a plus sign inside it is in the lower right corner of your screen and will open a "New Role/Role settings" menu.
-
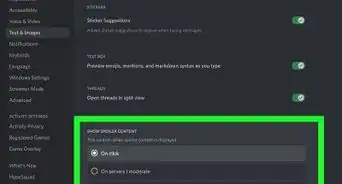
9Name the new role and select its color. This is only necessary if you plan on letting certain people perform specific tasks, like manage channels or ban members.
- You can do this to create as many roles as you want to have in your server.
- Tap the save icon when you're done (the save icon looks like a floppy disk).
-
10Swipe from right to left to access the server member list. You may need to do this a few times if you see the server menu panel.
-
11Tap a username to adjust their role. You'll see their server profile.
-
12Tap Manage User. It's next to a gear icon.
-
13Tap a role. If you want that user to have a specific role, tap it to select it. Then, tap the arrow to navigate back and you'll see that role listed in their server profile.


About This Article

1. Open Discord.
2. Swipe from left to right on your screen.
3. Tap +.
4. Tap Create My Own.
5. Select an option.
6. Name your server.
7. Tap Skip.
8. Tap Invite next to the people you want to invite to your server.