wikiHow is a “wiki,” similar to Wikipedia, which means that many of our articles are co-written by multiple authors. To create this article, 20 people, some anonymous, worked to edit and improve it over time.
There are 9 references cited in this article, which can be found at the bottom of the page.
This article has been viewed 75,688 times.
Learn more...
A dizi (also spelled d’tzu) is a six-holed flute typically made of bamboo, while a larger dizi has seven finger holes. Single tube finger-played flutes have been part of Chinese culture since ancient times. There are differing accounts of the origins of the dizi, or transverse flute, but many scholars believe it may have been imported into China during the Han Dynasty (206 BCE to 220 CE). Dizis were instruments for common people, with different styles heralding from northern regions (the bangdi) and southern regions (the qudi). Well-built and maintained dizis can potentially last 30 years.
Steps
Planning the Flute Body
-
1Select the type of material for the dizi’s body. Traditional dizis are made of bamboo, while historically, dizis and other flutes have been made from bone, jade or other stone, or pottery. Be sure to take into account being able to acquire and prepare the materials. Choose a piece of material that is about ¾” to 1” in diameter.
- Bamboo is the ideal material for a homemade dizi, as it is easy to acquire and easy to manufacture into a dizi. It is also lighter and will likely be easier to play, which is useful if you are a beginning player. Bamboo can come from a regular bamboo plant with any extraneous leaves removed, or you can repurpose another bamboo object, such as an old bamboo fishing rod.[1] There are different strains of bamboo that can be used; purple bamboo is typically used in the northern regions of China, while white bamboo is typically used in southern China.
-
2Choose the size of your flute. The size of the flute will determine the musical key in which it plays. Flutes are typically available in the following keys (from longest to shortest): F, G, G#, A, A#, B, C, C#, D, D#, E, F and F#.[2] A good length is approximately 18-20” long. Longer flutes may have an additional finger hole (the larger dizi has this), and they play lower octaves. Small flutes with higher octaves are smaller than 16”, while longer flutes are ideally 24-26” long.Advertisement
-
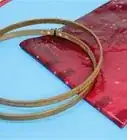
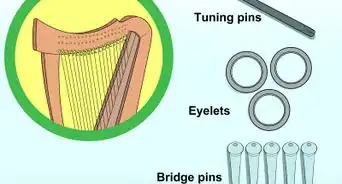
3Determine the style of ends for the dizi. Choose ringed ends, capped ends, or no ends for the dizi. These will determine how long-lasting your flute is, as well as how susceptible to cracking or molding it may become. The materials for the capped or ringed ends, called ferrules, can be made of brass, bone, plastic or wood.[3]
- Ringed ends: Some flutes have a brass ring around the end. This helps the flute (especially those made of bamboo or other wood) from cracking. Moisture can get underneath the ring, however, and cause molding. These can also be installed on a flute that did not previously have a ring in order to stop a crack from getting bigger.
- Capped ends: These ends are often made from plastic, cow bone or horn. Flutes with capped ends typically make brighter tones. Moisture can get underneath the cap, however, and cause molding.
- No ends: You do not need to have any rings or caps on the end of your flute. Instead, you can paint the ends to add decoration, or you can leave them bare. However, bamboo flutes especially may be susceptible to cracking more easily than flutes with ringed or capped ends.
-
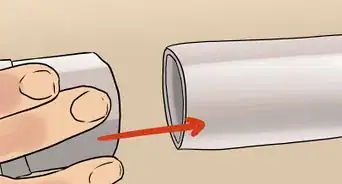
4Carefully measure the outside diameter of your flute body. Find the correct size of plastic or metal ring or cap to fit this diameter at a hardware store. If you are not using any ends, you can also opt to wrap string around the dizi to prevent cracking. [4]


Construct the Body of the Dizi
-
1Measure and cut the material you are using for the flute body. If you are using bamboo, measure a length of bamboo that is approximately 18-20” long, starting from just before one of the fibrous partitions of the bamboo stalk (this will be one of your ends). Mark it all the way around the stalk. Measure 18-20” from this line and make another mark all the way around the stalk. There should be at least a couple of fibrous partitions between each end, including the very last partition on one end. Cut both ends clean with a saw.
-
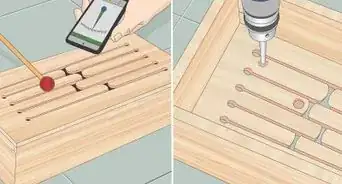
2Mark the holes. Decide which side the top of your flute will be. Starting from the blocked end of your flute, measure 1” along the top and mark a hole (this is the mouth opening, or embouchure). Measure 3” from this first hole and mark a hole (this is the mokong hole, which will be covered by a dimo membrane). Measure another 3” from this mokong hole, and mark another hole (this is the first finger hole). Continuing on at 1” intervals from there, measure and mark another 5 holes for finger holes. You should end up with one mouth opening, one mokong, and 6 finger holes. These holes will end up being about ¼” in diameter.[5]
-
3Burn out the inside for bamboo flutes. Burn out the inside to remove any fibrous material that might be inside the bamboo, stalk. Heat a ½” steel rod in a fire (do not use a kitchen oven) and hold the unheated end of the rod with protective oven mitts, as it will be very hot. Carefully insert the steel rod into the bamboo stalk, but do not poke it all the way through. Leave the blocked end intact. Twist the steel rod a few times to burn off any excess material inside the stalk. Remove the steel rod.
-
4Burn the hole marks. Using protective oven mitts and vice grips, heat a ¼” drill bit in a fire (again, do not use a kitchen oven). Place the tip of the drill bit on top of each hole you marked. Twist gently to burn away the wood, but do not push it all the way through the hole (this may cause the bamboo to crack).
-
5Sand through the holes. Roll up a piece of 3x3 fine-grit sandpaper into a tube and place the end on top of one of the burned holes.[6] Twist it back and forth to sand away the burned spots. The sandpaper tube should go through the hole and make the opening. Sand a little more on the mouth opening to make this opening slightly larger, but be careful to not make it too wide. It should only be about ¼” to 3/8” in diameter.
-
6Sandpaper your flute. Using a fine-grained sandpaper, sand carefully along the body of the flute. Spread out some newspaper on your work area to catch the dust. Take extra care around the mouth opening, finger holes, and ends. Sand the flute until it is smooth to the touch.


Decorating the Dizi
-
1Choose carvings you want to have on your dizi. Most dizi makers will carve their initials into the body of the dizi, and others will also include a Chinese poem or other saying along the body. The key of the dizi is typically carved into the flute next to the third finger hole.
-
2Choose a finish for your dizi. Some dizis are lacquered or painted, while others are natural and bare. One option is to use linseed oil to coat and finish the dizi.[7] Pour a little bit of linseed oil on an old rag and gently rub it into the body of the flute. Allow it to dry before adding accessories, attaching the dimo membrane, or playing the flute.
-
3Choose accessories for your dizi. These can be purchased at Asian markets or online. Attach a silk tassel to the bottom hole of the dizi. Red is typically a color associated with good fortune in China and can be an appropriate color choice for a tassel.


Attaching the Dimo Membrane
-
1Choose the material for your dimo membrane. Traditional dimo is made from a thin internal membrane from bamboo. Other useable materials are garlic skin, rice paper, cigarette paper, or other very thin papers. Dimo paper is available from online music supply stores. You can use clear tape as an alternative material, but this won’t produce the best sound.
-
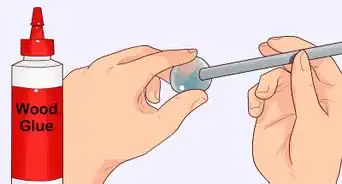
2Gather your supplies. These include small, sharp scissors, water, Erjiao (a traditional Chinese flute glue) or other water-soluble adhesive, the dimo membrane, and the dizi body. Erjiao can be purchased from online music supply stores.
- Water-soluble glue, such as the glue specifically intended for adhering the dimo, is preferred, since you may need to adjust the placement of the dimo from time to time. If you use an adhesive that hardens, it will crack when you try to move the dimo, thereby ruining the membrane.
-
3Measure and cut the dimo. The dimo will be placed on the second hole from the top of the dizi (this hole is called the mokong). Place the dimo paper over this hole and add at least 0.5 centimeter (0.2 in) on all sides of the hole. Cut the membrane to these specifications.
-
4Apply glue to the dizi. Dip your finger in some water and rub glue on your finger. Apply this glue around the hole where you will place the dimo. Swab any residual glue away from the hole itself and the very edge of the hole. Glue on the membrane over the hole will disrupt the vibration of the membrane.
- Another option is to use garlic juice to produce a sticky, water-soluble adhesive. Peel one garlic clove and gently rub the freshly cut garlic across the membrane hole. This will leave some adhesive material.[8]
-
5Gently place the dimo over the hole. Line up the dimo so it is even on all sides. Pinch the flute on either side of the hole with your fingers touching the dimo. Move your fingers up and down a few times gently to create lateral wrinkles in the dimo. The wrinkles should be evenly spaced on the dimo. If the dimo is completely smooth, the dizi will sound dull. If the dimo is not taut, even if it has wrinkles, the dizi may sound bright but may not emit any sounds at all from time to time, becoming unpredictable.
-
6Test the dizi. Blow into the dizi to check the sound created by the dimo. Tap on the dimo a few times while you play to help it settle into place. The dimo should start vibrating when you play.
- The membrane will cause the sound of the dizi to be lowered when played. It also limits the playability of high notes.
- You can use the same dimo for several months on a dizi, but you may need to make minor adjustments as you continue to play.
- Do not get discouraged if you have difficulties with the dimo. It takes skill and practice to apply the membrane correctly in order to achieve the best possible sound from the dizi.


Playing the Dizi
-
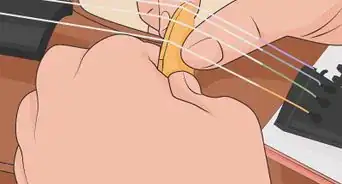
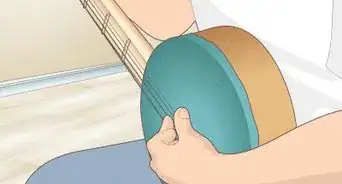
1Hold the flute horizontal to your body and place your lips next to the mouth opening. Place three fingers from one hand on the top three holes and three fingers from the other hand on the bottom three holes. Blow over the flute as you would a soda pop bottle, pursing your lips and directing air into the mouth opening. If you are not getting any sound, try pursing your lips even tighter so that the air hole is smaller.
- Since the dizi is symmetrical, it can be held in either horizontal direction, and can be played easily by a left-handed person as by a right-handed person.
-
2Consider the season and temperature when you play. A dizi can emit different tones depending on temperature and humidity, so oftentimes winter is a less desirable season to play certain dizis.
-
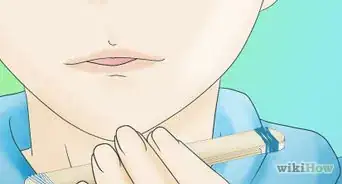
3Practice in front of a mirror. Watch the shape that your mouth makes as you are playing. Take note of how your mouth looks when you are able to make noise with the flute.
-
4
-
5Learn advanced techniques. Once you have mastered how to play a dizi, you can start to experiment with other techniques, such as sliding and popping notes, creating two tones simultaneously, using different tonguing techniques, using circular breathing, and so on, which can be accomplished by changing the embouchure and airflow.[11] These are difficult to achieve, so a beginner should certainly not expect to be an expert player immediately. Dizi musicians spend decades perfecting their techniques.
- Master dizi players typically use several dizis to be able to play in a range of keys.


Storing and Caring for a Dizi
-
1Wipe the dizi dry after playing. After you have finished playing the dizi, use a soft cloth to wipe it dry. You may use a long rod to push a cloth inside the dizi to catch excess moisture.
-
2Store the dizi in a dedicated case. Cloth bags, plastic airtight bags, or hard-covered soft-lined cases are ideal containers in which to store a dizi.
-
3Avoid swift temperature changes. Bamboo flutes are susceptible to expanding or contracting depending on temperature and humidity. Do not place in direct sunlight such as on a windowsill, as this will likely lead to cracked bamboo. If you are taking the dizi outside on a cold day, allow the flute to acclimatize before playing it.
-
4Eliminate any growth of fungus. Since moisture may gather in the dizi, even if you’ve dried it, fungus spores may start to grow. Use food grade hydrogen peroxide to spot clean the flute to eliminate fungus growth.
-
5Periodically oil the dizi. Some flute owners choose to oil their dizis with almond oil 3-4 times per year. It is best to wait until the flute is completely free of moisture (i.e., waiting a day after playing and drying it) before applying oil. Use just a bit of oil and rub it into the dizi with a soft cloth. You may also choose to oil the inside of the flute as well. Allow to dry completely before playing.


Community Q&A
-
QuestionHow do I determine the notes I am playing on a dizi flute?
 Community AnswerBuy a music book. They aren't very expensive and specialize in each and every instrument.


References
- ↑ http://www.backwoodshome.com/articles/kramer42.html
- ↑ http://www.shakuhachi.com/F-Dizi.html
- ↑ http://www.oldflutes.com/world/chinese.htm
- ↑ http://www.oldflutes.com/world/chinese.htm
- ↑ http://www.backwoodshome.com/articles/kramer42.html
- ↑ http://www.backwoodshome.com/articles/kramer42.html
- ↑ http://www.backwoodshome.com/articles/kramer42.html
- ↑ http://www.goamcan.com/imports/How-to-play-dizi.html
- ↑ http://www.shakuhachi.com/PG-Liu.html