This article was co-authored by wikiHow Staff. Our trained team of editors and researchers validate articles for accuracy and comprehensiveness. wikiHow's Content Management Team carefully monitors the work from our editorial staff to ensure that each article is backed by trusted research and meets our high quality standards.
This article has been viewed 216,592 times.
Learn more...
A dollar bill bow tie is a quirky and delightful bit of origami that is easy to make, even for an origami novice! Creating these bow ties doesn’t do any damage to the actual bill, meaning that as soon as you want to use the bill you can simply unfold it and spend it as you please. You can create a classic, chunky bowtie or a thinner, more sophisticated bowtie using different methods of folding. Dollar bill bow ties make great party favors and are sure to fetch compliments and attention when you wear them around the town!
Steps
Making a Classic Dollar Bill Bow Tie
-
1Fold the bill in half. To begin making this classic, somewhat chunky dollar bill bow tie, place an unfolded dollar bill on a flat surface. Then fold the bill in half lengthwise so that the two shortest sides meet up together.[1]
-
2Fold the dollar bill in half widthwise. After the first fold, make another fold, this time folding widthwise or “hot dog style,” so that the longest sides of the dollar bill meet up together.[2]Advertisement
-
3Open the bill up and make triangle folds. Open up the fold that you just made, keeping the first fold intact. You should see a section of the bill sticking up that looks almost like a pocket. Stick your finger in this “pocket” and push the sides over to flatten it, then use a finger to push the tip of the crease (located near George Washington’s face) to fold the crease inward. Doing this should make a triangular fold downward.[3]
-
4Flip over the bill and make triangular folds on the other side. Once you have made the triangular folds on one side of the dollar bill, flip the dollar bill over. Then repeat the process of pushing the “pocket” flat and making the triangular fold, just on the side of the bill.[4]
-
5Invert the folds to make a pentagon. After you make the triangular folds on each side of the bill, flip the top fold over so that instead of seeing the complex fold pattern in the bill, you see a smooth portion of the bill shaped like a pentagon with a crease running down the middle. Flip the bill over and do the same on the other side.[5]
- The pentagon should have the face of George Washington at the top point.
-
6Fold the bottom half of the pentagon up. Once you have formed the pentagon, fold up the bottom half of the pentagon so that it touches the very tip of the pentagon. Then flip the bill over and repeat the same thing on the other side.[6]
-
7Fold the inside edges of the bill into a triangle. The bill should now look rectangular, with the corners of the bill at one side of the rectangle. Take one of the opposite corners (not a corner at the edge of the bill) and fold it over in a triangle shape. Do the same for the corner of the same end of the bill, making sure that the triangular folds are the same size and don’t touch at the center.[7]
-
8Open up the dollar bill. Take the folded bill and flip it 90 degrees so you are looking at the edge of the folded bill rather than at its face. You will see a central fold in the bill, with the very corners of the bill (with the $1 sign) visible. Hold each corner flap with your fingers and pull the folds slowly apart.[8]
-
9Pull the center of the bowtie open and flat. You should see that the bowtie is almost made, but the central “tie” of the bowtie is still folded in on itself. To open it, hold the bowtie on both sides right next to the folded center of the bowtie, then gently pull. The folds should expand, then open to reveal the face of George Washington right on the center of the bowtie! Push on the center if it is not flattening.[9]
Making a Skinny Dollar Bill Bow Tie
-
1Fold and unfold a dollar bill. A skinny dollar bill bow tie gives you a more old fashioned looking bow tie that is long and thin and has a small, square center. To begin making this design, take a dollar bill and place it on a flat surface with the front of the bill facing up. Fold it horizontally in half “hotdog” style, then unfold. Then fold it top to bottom “hamburger style” and unfold.[10]
-
2Fold the four corners towards the centerline. Take all four corners of the bill and fold them over in small triangles whose inside edges almost touch the central fold.[11]
-
3Fold each long edge towards the center crease. Take the top long edge of the dollar bill and fold it over towards the central crease of the dollar bill so that the edge almost touches the crease. Repeat on bottom edge, folding it up so that the edge nearly touches the central crease.[12]
-
4Make a vertical crease. You should now have a long, skinny folded over bill with a crease running horizontally through it and triangular points at each end. Fold the bill in half so that the points touch, then unfold the fold you just made to make a vertical crease.[13]
-
5Fold and unfold the bill to make “x” shaped creases. The dollar bill should now be folded in a long, skinny shape that lays horizontally. Create a backward lowercase “r” by folding the right side of the bill down, making a diagonal crease at the center point of the bill. Unfold this fold and repeat on the left hand side, this time making a lowercase “r” shape by folding the left side of the bill down at the central point to make a lowercase “r” shape, then unfolding.[14]
-
6Do a squash fold to make a diamond shape. After making the two x-shaped folds, turn the bill over to the unfolded side. You will see the “x” shaped creases in the center. Use your fingers to “squish” the top and the bottom triangles of the x in on themselves, which folds the bill in half into a diamond shape.[15]
-
7Fold the ends of the diamond shape over the central crease. Hold the diamond shape by the end that is not connected to the crease and fold it over the other side so that it is hanging further than the crease. Turn the bill over and repeat on the other side.[16]
-
8Fold the bill so both ends meet. You should now have a folded bill that looks like a “z” shape when viewed from the side, with one end sticking to the left, the central folded area in the middle as the base, and the other end sticking over to the left. Take the one end of the bill and fold it 90 degrees under so that the ends are now parallel to each other, with their folded sides facing outward.[17]
- Each end of the dollar bill should roughly be in a pentagon shape.
-
9Fold the corners of the pentagon shape toward the center line. Take the bottom edges of the pentagon shape and fold the corners in towards the center fold in triangle shapes. Turn the folded bill over and repeat on the other side.[18]
-
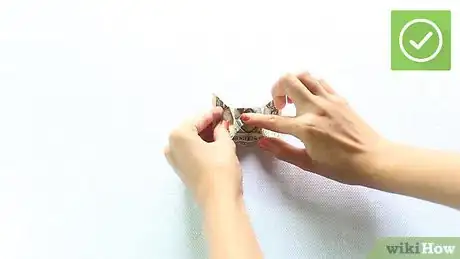
10Pull ends to open up the bowtie. Take both pointed ends in each hand, with one finger against the back of the pointed fold in the center. Gently pull each end out while using your finger to gently push the central crease in towards you.[19]
-
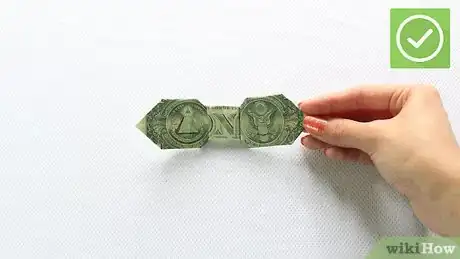
11Pull to flatten the center square. Your bow tie is almost complete, with the central square of the bow tie still looking a little folded. Hold the bow tie on both sides right next to this central square and pull. The square will expand, then flatten to create a perfect, skinny bowtie![20]
Attaching Your Dollar Bill Bow Tie
-
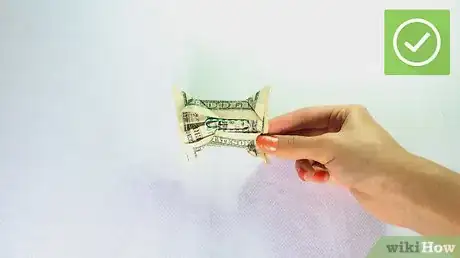
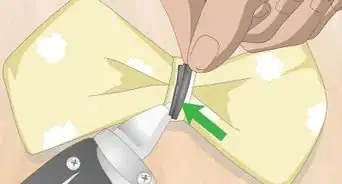
1Clip the bow tie with a paperclip. The easiest way to attach the dollar bill bow tie to your shirt is to clip it on with a paperclip. Flip the bow tie over to the back side and hook one end of the paperclip into a fold of the bow tie. Then hook the bowtie into the collar of your shirt to keep it in place![21]
-
2Pin the bow tie to your shirt. Another more secure way to attach the bow tie is to use a safety pin. Turn the bow tie to the back side and weave the safety pin through a small section of the bow tie. Then pin the safety pin into the spot of your shirt where you want to affix the tie.
-
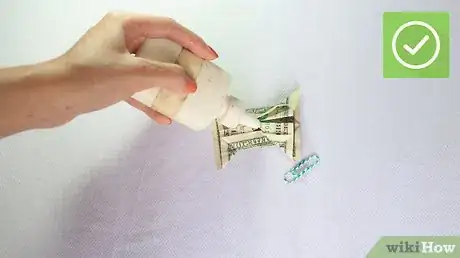
3Glue a clip to the dollar bill bow tie. Another way to attach the dollar bill bow to is to use a clip to hold it in place. Purchase a small clip and glue it to the back of the tie using hot glue or another strong glue. Then clip the tie in place.
- Keep in mind that if you use hot glue, you may render the bill unusable if you accidentally tear it when you detach it from the clip.
Things You’ll Need
- Dollar bill
- Paper clip, safety pin or binder clip
References
- ↑ http://www.instructables.com/id/Dollar-Bill-Bow-Tie/?ALLSTEPS
- ↑ http://www.instructables.com/id/Dollar-Bill-Bow-Tie/?ALLSTEPS
- ↑ http://www.instructables.com/id/Dollar-Bill-Bow-Tie/?ALLSTEPS
- ↑ http://www.instructables.com/id/Dollar-Bill-Bow-Tie/?ALLSTEPS
- ↑ https://snapguide.com/guides/fold-a-dollar-bill-into-a-bow-tie/
- ↑ http://www.instructables.com/id/Dollar-Bill-Bow-Tie/?ALLSTEPS
- ↑ https://snapguide.com/guides/fold-a-dollar-bill-into-a-bow-tie/
- ↑ https://snapguide.com/guides/fold-a-dollar-bill-into-a-bow-tie/
- ↑ https://snapguide.com/guides/fold-a-dollar-bill-into-a-bow-tie/
- ↑ http://www.origami-instructions.com/money-origami-bow-tie.html
- ↑ http://www.origami-instructions.com/money-origami-bow-tie.html
- ↑ http://www.origami-instructions.com/money-origami-bow-tie.html
- ↑ http://www.origami-instructions.com/money-origami-bow-tie.html
- ↑ http://www.origami-instructions.com/money-origami-bow-tie.html
- ↑ http://www.origami-instructions.com/money-origami-bow-tie.html
- ↑ http://www.origami-instructions.com/money-origami-bow-tie.html
- ↑ http://www.origami-instructions.com/money-origami-bow-tie.html
- ↑ http://www.origami-instructions.com/money-origami-bow-tie.html
- ↑ http://www.origami-instructions.com/money-origami-bow-tie.html
- ↑ http://www.origami-instructions.com/money-origami-bow-tie.html
- ↑ http://www.instructables.com/id/Dollar-Bill-Bow-Tie/?ALLSTEPS
