wikiHow is a “wiki,” similar to Wikipedia, which means that many of our articles are co-written by multiple authors. To create this article, 9 people, some anonymous, worked to edit and improve it over time.
This article has been viewed 33,507 times.
Learn more...
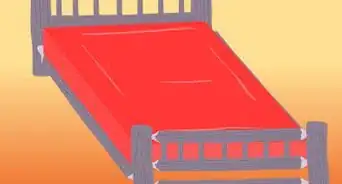
A headboard is both a practical and stylish way to decorate a bedroom. An upholstered headboard is also comfortable to sleep and lean against. Leather or faux leather materials are often used to make upholstered headboards. Faux leather is a synthetic fabric that mimics the look of real leather. It is less expensive, more durable and easier to clean than leather. You can make an upholstered faux leather headboard at home for a fraction of the price you would find in a store. This article will tell you how to make a faux leather headboard.
Steps
Prepare the Materials
-
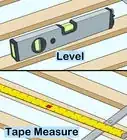
1Measure the shape of your headboard. Measure the width of your bed and how high you want your headboard to go from the top of your bed. These will be your measurements for your piece of plywood.
-
2Decide what shape you would like your faux leather headboard to be. You can choose rectangle, oval, octagonal, or any shape of your choice. Most leather headboards are rectangular.Advertisement
-
3Purchase a piece of plywood with the measurements you just took. Ask a home improvement store to cut the plywood to your specifications. If you own a jigsaw, you may choose to cut it yourself.
-
4Find the faux leather of your choice at a fabric store. You can choose a fabric especially made for upholstery that will be more sturdy. Depending upon the width of your bolt of fabric, you may need to stitch sections of fabric together in order to be able to cover your piece of plywood.
- Bring your headboard measurements into the fabric store. You will need enough fabric to cover the front of your fabric and to wrap leather around the back of the headboard. Add approximately 1 foot (30.5 cm) to the height and width measurements of your plywood.
-
5Set up a work station on a waist-high table in a well-ventilated room. Lay down a drop cloth to catch dust. Cover the table with a fitted sheet, if you want to protect it.


Constructing the Headboard
-
1Place the sheet of plywood on your table. Sand both sides with 180-grit sandpaper, working with the grain of the plywood 3 to 4 times in each section of the surface, front and back. Repeat the process with 200 or 220-grit sandpaper.
- Sweep away the dust with a brush. Wipe the surface thoroughly with a tack cloth.
- Apply your spray adhesive to the front surface of the plywood. Adhere the 2-inch (5-cm) foam to the surface. Follow the adhesive package directions on application and drying time to make sure you have optimal adhesion.
- Your foam is not likely to cover the entire surface right out of the package. You may need to glue pieces side by side, either vertically or horizontally, in order to cover the entire area.
-
2Use an electric carving knife to cut away excess foam. Plug it in and then place it flush with the edge of the plywood before turning it on. Work around the perimeter slowly, making a headboard with a clean, professional shape.
-
3Lay sheets of batting on top of the foam after it has dried. Batting is a material used to stuff quilts, pillows and comforters. Trim the batting so there are 6 inches (15 cm) of extra batting on each side.
-
4Move the end of the plywood so that it is hanging over the edge of the table. Lay on your back below the plywood. Ask a friend to hold down the batting to prevent wrinkling as you begin to affix it to the back side of your headboard.
-
5Staple the batting onto the plywood. Pull the batting tight over the edge of the headboard and then staple it to the back side. Repeat this process every inch (2.54 cm) until you have stapled around the entire back edge of the plywood.
- When you staple the corners, create a fold of batting on either side of the corner and pull down. This is similar to how you would wrap the end of a present. Pull taught and affix with 3 to 4 staples. Trim off any excess batting.
-
6Lay the faux leather over the top of your batting. Lay it evenly, so that there is an excess of 2 to 4 inches (5 to 10 cm) all the way around the back of the plywood. If you need to stitch more than 1 piece of faux leather together, you can do this by hand or with an upholstery needle on a sewing machine.
-
7Begin stapling your faux leather fabric in the center of 1 of the sides. Move around the sides of the fabric, leaving the corners for later. Pull the fabric taught, but not so tight that the fabric starts to buckle.
- Return to the corners when you have done the sides. Pull 1 side of the fabric at the corner and staple it down on the edge of either side of the corner. Fold the fabric at the corner and pull it taught. Staple it at a 90 degree angle. You should have a corner with 1 clean fold over it. Repeat at each corner.
- If you have rounded corners, you will need to create hospital corners. Staple until you get to the curve. Pinch the leather in the center of the curve and pull it down. Staple it in place. Pinch and pull down the leather in a clean line at either end of the curve. Staple around the curve 4 to 5 times.
-
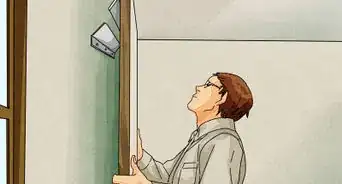
8Attach the headboard to the wall. Screw a flush mount hanger to the back side of your headboard. Screw the other end to the wall, preferably to a stud and lift it into place.


Community Q&A
-
QuestionCould I do this just using the batting, fabric and my headboard?
 HumanBeingTop AnswererIf you wish to upholster an existing headboard, you can try the latter parts of this technique. Ideally you have a plain, wooden headboard to cover, so you should be able to follow the steps that apply. If the headboard you have is not wooden or already covered in some type of fabric, you may need to consider your options more carefully.
Things You'll Need
- Faux leather fabric
- Batting
- Plywood
- Staple gun
- Staples
- Sandpaper
- Measuring tape
- Foam
- Tack cloth
- Home-improvement store
- Electric carving knife
- Spray adhesive
- Table
- Sewing machine
- Upholstery needle
- Flush mount hanger
- Safety goggles
- Friend