X
This article was co-authored by wikiHow Staff. Our trained team of editors and researchers validate articles for accuracy and comprehensiveness. wikiHow's Content Management Team carefully monitors the work from our editorial staff to ensure that each article is backed by trusted research and meets our high quality standards.
There are 8 references cited in this article, which can be found at the bottom of the page.
This article has been viewed 70,109 times.
Learn more...
Steps
Method 1
Method 1 of 2:
Making the Lamp With Drilling
-
1Select a vase. You want a vase large enough to allow you to work with, but also stable enough to support the fixtures you are about to add. The overall vase size is up to you and depends on the location you want to place it. You may add an additional base.[4] [5]
- The standard lamp kit has dimensions of 8.75” tall x 1.75” deep x 5.75” wide. So keep this in mind when selecting your vase. If your vase has a wider opening this will be addressed later. If it is too narrow then you will need to choose a different vase.
-
2Add a base. Use a ruler or tape measure to calculate and mark the center of the base. Do the same for the vase. This is something to consider in conjunction with stability of the vase and planning for the power cord. The base needs to be larger than the bottom of the vase in square area for stability.[6]
- You want a base that will allow for the power cord to exit out the bottom center or side.
Advertisement -
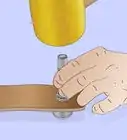
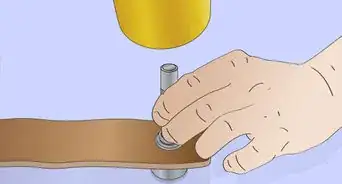
3Drill a hole in the bottom of the vase. Use a 3/8″ drill bit and power drill. Drill into point where you marked the center of the vase’s bottom. Drill from outside to inside.[7]
- Clear out excess materials so they don’t create a hazard later.
-
4Apply the adapter to the vase. Use the pipe kit portion of the Westinghouse kit. Choose the rubber adapter that will fit into the vase opening, but don’t put it into the vase yet.[8]
- If none of the kit’s adapters are wide enough for your vase you can look for other adapters at a lighting or hardware store.
-
5Insert the lamp’s nipple into the adapter. Do this so that 1⁄4” extends beyond the rubber adapter. Put the locknut onto the opposite end of nipple and tighten it. Insert the whole adapter and nipple setup into the vase so that the 1⁄4” nipple portion is protruding upward. Slide the kit’s check ring and harp bottom over the nipple. Place the socket cap onto the nipple and tighten it.[9]
-
6Slip wire through the sleeve in the socket cap. Tie this wire into an overhand knot with two free ends within the cap.[10]
-
7Connect the wire to the neutral conductor. Look for the ribbing or raised portion on the insulation. Connect one end of the free end of the knotted wire to the silver-colored terminal screw on one side. Connect the other free end of the knotted wire to the brass-colored terminal screw on the other side. Hold the wires partially hooked under each screw head while you tighten both terminal screws to make sure both ends of the conducting wires remain under the screw heads.[11]
- Try getting one screw started enough to hold the first wire, and then start on the second one. Get the second screw turned enough to pinch the wire down. You can now more easily finish tightening both terminal screws.
-
8Place the brass shell over the lamp socket. Make sure the brass shell has paper insulation. Pull the extra wire sticking out of the socket back into the lamp and snap the brass shell onto the socket cap.[12]
- Rock the shell back and forth if necessary. Listen for a clicking sound to signal the shell is locked onto the cap.
-
9
-
10Add the light bulb. Turn the bulb just enough so it starts to tighten, but don’t over-tighten.[15]
- Don’t plug in the lamp just yet or you might blind yourself. This design is meant for up to 150 watts.
-
11Add a lamp shade. The style of shade is up to you. The harp should come with a fastener (finial) on top to fit a hole on top of shades configured for it.[16]
- Make sure the shade is not too narrow or short for the harp or vase.


Advertisement
Method 2
Method 2 of 2:
Making the Lamp Without Drilling
-
1Select a suitable vase. Pick a vase that will give you room to maneuver with your hands. As with the drilling method you still need one that will fit the average sized lamp fixtures you might have in mind.[17] [18]
- Don’t pick a vase that will be too top-heavy.
- If you add a base remember to add one that will allow for the power cord to pass through the center and then bottom or side.
-
2Place the hex nut onto the threaded lamp nipple. You’ll be using the 3/8-inch hex nut and IP threaded nipple. Twist the hex nut onto the nipple. Make sure the nipple’s end is flush with the edge of the hex nut. Put the flat washer over the other end of the nipple. Allow the nipple to rest against the hex nut.[19] [20]
- Do not let the nipple protrude past the hex nut.
-
3
-
4
-
5Place one of the IP interior threaded couplings onto the nipple. Twist it on above the knurled locknut. Make sure the coupling is flush against the locknut.[25]
-
6
-
7
-
8
-
9Thread the lamp cord. Pull the ends of the cord upward through the rubber gasket preinstalled in the bottom of the socket cap. Grab the two lamp cord wires from the socket cap with your fingers, and separate about three inches of cord by pulling the grabbed wires apart.[32] [33]
- You can do this because these lamp cords should have thin insulation holding the two wires together that are pre-designed to allow separation. Ask the purchasing shop if you have questions about this kind of electrical cord.
-
10Tie the wires in an overhand knot within the cap. Wrap one free end of one lamp cord wire around one screw on the interior lamp socket. Wrap the other free end of the wire around the interior lamp socket’s other screw. Tighten both screws to keep both wire leads under the screw heads.[34] [35]
- Get one screw partially started so it is holding one wire in place before you start the second screw. Get the second screw turned enough to hold the second wire in place. Finish tightening both terminal screws.
-
11
-
12
-
13
-
14


Advertisement
Community Q&A
-
QuestionWhat drill bit do I need for making a hole for the electrical wire? Any safety tip to avoid breakage?
 T. ChinsenTop AnswererDrill bit should be close to the diameter of the cord or part to be installed. Article uses 3/8" drill bit. Place tape over the area (both sides) to be drilled to prevent chipping around the hole. Go slowly, as too much speed will likely cause cracking and breakage. Make sure the item is held in place, as any slippage could cause an angled hole. Note: the cord needs to lie flat if it comes off the underside (not mentioned in article).
Advertisement
Warnings
- Always exercise extreme caution when handling electrical wiring and power tools.⧼thumbs_response⧽
- Never use bulbs of a wattage higher than the lamp is rated for.⧼thumbs_response⧽
- If the wires you are using in the kit or from the hardware store are frayed, the insulation is peeling, or seem damaged in anyway then you should not use them.⧼thumbs_response⧽
Advertisement
Things You'll Need
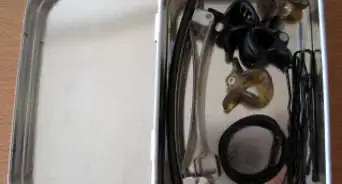
- Westinghouse Make a Lamp Kit
- Lamp Harp
- Westinghouse All-Thread Lamp Pipe Kit.
- Base for your vase.
- 3/8″ glass and tile bit and drill
- Wrench
- Screw driver
- Vase
- Hex nut, 3/8-inch
- IP threaded nipple, 1/8-inch, 1 1/2-inches long
- Flat washer, 3/8-inch
- Rubber lamp adapters
- Knurled locknuts, 3/8-inch
- IP interior threaded coupling, 1/8-inch, 7/8-inch high
- IP threaded-end lamp pipe, brass, 1/8-inch
- Lamp harp saddle
- Side-outlet lamp socket
- Prewired lamp cord
- Light bulb
- Lampshade
- Finial


References
- ↑ http://www.houzz.com/ideabooks/27632356/list/How-to-Turn-a-Vase-Into-a-Lamp/
- ↑ http://www.brightboldbeautiful.com/2013/08/12/how-to-make-a-lamp-from-a-vase/
- ↑ http://www.southernliving.com/home-garden/solutions/do-it-yourself-craft-lamp/do-it-yourself-craft-kit
- ↑ http://www.brightboldbeautiful.com/2013/08/12/how-to-make-a-lamp-from-a-vase/
- ↑ http://www.homedepot.com/p/Westinghouse-Make-A-Lamp-Kit-7002500/100192701
- ↑ http://www.brightboldbeautiful.com/2013/08/12/how-to-make-a-lamp-from-a-vase/
- ↑ http://www.brightboldbeautiful.com/2013/08/12/how-to-make-a-lamp-from-a-vase/
- ↑ http://www.brightboldbeautiful.com/2013/08/12/how-to-make-a-lamp-from-a-vase/
- ↑ http://www.brightboldbeautiful.com/2013/08/12/how-to-make-a-lamp-from-a-vase/
- ↑ http://www.homedepot.com/catalog/pdfImages/69/69c30f9f-b8e0-492e-b5f7-2bd046578a5d.pdf
- ↑ http://www.brightboldbeautiful.com/2013/08/12/how-to-make-a-lamp-from-a-vase/
- ↑ http://www.brightboldbeautiful.com/2013/08/12/how-to-make-a-lamp-from-a-vase/
- ↑ http://www.brightboldbeautiful.com/2013/08/12/how-to-make-a-lamp-from-a-vase/
- ↑ http://www.homedepot.com/p/Westinghouse-Make-A-Lamp-Brushed-Nickel-3-Way-Socket-Kit-7045500/205755529
- ↑ http://www.brightboldbeautiful.com/2013/08/12/how-to-make-a-lamp-from-a-vase/
- ↑ http://www.brightboldbeautiful.com/2013/08/12/how-to-make-a-lamp-from-a-vase/
- ↑ http://www.southernliving.com/home-garden/solutions/do-it-yourself-craft-lamp/do-it-yourself-craft-kit
- ↑ http://www.houzz.com/ideabooks/27632356/list/How-to-Turn-a-Vase-Into-a-Lamp/
- ↑ http://www.southernliving.com/home-garden/solutions/do-it-yourself-craft-lamp/do-it-yourself-craft-kit
- ↑ http://www.houzz.com/ideabooks/27632356/list/How-to-Turn-a-Vase-Into-a-Lamp/
- ↑ http://www.southernliving.com/home-garden/solutions/do-it-yourself-craft-lamp/do-it-yourself-craft-kit
- ↑ http://www.houzz.com/ideabooks/27632356/list/How-to-Turn-a-Vase-Into-a-Lamp/
- ↑ http://www.southernliving.com/home-garden/solutions/do-it-yourself-craft-lamp/do-it-yourself-craft-kit
- ↑ http://www.houzz.com/ideabooks/27632356/list/How-to-Turn-a-Vase-Into-a-Lamp/
- ↑ http://www.houzz.com/ideabooks/27632356/list/How-to-Turn-a-Vase-Into-a-Lamp/
- ↑ http://www.southernliving.com/home-garden/solutions/do-it-yourself-craft-lamp/do-it-yourself-craft-kit
- ↑ http://www.houzz.com/ideabooks/27632356/list/How-to-Turn-a-Vase-Into-a-Lamp/
- ↑ http://www.southernliving.com/home-garden/solutions/do-it-yourself-craft-lamp/do-it-yourself-craft-kit
- ↑ http://www.houzz.com/ideabooks/27632356/list/How-to-Turn-a-Vase-Into-a-Lamp/
- ↑ http://www.southernliving.com/home-garden/solutions/do-it-yourself-craft-lamp/do-it-yourself-craft-kit
- ↑ http://www.houzz.com/ideabooks/27632356/list/How-to-Turn-a-Vase-Into-a-Lamp/
- ↑ http://www.southernliving.com/home-garden/solutions/do-it-yourself-craft-lamp/do-it-yourself-craft-kit
- ↑ http://www.houzz.com/ideabooks/27632356/list/How-to-Turn-a-Vase-Into-a-Lamp/
- ↑ http://www.southernliving.com/home-garden/solutions/do-it-yourself-craft-lamp/do-it-yourself-craft-kit
- ↑ http://www.houzz.com/ideabooks/27632356/list/How-to-Turn-a-Vase-Into-a-Lamp/
- ↑ http://www.southernliving.com/home-garden/solutions/do-it-yourself-craft-lamp/do-it-yourself-craft-kit
- ↑ http://www.houzz.com/ideabooks/27632356/list/How-to-Turn-a-Vase-Into-a-Lamp/
- ↑ http://www.southernliving.com/home-garden/solutions/do-it-yourself-craft-lamp/do-it-yourself-craft-kit
- ↑ http://www.houzz.com/ideabooks/27632356/list/How-to-Turn-a-Vase-Into-a-Lamp/
- ↑ http://www.southernliving.com/home-garden/solutions/do-it-yourself-craft-lamp/do-it-yourself-craft-kit
- ↑ http://www.houzz.com/ideabooks/27632356/list/How-to-Turn-a-Vase-Into-a-Lamp/
- ↑ http://www.southernliving.com/home-garden/solutions/do-it-yourself-craft-lamp/do-it-yourself-craft-kit
- ↑ http://www.houzz.com/ideabooks/27632356/list/How-to-Turn-a-Vase-Into-a-Lamp/
About This Article

wikiHow Staff
wikiHow Staff Writer
This article was co-authored by wikiHow Staff. Our trained team of editors and researchers validate articles for accuracy and comprehensiveness. wikiHow's Content Management Team carefully monitors the work from our editorial staff to ensure that each article is backed by trusted research and meets our high quality standards. This article has been viewed 70,109 times.
Co-authors: 11
Updated: September 16, 2021
Views: 70,109
Categories: Lamps and Lampshades | Creative Reuse and Repurposing | Decoration Projects
Advertisement